Recycled Mason Jar Redo: Spring Vase Part I
Nowadays, mason jars are all the rage and there are a million and one things you can do to recycle and re-use them! Lucky for me, my mom has boxes upon boxes of old mason jars in her basement.
Using StazOn Opaque Inks, I have done two different mason jar makeovers. In today’s post (part I), I will show you how to use some simple StazOn techniques on clear glass!

This project is super simple and only uses 4 different products: StazOn Ink (any kind and color), circle stamp (or design of choice), Mason Jar & Ribbon! I used the StazOn Opaque Inks in Buttercream Yellow and Baby Blue. The Opaque Inks are super creamy and give a slightly translucent look.

I started off by stamping a few circles onto my Jar in the Buttercream Yellow Ink. I used the circle stamp from the Delight Fancy Pants Design Stamp Set.
TIP: When stamping, don’t push too hard. Your stamp will slide and smear on the glass.

Next, using the Baby Blue Ink, I added some dots inside of my stamped circles. I used a Qtip for this part. Roll your Qtip into the Ink and then press onto your glass where you want the dot to appear. As weird as this sounds, the less ‘fluffy’ your Qtip, the better.

I filled some of the circles completely with blue dots. On others I added only a few dots inside of the yellow circle. In all honestly, you can use whatever colors of inks, stamps & designs you would like for this project to personalize it to your taste!

I wanted my design to be subtle and just add a little something extra to draw your eye to the glass. The blue and yellow look great together. All of the StazOn Opaque Ink colors are made to work well together and are all perfect colors for spring!

Next, I added ribbon to the top ring of my jar using May Arts Chevron Ribbon in blue and yellow, both from my stash.

I folded and wrapped the blue chevron ribbon around the top of my jar and hot glued it in place.

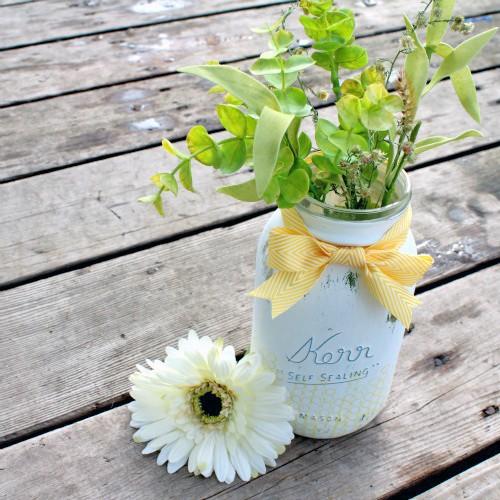
On top of that, I tied a bow using the smaller yellow chevron ribbon. Lastly, I cut pennants into the ends of my ribbon and the vase was complete! A little water and fresh flowers and this vase will be ready to go!
I hope you loved the project and try it out for yourself! The Stazon Inks are wonderful and can be used on so many different materials like glass, wood, paper, leather & MORE! The possibilities are endless…
Stay tuned to see another version of this mason jar project using the same Inks but a completely different design with a vintage twist! Here is a sneek peek!
(Recycled Mason Jar Redo! StazOn Ink Spring Vase Part II)

WHAT DO YOU THINK?
Comment below with your thoughts on this project! I LOVE to hear what you followers have to say and love hearing all of your great feedback!
FEATURED SALES