Sweet Summer Dreams Dreamcatcher: Part II
On Monday we started a project creating the perfect whimsical summer project, a whimsical dreamcatcher!
To see the first steps in making your dreamcatcher, including step-by-step weaving instructions, check out the previous post: Sweet Summer Dreams Dreamcatcher Project Tutorial: Part I

Now that the hardest part, is done… let’s get ready to embellish and decorate!
My favorite thing about this project is that you can personalize it any way you’d like. Use feathers, beads, glitter, ribbons, rhinestones, inks and more to bedazzle your dreamcatcher to fit your personality.

Rather than give you “instructions” or a tutorial on how to embellish your dreamcatcher, I am instead going to share a few of my tips, tricks and how I embellished mine. That way, you can use your imagination and dream up a beautiful piece all your own!

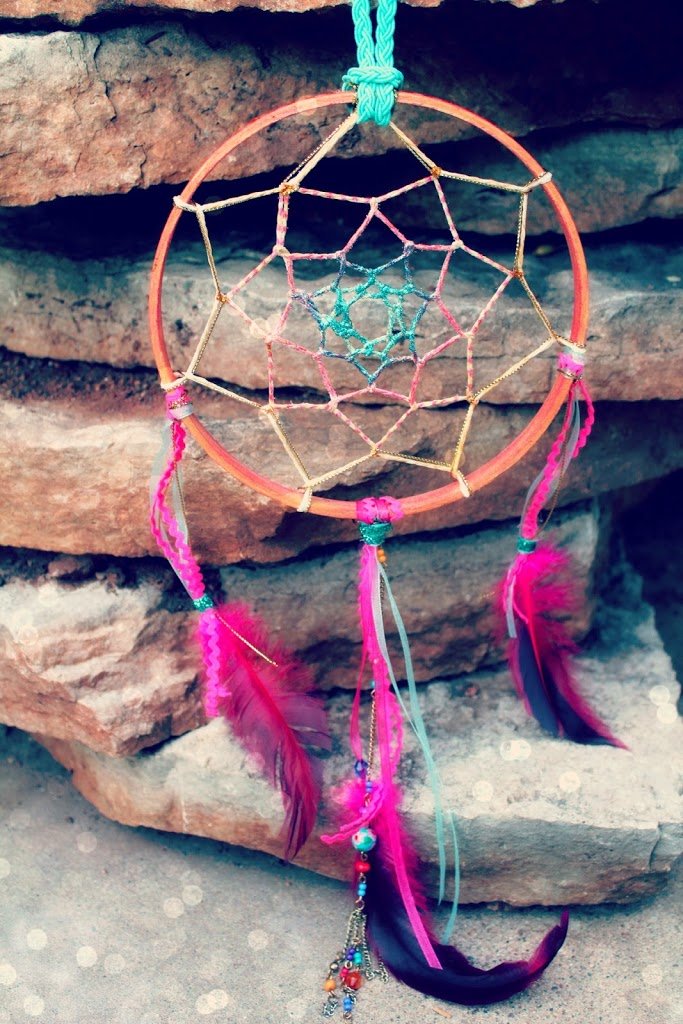
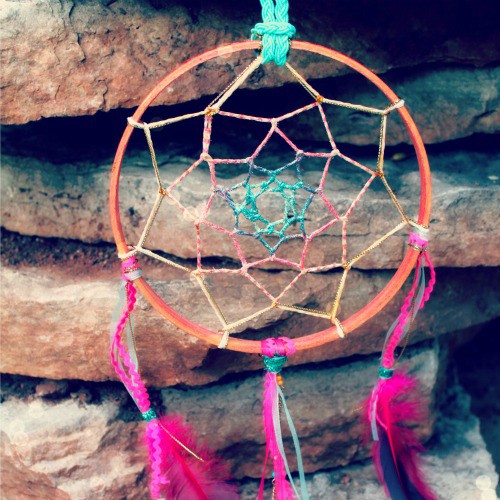
The first thing I did was rubbed my entire web with the Imagine Crafts All-Purpose Ink in Vegas Gold. Remember, this ink in permanent and will stain your skin and clothes, so be careful! While my gold ink was still wet, I sprinkled Ranger Dry Fine Glitter (in Lagoon) onto the center of my dreamcatcher.
TIP: Once the gold ink and glitter dried for few minutes, I sprayed over the glittery center with hairspray for a little bit of extra hold.

Next, using the same Cherry Pink All-Purpose Ink that I used to dye my wooden hoop, I added some pink detail to my web. Using the Fantastix Applicator I colored the strands surrounding my glittery center. On the next layer out, I inked a dashed pattern, which created a cool a twine effect!

Next I laid out all of my pretty ribbons and beaded chain to see what would look good hanging down off of my dreamcatcher. I left out the glitter ribbon and teal braided cord. They were a bit thick, but I will use them later!

Rather than tie on all of the ribbons individually, I took my bunch of ribbons and created a large Lark’s Head Knot. (Yes, this is e actual name of the knot)
Here’s a quick 30 second video tutorial on this knot. Do the same concept, but with multiple ribbons all at once!

Once my knot was secure, I took one broken end of my necklace and intertwined it through the knot. Once I found a good spot, I added a blob of hot glue to secure the knot and the ribbons to my hoop.
TIP: Loosen the knot just a bit and hot glue the necklace to the hoop. While the hot glue blob is still hot, pull the ribbon tight to secure the hold and cover the glue.
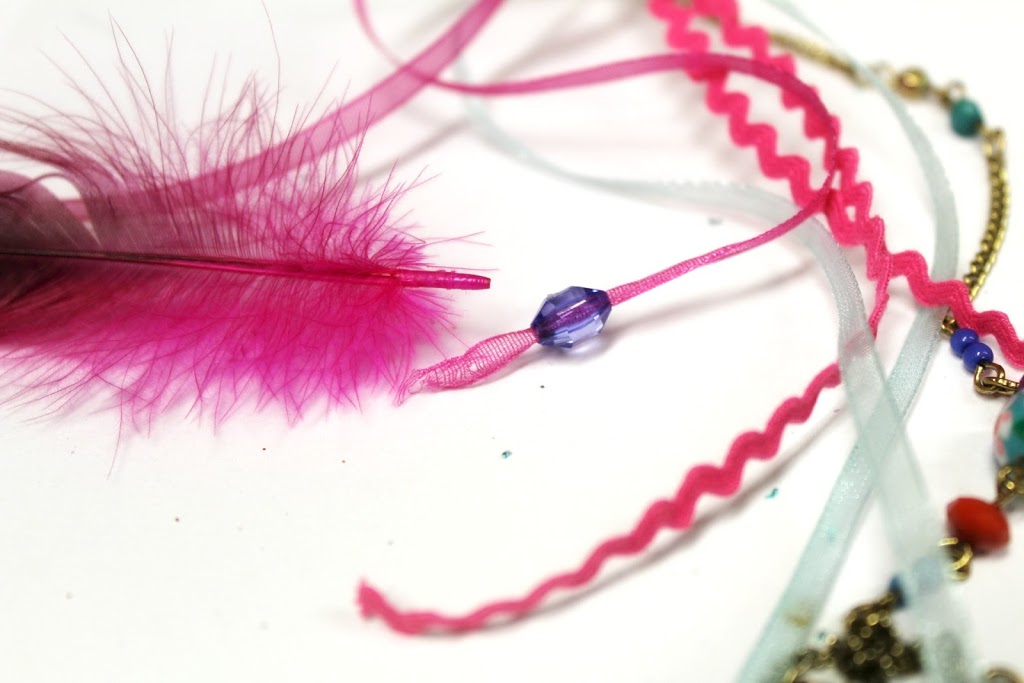
To add the feathers to your necklace, string a single bead onto your ribbon of choice. Pull your bead almost all the way to the end of the ribbon. Next, add a very small dab of hot glue onto the end of the feather and push it tightly into your bead hole.
TIP: The bead you choose should have a big enough hole to fit your ribbon and your feather end.

I added two more small bunches of hanging ribbons to the lower sides of my dreamcatcher. I then took the glittery ribbon that I had not used yet and glued it around the ends of my ribbon bunches, just above the feathers. I also added some around the bade of my center larger ribbon bunch to cover the necklace lump.
To hang my dreamcatcher I used the teal braided cord and, using the same Lark’s Head Knot, tied it to the top of my dreamcatcher.

I know some of these directions are vague, but that’s the point! You don’t have to do any of these exact embellishments, you can decorate your dreamcatcher however…you…want!
I hope you loved the project!
My dreamcatcher was made specifically for my niece’s 5-year-old birthday present. Her and her brother share a room and every night they talk until they fall asleep, but Bella has told me that…
“sometimes he falls asleep first, and then I get scared and have bad dreams…”
She ended up LOVING it and hung it on her wall right above her bed.
*Leave a comment below. I love hearing feedback and your thoughts*
FEATURED SALES