Happy Halloween! How to carve a foam pumpkin tutorial!
Happy Halloween everyone! We hope that you have a spooky good day!
We have a special guest blogger today, Kristin, from Wife Of Wimsey. Kristin wanted to share a fun tutorial today on how to carve your own foam pumpkin! These pumpkins are great… they last year after year and you can customize away. And yes, YOU can make your very own too!

Let’s get started…
You will need:
– A FOAM pumpkin to carve (no real pumpkins)
– Walnut Hollow Professional Hot Knife
– Straight pin with a large head
– Name or shape you wish to carve on regular paper, cut or printed to size
– Tape
Here’s the how to:
First, create a design for your pumpkin.
You can print your design off on your computer, or use your Cameo or other die cutting machine to cut out a shape you wish to carve. Kristin decided to carve her son’s name here.
Keep in mind, the larger your design, the larger pumpkin you will need. Though you can get intricate detailed cuts, you may want to save those for real pumpkins! Trim your design down so it fits comfortably on your pumpkin.
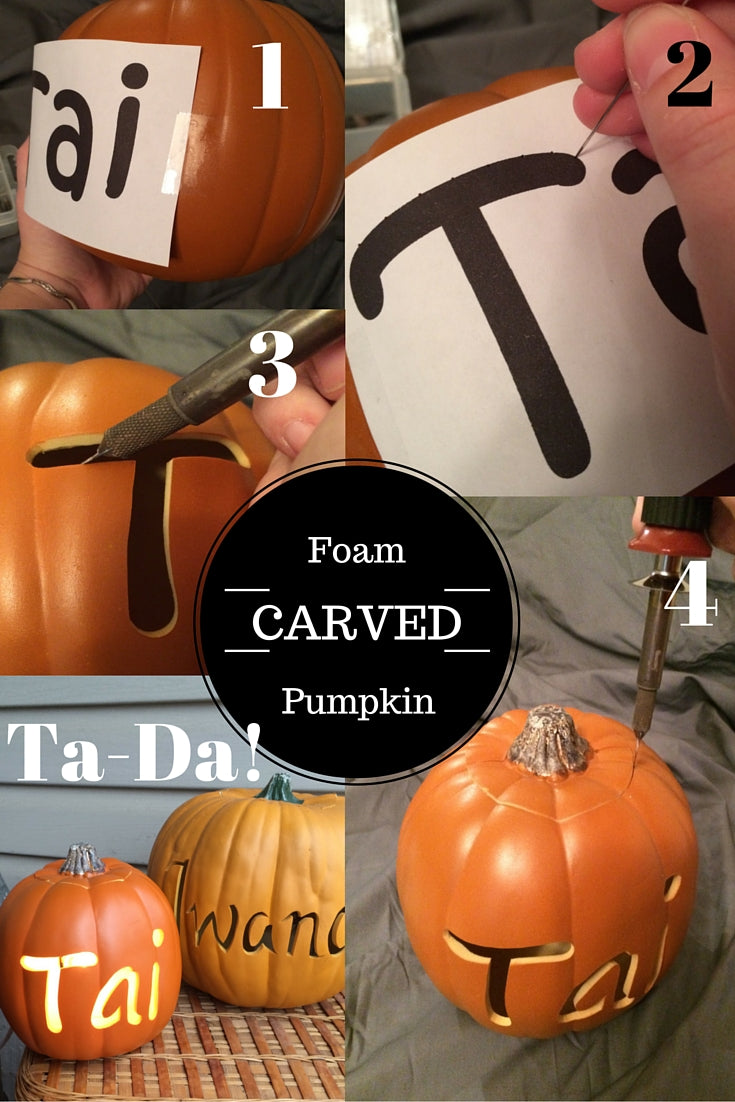
Tape your design to your pumpkin:

Next you will want to take your straight pin and follow along the lines of your template and poke holes into the pumpkin. This will transfer your design onto your pumpkin and give you a template to follow with your Hot Knife.

TIP: If the letters have closed off sections (like B’s, D’s, O’s, etc.), you’ll need to make sure that you leave a stem to hold that section in place, otherwise you will be missing the centers of your letters.
Next: Play “Connect the Dots!” This is by far the longest and most tedious part of process. Take your time cutting, the knife is VERY hot.

NOTE: You can pause briefly while cutting, but don’t hold still for too long or you WILL melt your pumpkin.
Next, cut a hole in the top of your pumpkin. It is CRUCIAL to cut off the top LAST! If you do this part first, it compromises the sturdiness of the pumpkin and makes it 100x harder to carve.

At this stage if some of your letters haven’t “popped out” yet, you can stick your hand inside and help them along. You can also go back and smooth out any jagged or uneven sections at this point.

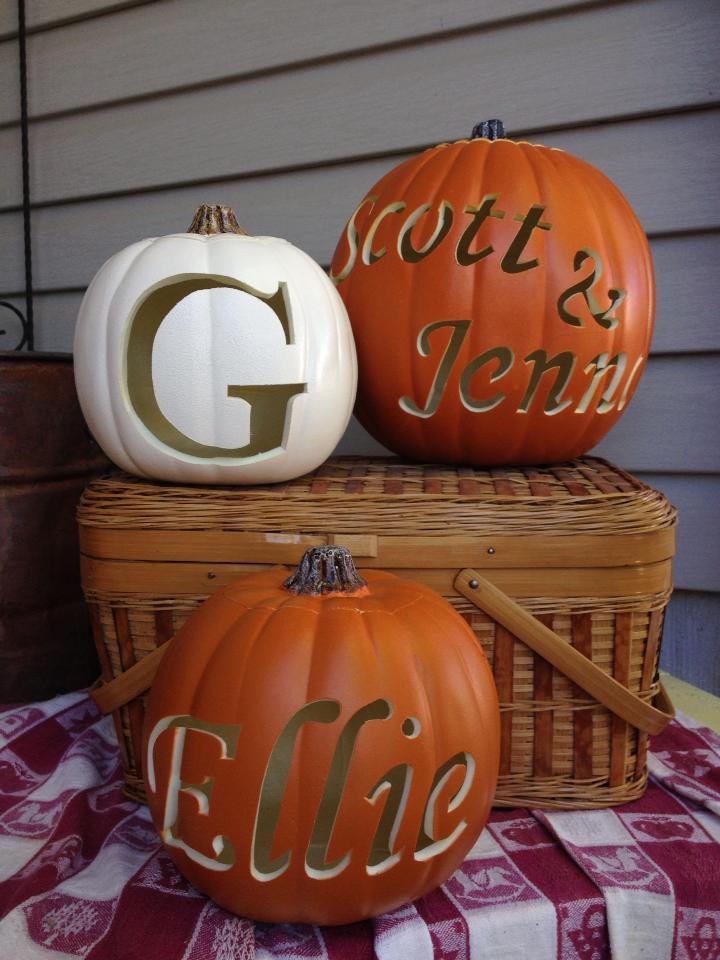
Ta-da! An everlasting pumpkin that looks so professionally done! I highly recommend that these be placed on a covered porch or sheltered area if you want to keep them outside, to help protect them from the elements. You can put in a battery-operated tea light, but please forgo using a real candle (foam pumpkins + candle = melted masterpiece or fire!).
For finishing touches, you can even paint the cut edges of your pumpkin in any color that you desire:

There are so many possibilities! And they turn out great!

I just wanted to give a BIG thank you to Kristin for sharing her know how with the Hot Knife and pumpkin carving! The Hot Knife can carve foam and plastic. This is a great tool to get your hands on!
Happy Crafting!
Kala
FEATURED SALES