“Through The Bunny Hole” Easy Easter Bunny Punch Card


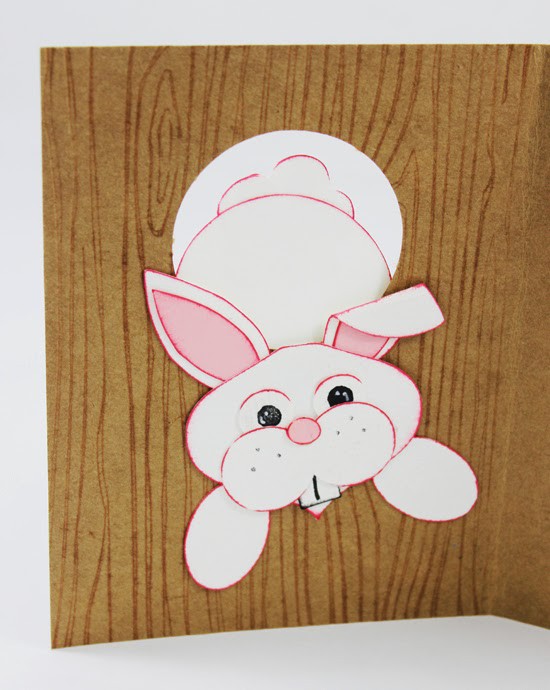
Let’s start with the card base. I used a 2 inch circle punch to cut my bunny hole out of my brown kraft paper. Just center the punch as far in as it will go and pop out the circle. Next I used a wood grain embossing folder to give my front AND the inside of my card texture.
To give my card more detail, I used a Megan Elizabeth “Wrap Me In Chocolate” Ink Edger and inked both sides of my embossing folder. Just tap it on and make sure you get good coverage on both sides of the folder.

Next, take the front of your card and place it inside the embossing folder. Be careful to place your card front in and then do not move it or you will smudge your lines.

Wrap the back of the card around the embossing folder so you can send it through your machine. I used my Cuttlebug. You’ll want to give minimal pressure with this process because the kraft paper will tear if you put it through with a full “sandwich” …ask me how I know this…
What I ended up doing is sending this through with my white bottom plate and one B plate, then a chunk of paper. You’re basically looking to use the embossing folder to give just a touch of texture but mostly to use it like a stamp! You may have to experiment a little with this- try it on your punched out circle first to make sure you have the right amount of pressure!
Next we can move onto making the bunny!
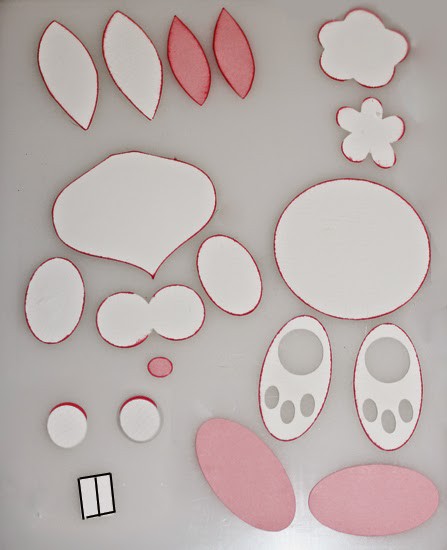
I used a lot of different tools to make this bunny- and you can adapt based off what you have at your disposal. I used my Cricut with the Mother’s Day Bouquet Cartridge to make the ears, tail, eyes and bottom/body pieces. This cartridge is SO versatile! I used my Cameo for the head, feet, cheeks and hands (or are those feet too??) pieces. There are lots of shapes you could substitute for these parts so get creative and don’t feel like you HAVE to use a die cutting machine to make this card.
I used a pink ink pad to ink all the edges of my bunny to make the pieces stand out. Make sure you ink both the front and back of the body and tail pieces, since you’ll see them on both sides of your card.
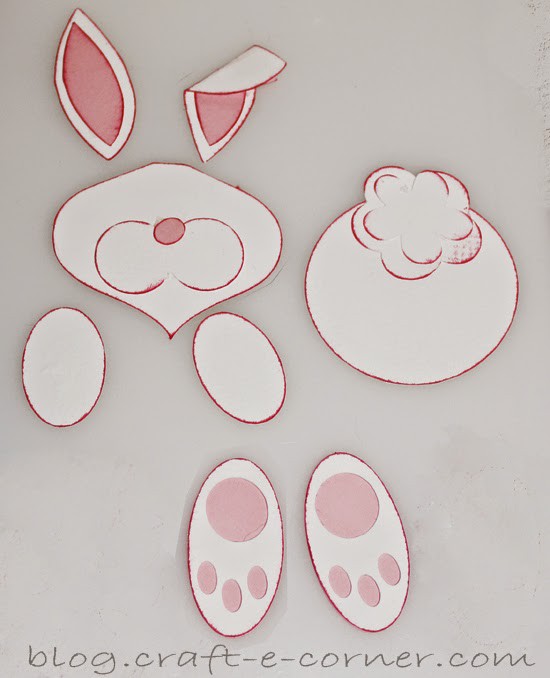
Now you can layer up your bunny! I used a tape runner to attach all the pieces together. I folded over one ear to give my bunny some personality!
Now attach the bunny’s bottom to the front of the card. Make sure to put adhesive on just the very bottom of the body circle, so you don’t have adhesive showing on the other side of the card.

I used a Megan Elizabeth 1 A.M Ink Edger and a pencil eraser to make the bunny’s eyes and a white gel pen to add little white lines to add some interest.

Make sure when you position the bunny’s ears on his head that you keep them below the back of the bunny, so you can’t see them from the front of the card. I added a couple of spots to his cheeks with a pen to finish him up (I wanted to add some detail, but not overwhelm).
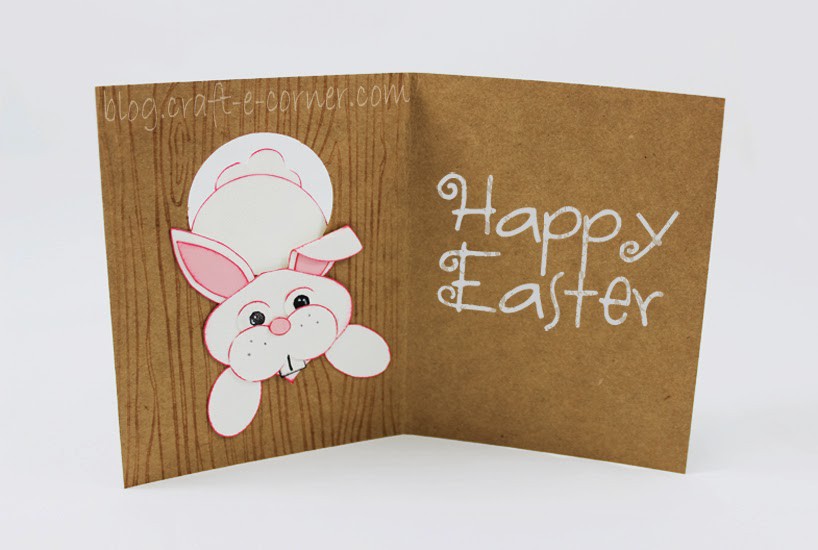
I added a Happy Easter stamp using a white pigment ink pad and finished off this card! This was a very quick card to make and would be easy to produce multiples of it if you have a lot of cards to send!
I hope you enjoyed this tutorial!
What Easter crafts are you making – will “the bunny” show up in your cards this year?

FEATURED SALES