Moonlight Twinkles Using Brusho Crystals and Hand Lettering
A dramatic background can transform and enhance simple hand lettered artwork. Moonlight Twinkles showcases a short quote completed in silver pen on a dark watercolor background. Add a white mat and you have an easy piece of frameable art.

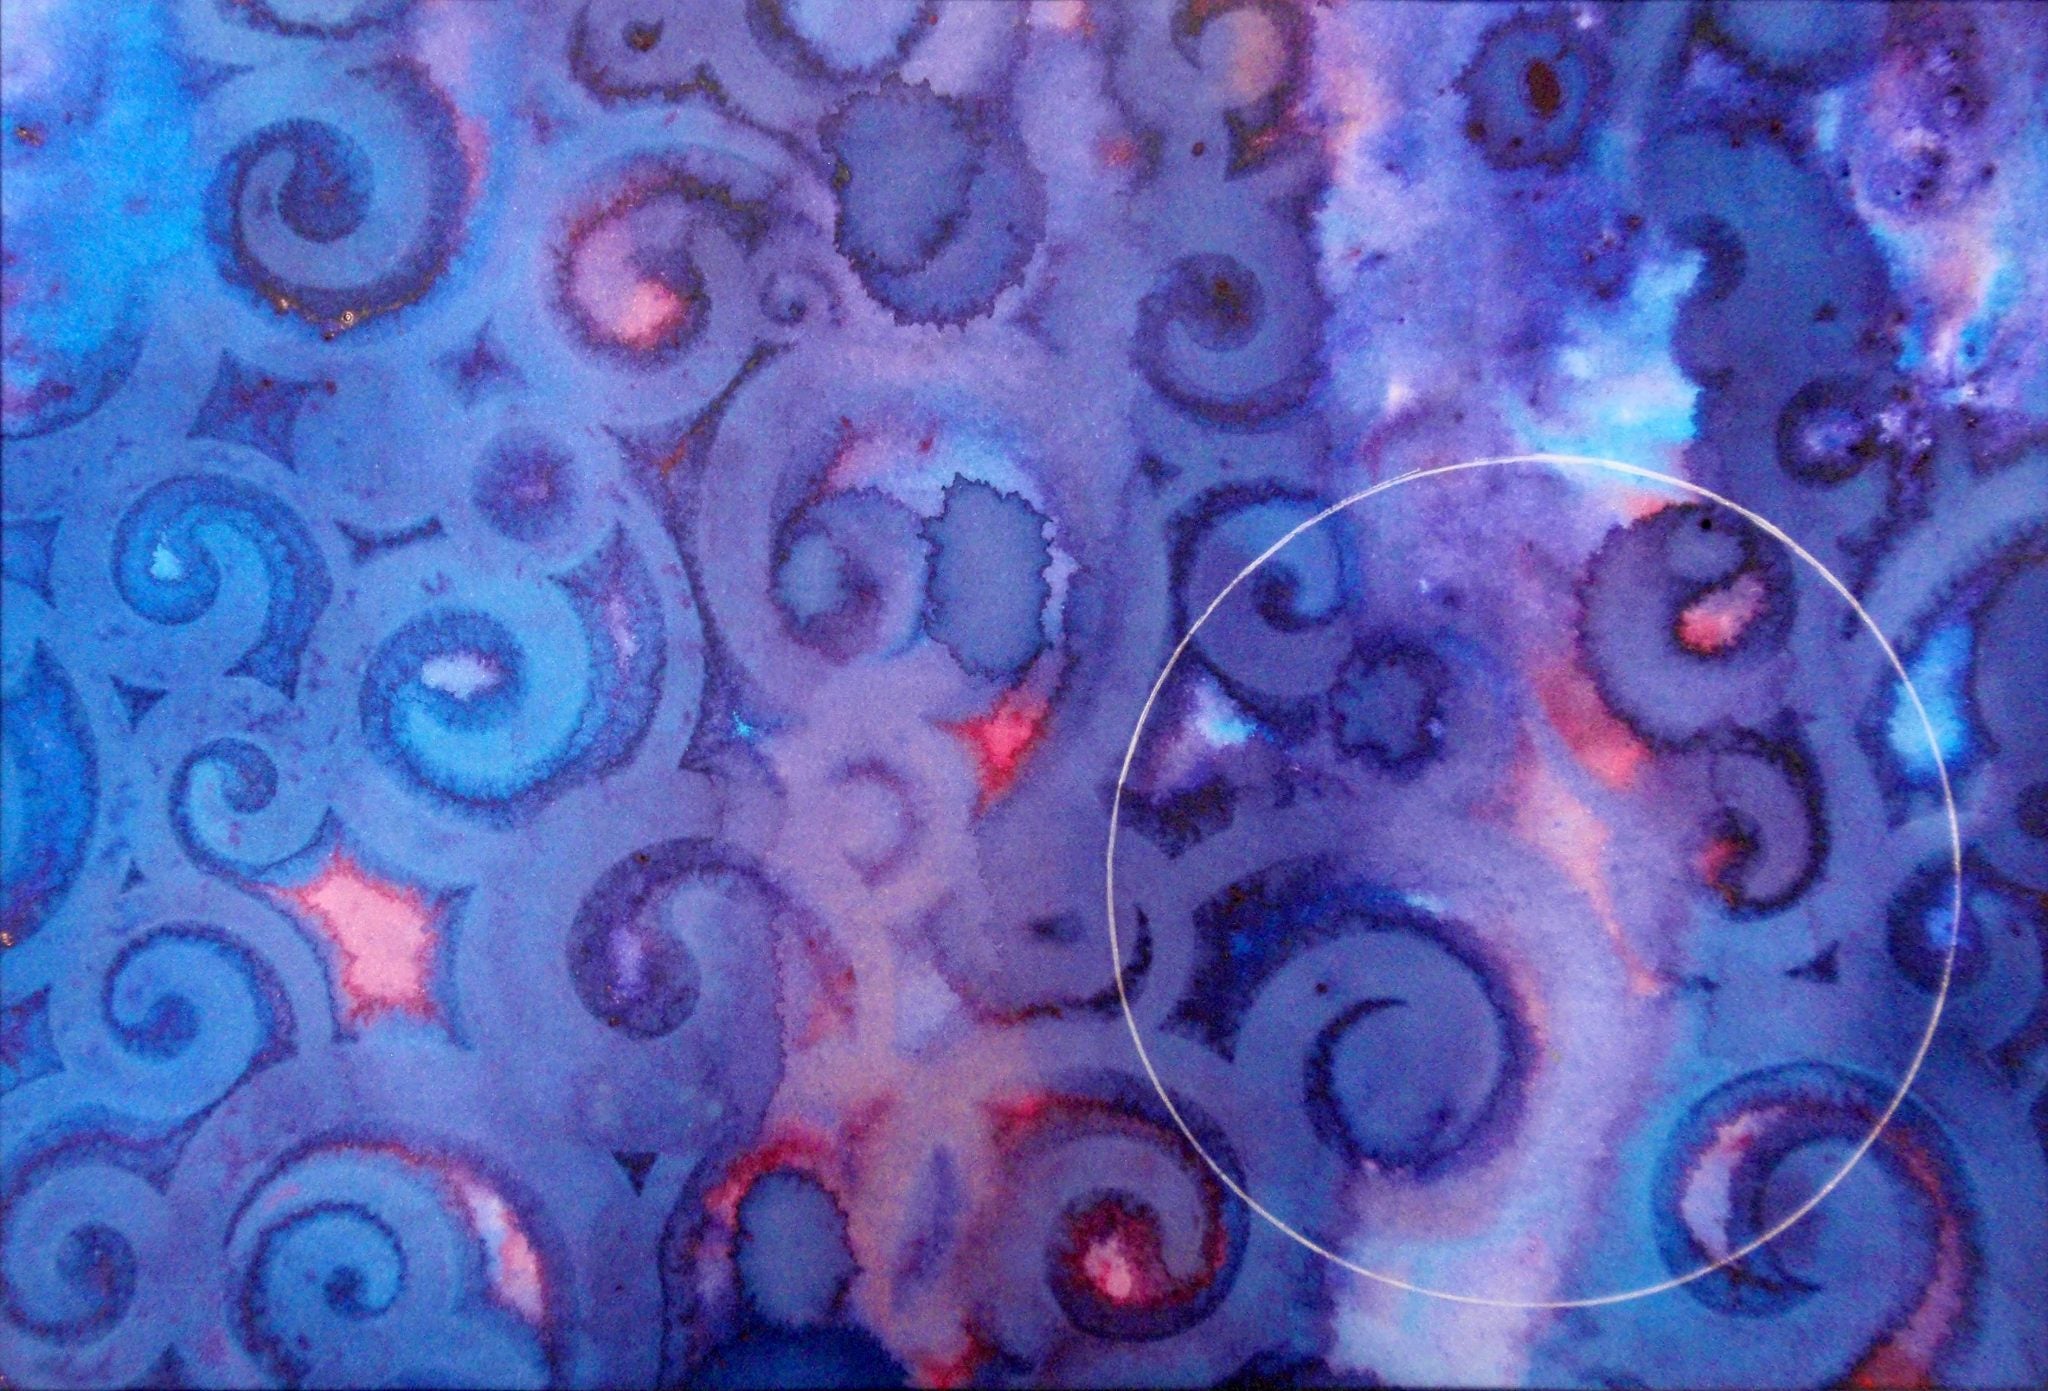
This project uses Brusho Crystal Colour along with a simple sprinkle technique to quickly create a vibrant colored background. Brusho is highly pigmented watercolor ink powder. The small sampler set includes 6 jars of color (sunburst lemon, orange, alizarin crimson, violet, turquoise, and sea green) and 1 empty spritzer bottle. The paint is non-toxic. Like all paints, it can stain, so cover your work surface and your clothes.

Supplies:
9 in. x 12 in. watercolor paper
Painters tape
Scrap foamboard or cardboard large enough for paper
Brusho Crystal Colours
Spray water bottle (small)
Deli or tracing paper
12 in. x 12 in. background stencil
Silver paint pen
White acrylic paint and brush
Light (e.g., white) pencil or pen
Transfer paper
White mat 11 in. x 14 in. with 8 in. by 10 in. opening
Directions:
Step 1
Tape the water color paper along all four sides to scrap foam board using painters tape. Overlap the tape with the edge of the paper about .25 in. Spritz water onto the watercolor paper using the small spray bottle.
Step 2
Punch a hole in the lid of the jar of Brusho and sprinkle Brusho over the wet paper.

Step 3
Spritz more water over the crystals.

Step 4
Lay a stencil on top of the paint. Leave the stencil in place and allow paint to dry.

Step 5
Remove the stencil after the paint has dried on the surface of the paper, but while the back of the paper is still damp.

Step 6
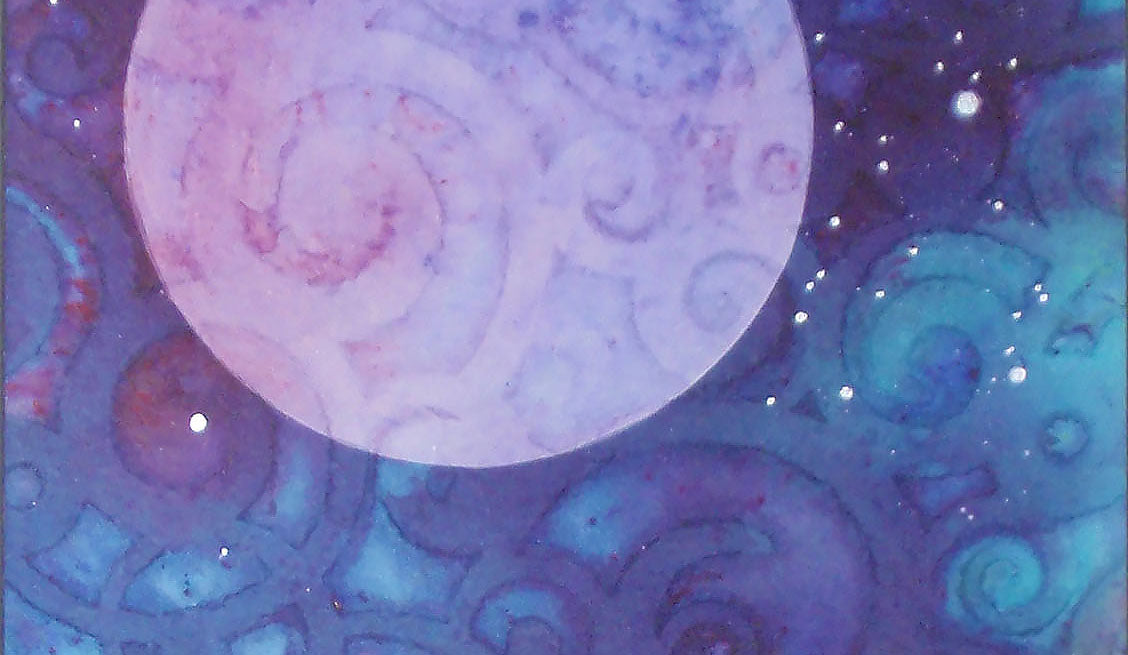
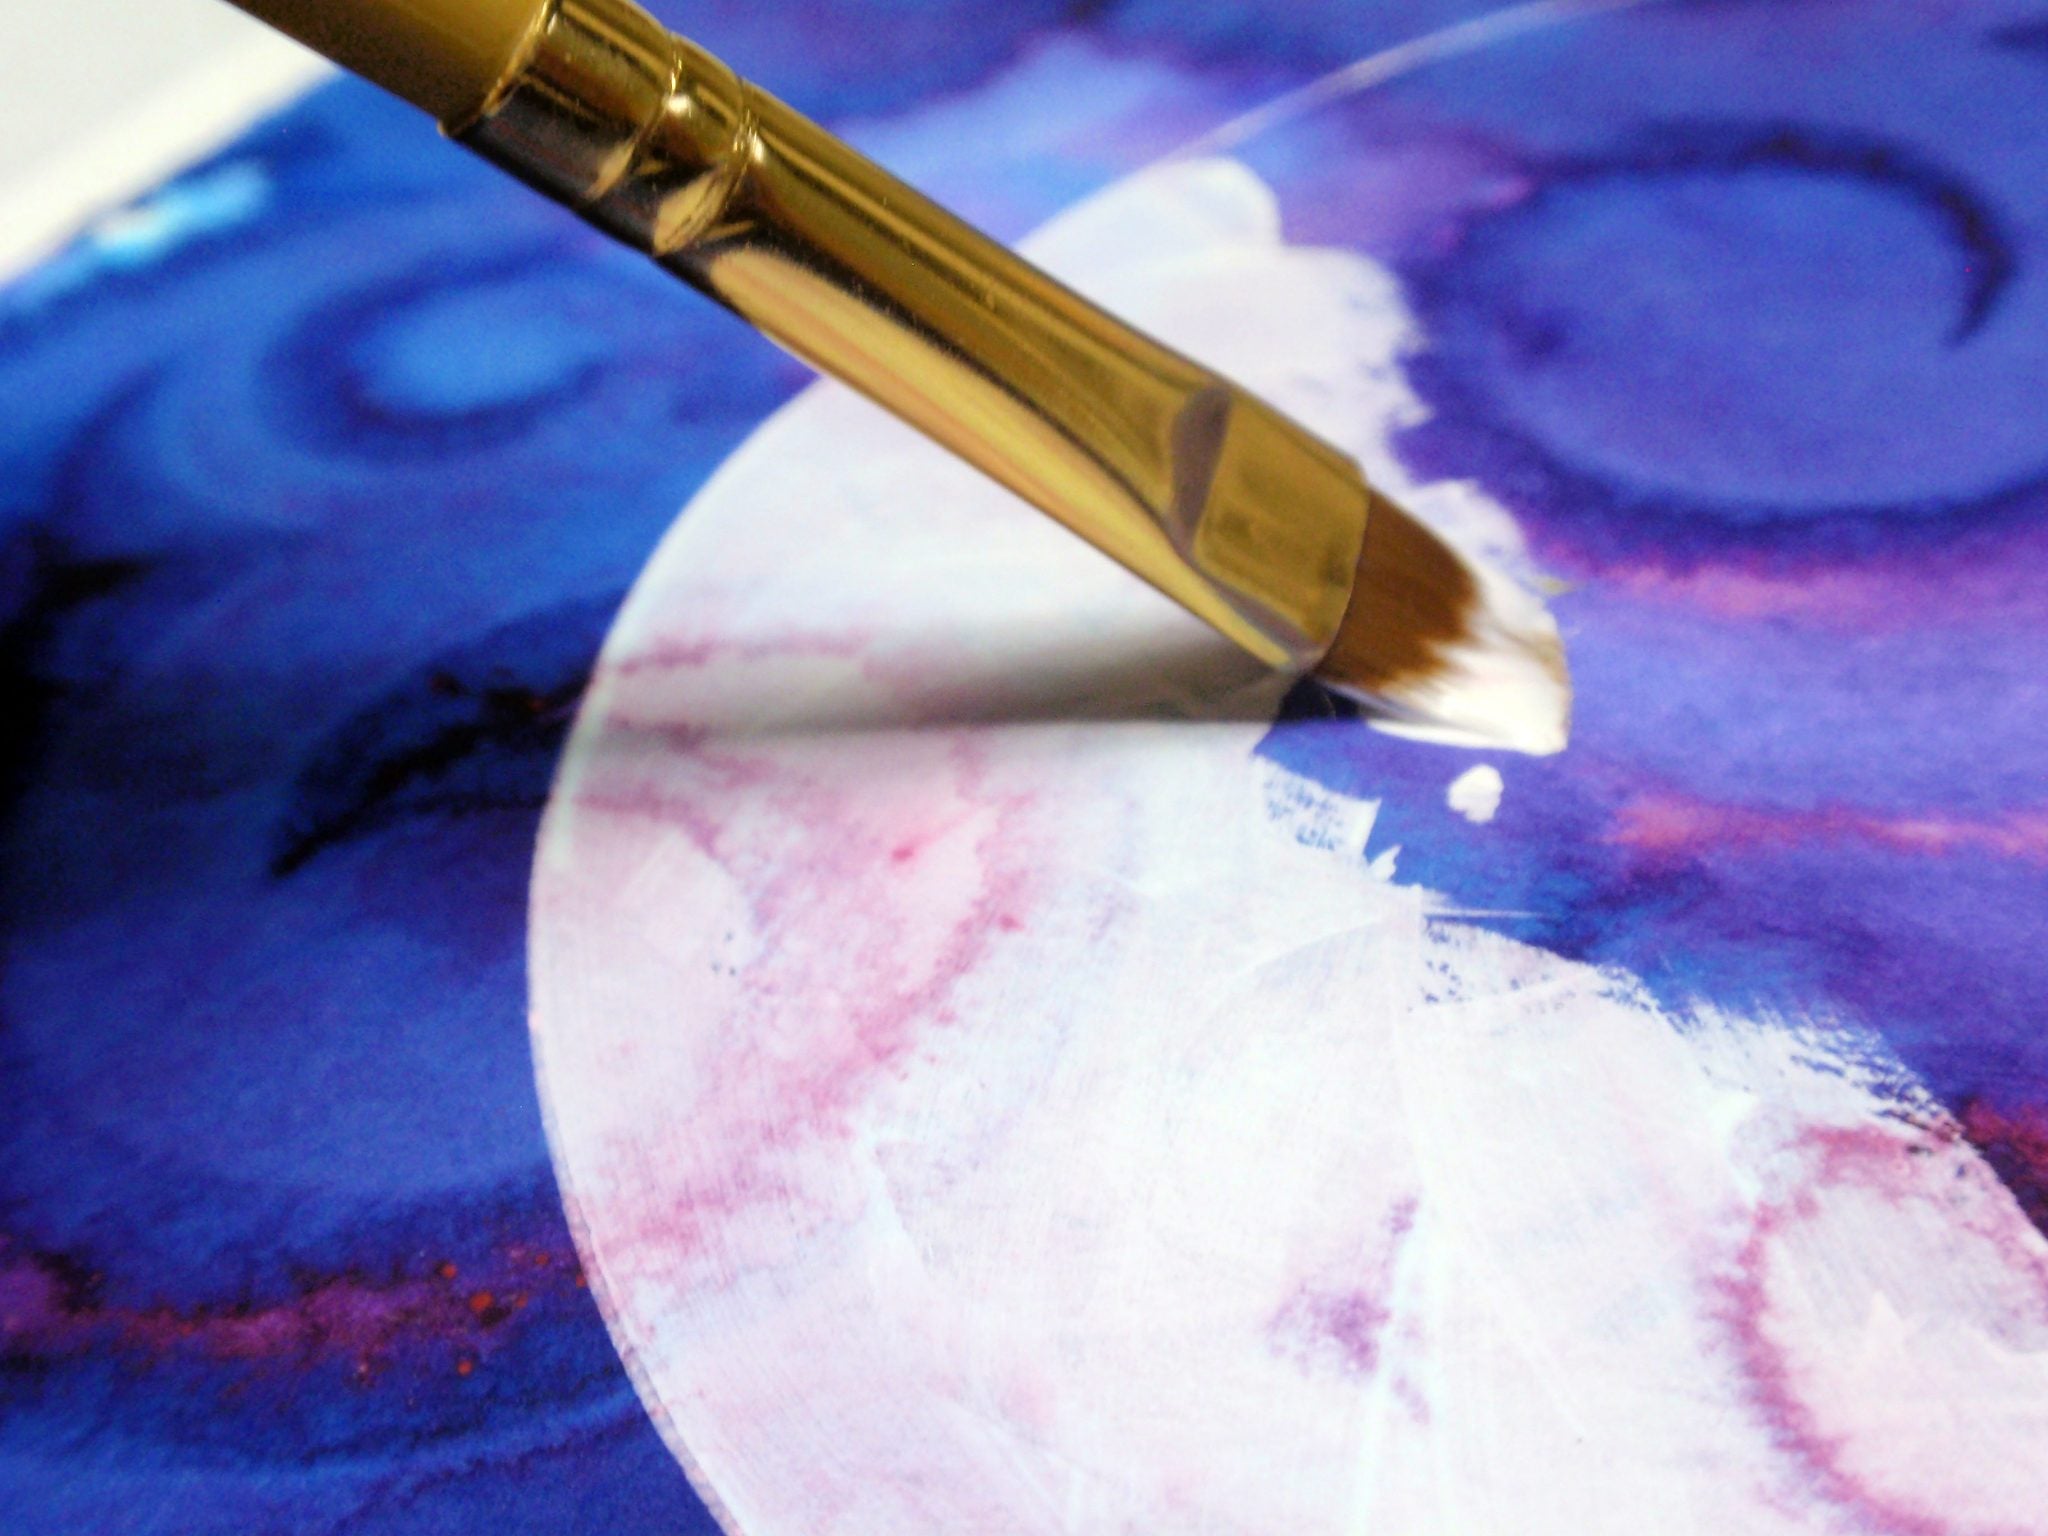
Trace around a circular object (about 4 in. in diameter) using a light pencil or pen to create the shape for the moon.
Step 7
Paint in the circle using white acrylic craft paint. Use as few brush strokes as possible. The white paint will blend with the paint on the still damp paper to eliminate brush strokes. The pattern on the paper will show through the white paint.
Step 8
If you’d like, loosen some white paint with water and spatter some “stars” on the upper half of the painting. Allow the paint and paper to dry completely.

Step 9
Practice lettering the quote on some writing or graph paper. Then plan the layout of the quote on some deli or tracing paper.
“Moonlight is the twinkle of your love.” – Debasish Mridha

Step 10
Transfer the hand lettered quote to the painted background using a light-colored transfer paper. Or reproduce your lettered design free-hand on the background using a light-colored pencil.

Step 11
Trace over the letters using a silver paint pen. Highlight the stars with silver pen if desired.

Step 12
When the paint pen has dried, use a damp brush to remove the transfer paper marks from the surface of the paper. Finish the artwork by positioning it behind a white mat and taping it in place. Easy and beautiful!

Succulent Sketch: How to Draw with a Photo Reference
FEATURED SALES