
Teacher Appreciation DIY - Drawing in Cricut Design Space

We all know and love our Cricut’s for their ability to cut through endless amounts of materials. But did you know that your Cricut (from the Explore on up) can also write or draw with a pen? It’s one of my favorite features of the Cricut! I’m making a project for Teacher Appreciation Day that uses the drawing feature in Design Space, so I thought I would not only show you how to make the project but also use the drawing feature!
Materials:
- Cricut
- Knife Blade
- Chipboard
- Succulent (or any kind of plant)
- Soil
- Rocks
- Pot
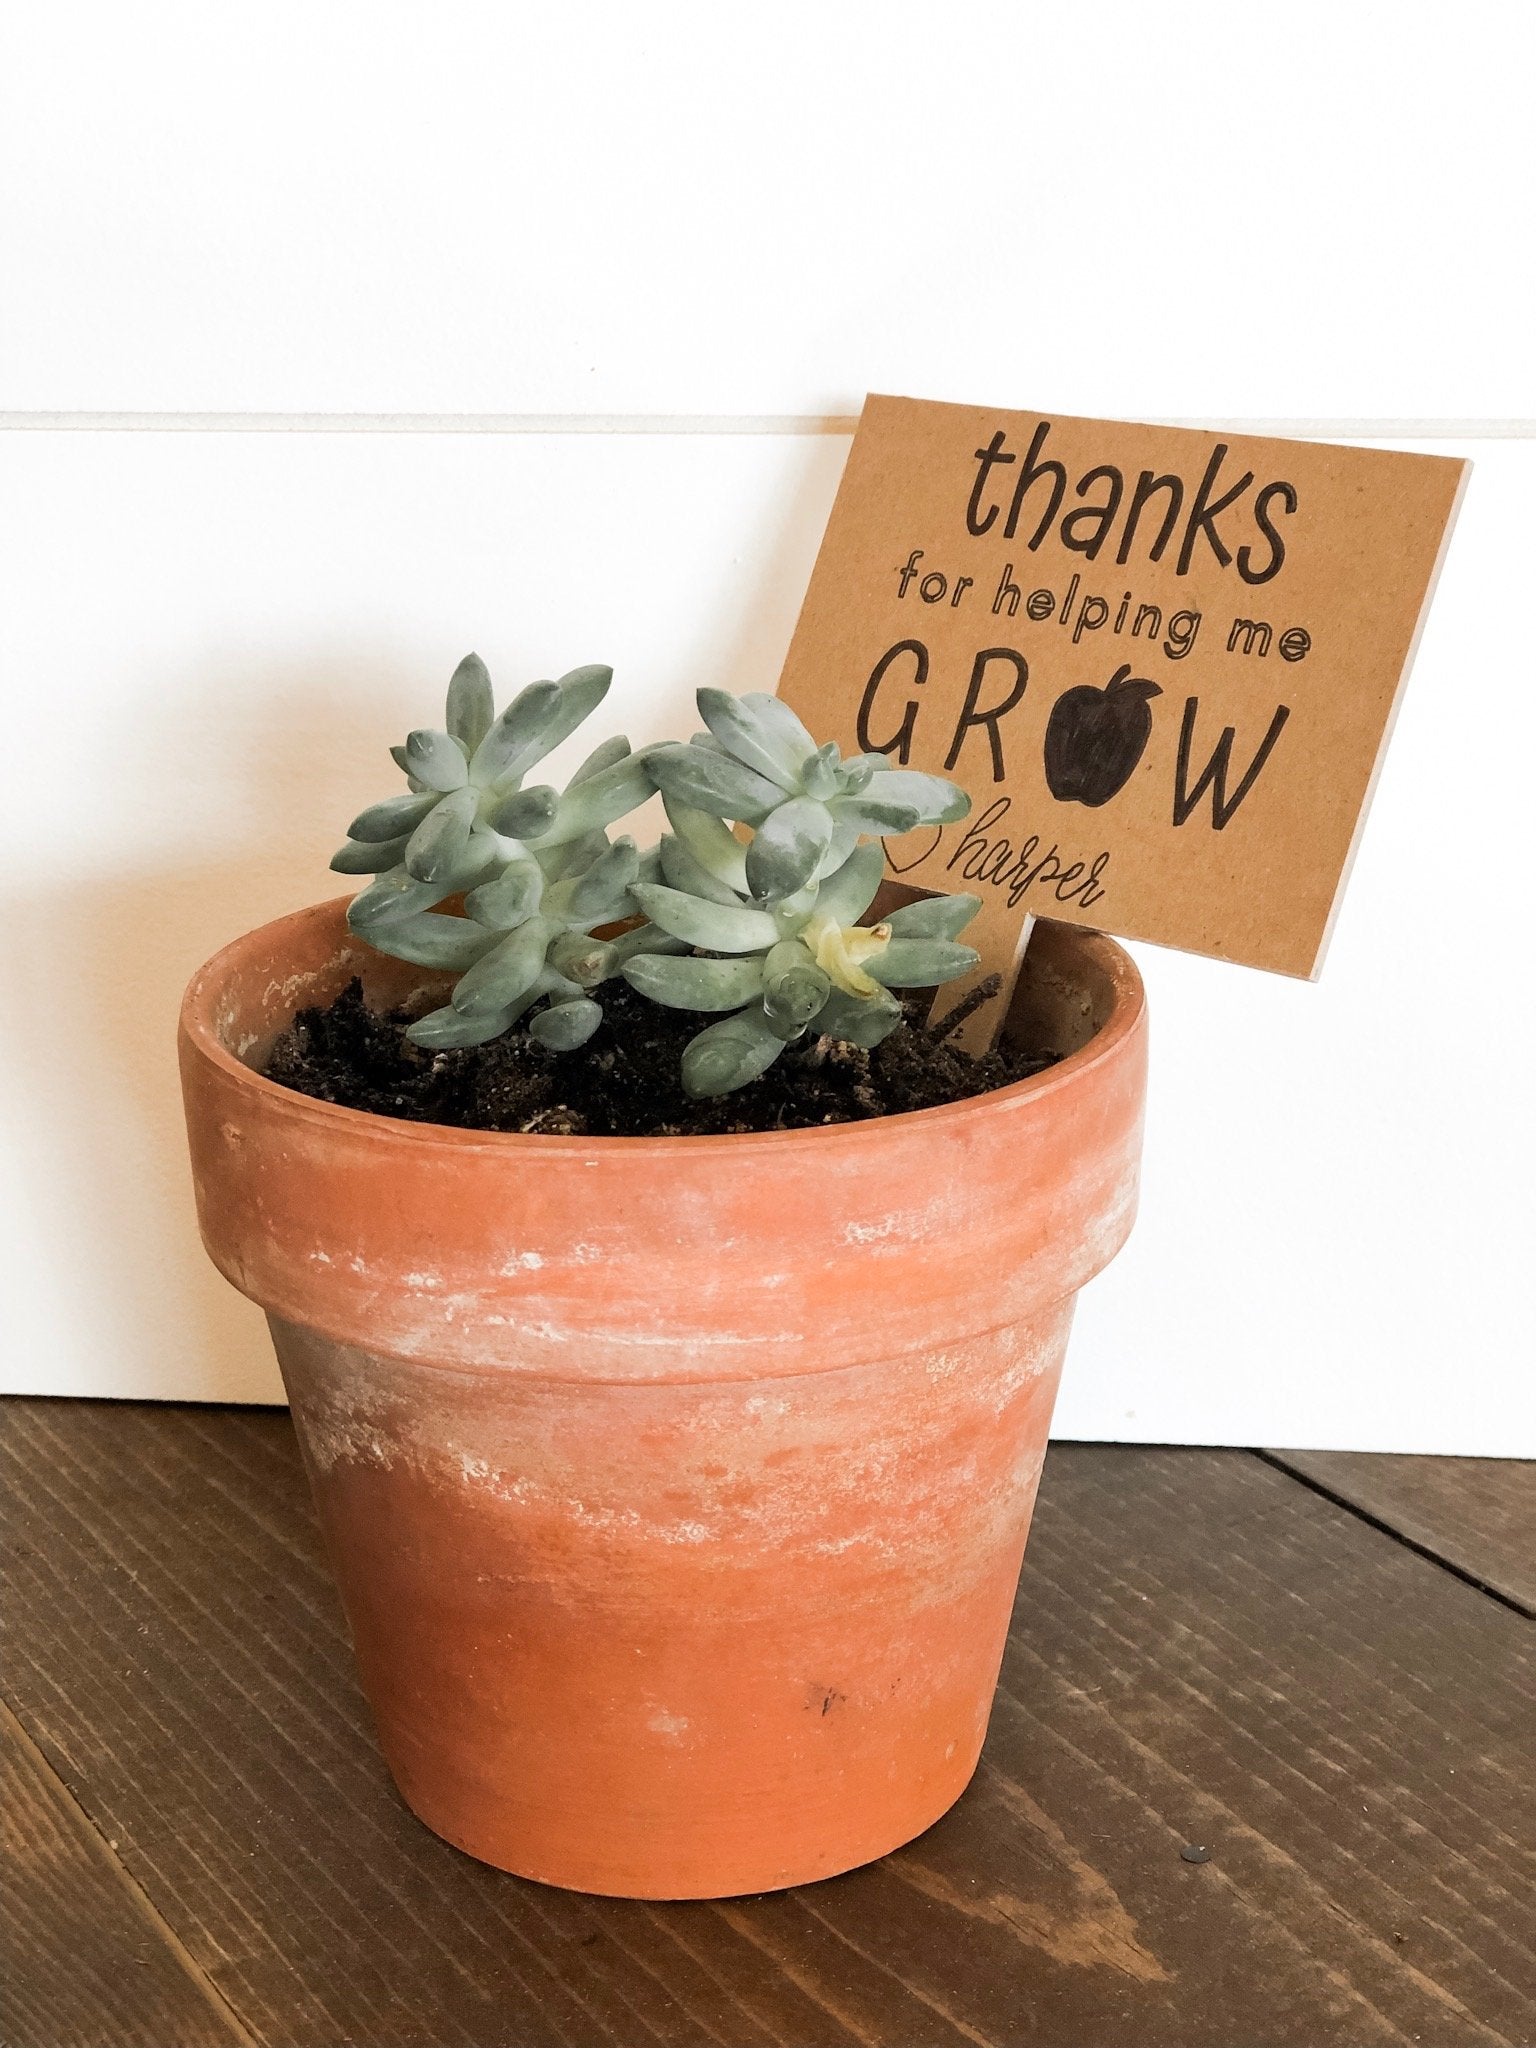
Step One: The first thing we are going to do is actually just to plant the succulent in the pot. Since succulents don’t need a lot of water, we want to make sure that there is proper drainage in our pot. To do this, put a handful of rocks on the bottom of your pot before adding in soil. Once you’ve got a good layer on rocks, add in the soil. Then create a circle in the soil for your succulent to sit in. When you take the succulent out of the plastic container it came in, I like to break up the roots before putting it in the new pot. You can literally just rip a good portion of the bottom roots off. Then put the succulent into the hole that you created, add a little more soil on top and then push firmly down. Then add a little bit of water (remember, not too much!). You can decorate your pot however you want too – I just added a bit of twine around it. I think I may add a gift card to hang from the twine!
Step Two: Head over to Design Space and get your file ready. I actually created mine and you can download it for free too, if you want! It says, “Thanks for helping me grow” and then has a heart at the bottom to sign your kid’s name. You can make your own design in Design Space if you want! If not, you’ll need to upload your design into Design Space. When you upload it, choose “Cut File”. Once it’s uploaded, insert it into your canvas like the photo below.

Step Three: A However, it is currently a cut file and we want it to draw – not cut! To do this, simply head to the top left-hand side of design space and find the drop-down box that says “Linetype”. As you can see in the photo above, it currently says “Cut”. Click on the drop-down box and click “Draw”. Then it will outline your text as you can see below! This is exactly how it will draw your design. If you use text in Design Space that is specific for drawing, it will fill in the spaces for you. In this case, we will have to fill it in when it’s done cutting.

In the image below, you can see which fonts are specific for the drawing feature and which are not. If they say “writing” next to them, then they will not draw an outline. However, for this project, I really wanted to use the fonts that I had. I will just have to fill in the words with my black pen after it’s done cutting which is not a huge deal.

Step Four: Now it’s time to create our “garden stake”, if you will! I am going to use chipboard for the base of this. I used a sheet from Cricut’s Damask Sampler. To do this, I inserted two squares onto my canvas in Design Space. You can find these on the left-hand side under “Shapes”. Then I manipulated the images to create the stake. In the second picture, I have circled a lock image. If you click on this, it will unlock your image so that you can transform it anyway you’d like. I made a rectangle out of the first square and then created a super skinny rectangle for the stake. Once you are finished, make sure that you lock the images again so they don’t move on you. Then, click on both of the images and weld them together. You can find the button for “Weld” in the bottom right hand corner.

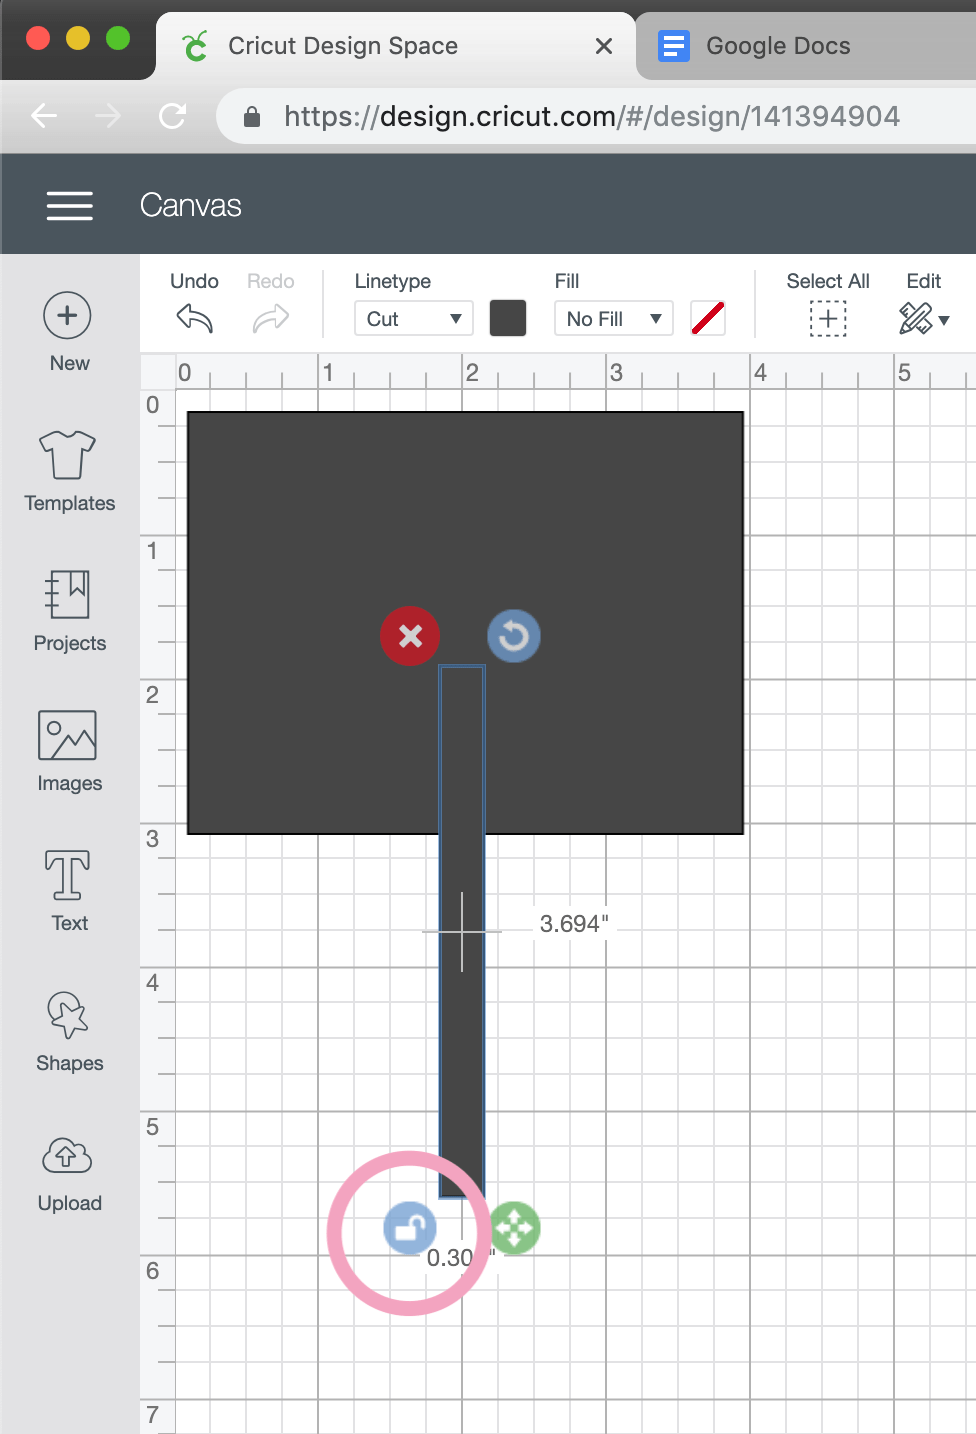


Step Five: Once it’s welded, I changed the color of the garden stake so that I could better see my words on top of the stake. Then move your drawing on top of the garden stake and fit it to the correct size you need. Once you have it how you’d like it, go to the bottom right hand corner of the screen again (where weld previously was) and click “Attach”. This is going to tell the Cricut that we want the images together BUT that we want the bottom to cut and the top portion to draw.

Step Six: Once you’ve attached it, click “Make It” in the top right hand corner and get cutting/drawing! I am using a thicker chipboard, so I needed to use the Knife Blade for this project. Insert your knife blade into the “B” slot and push the white star wheels all the way to the right. Then insert your pen into the “A” slot and make sure it snaps in firmly. You’ll hear a clicking sound. Another tip when cutting chipboard is to use your StrongGrip cutting mat and to using masking tape or painter’s tap along the edges of the chipboard to help it stay in place.

That’s all for now! This is a quick and simple project that you could make for your child’s teacher for Teacher Apprecation Day. I love how the Cricut allows us the ability to customize anything we want. You could have even had the Cricut draw your teacher’s name on the chipboard! The possibilities are endless. Let us know if you have any questions and happy making!
-Courteney

15 DIY Cricut Craft Projects for the Teacher in Your Life
FEATURED SALES


1 comment
Thanks it was very help full love it