
DIY Party Paper Straws
These adorable paper straws are a perfect addition to any celebration, anything from summer picnics to birthday parties! I am going to walk you through, step by step, how I made adorable paper straws for a bridal shower!
Materials to Create Straws:
-
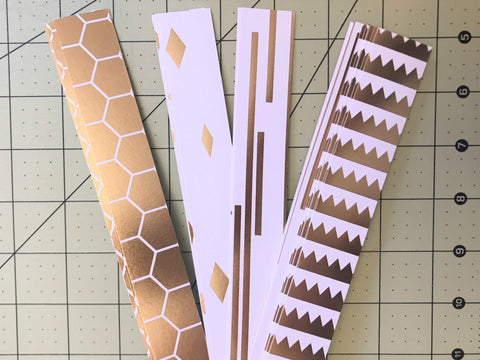
Cricut Foil Embossed Paper (I used Gold, White)

- Paper Trimmer Tool
- Scissors
- Glue
- Dowel or Pencil to wrap paper around
- Cutting Mat
Materials to Waterproof Straws (optional, if you are using for decor only this step is not necessary):
- Beeswax
- Tall, narrow Glass
- Pot
- Aluminum Foil
- Cricut Tweezers
Materials to Decorate Straws:
- Cricut Maker or Explore Air 2 Machine
- Cricut Corrugated Cardboard Set (I used the Pastels sampler & the flat pieces)
- Cricut Multi Pen Set in Gold (I used the .8 Sparkle Gel Pen)
- Cricut Lightgrip Mat
Step 1 // Cut Strips of Paper
I used a cutting tool to cut 12×1 inch strips of paper. Since Cricut sheets are 12×12 inch, you will have 12 strips per sheet.
Step 2 // Apply Glue
Place two upside down paper strips next to each other and glue in the middle. 
Step 3 // Roll
Use a pencil (dowel) to roll the strip of paper around. The glued side should only overlap on paper, not touching the pencil. You will want to play around with angles. Bigger angle=long straw. Small angle=short straw.

Step 4 // Remove
Slide off of Pencil (dowel) and secure any loose ends with a touch of glue.
Step 5 (optional) // Dip in Wax for Waterproofing
I decided to use beeswax to waterproof my straws. Boil water in a pot, cover with aluminum foil, & create a hole for the jar to go. I made sure the glass jar was tall enough to dip an entire straw, but also narrow enough to not waste any wax (narrower the jar, higher the wax goes). The wax will melt on low to medium heat. Once completely melted, dip the straw! Place on wax paper to dry. 

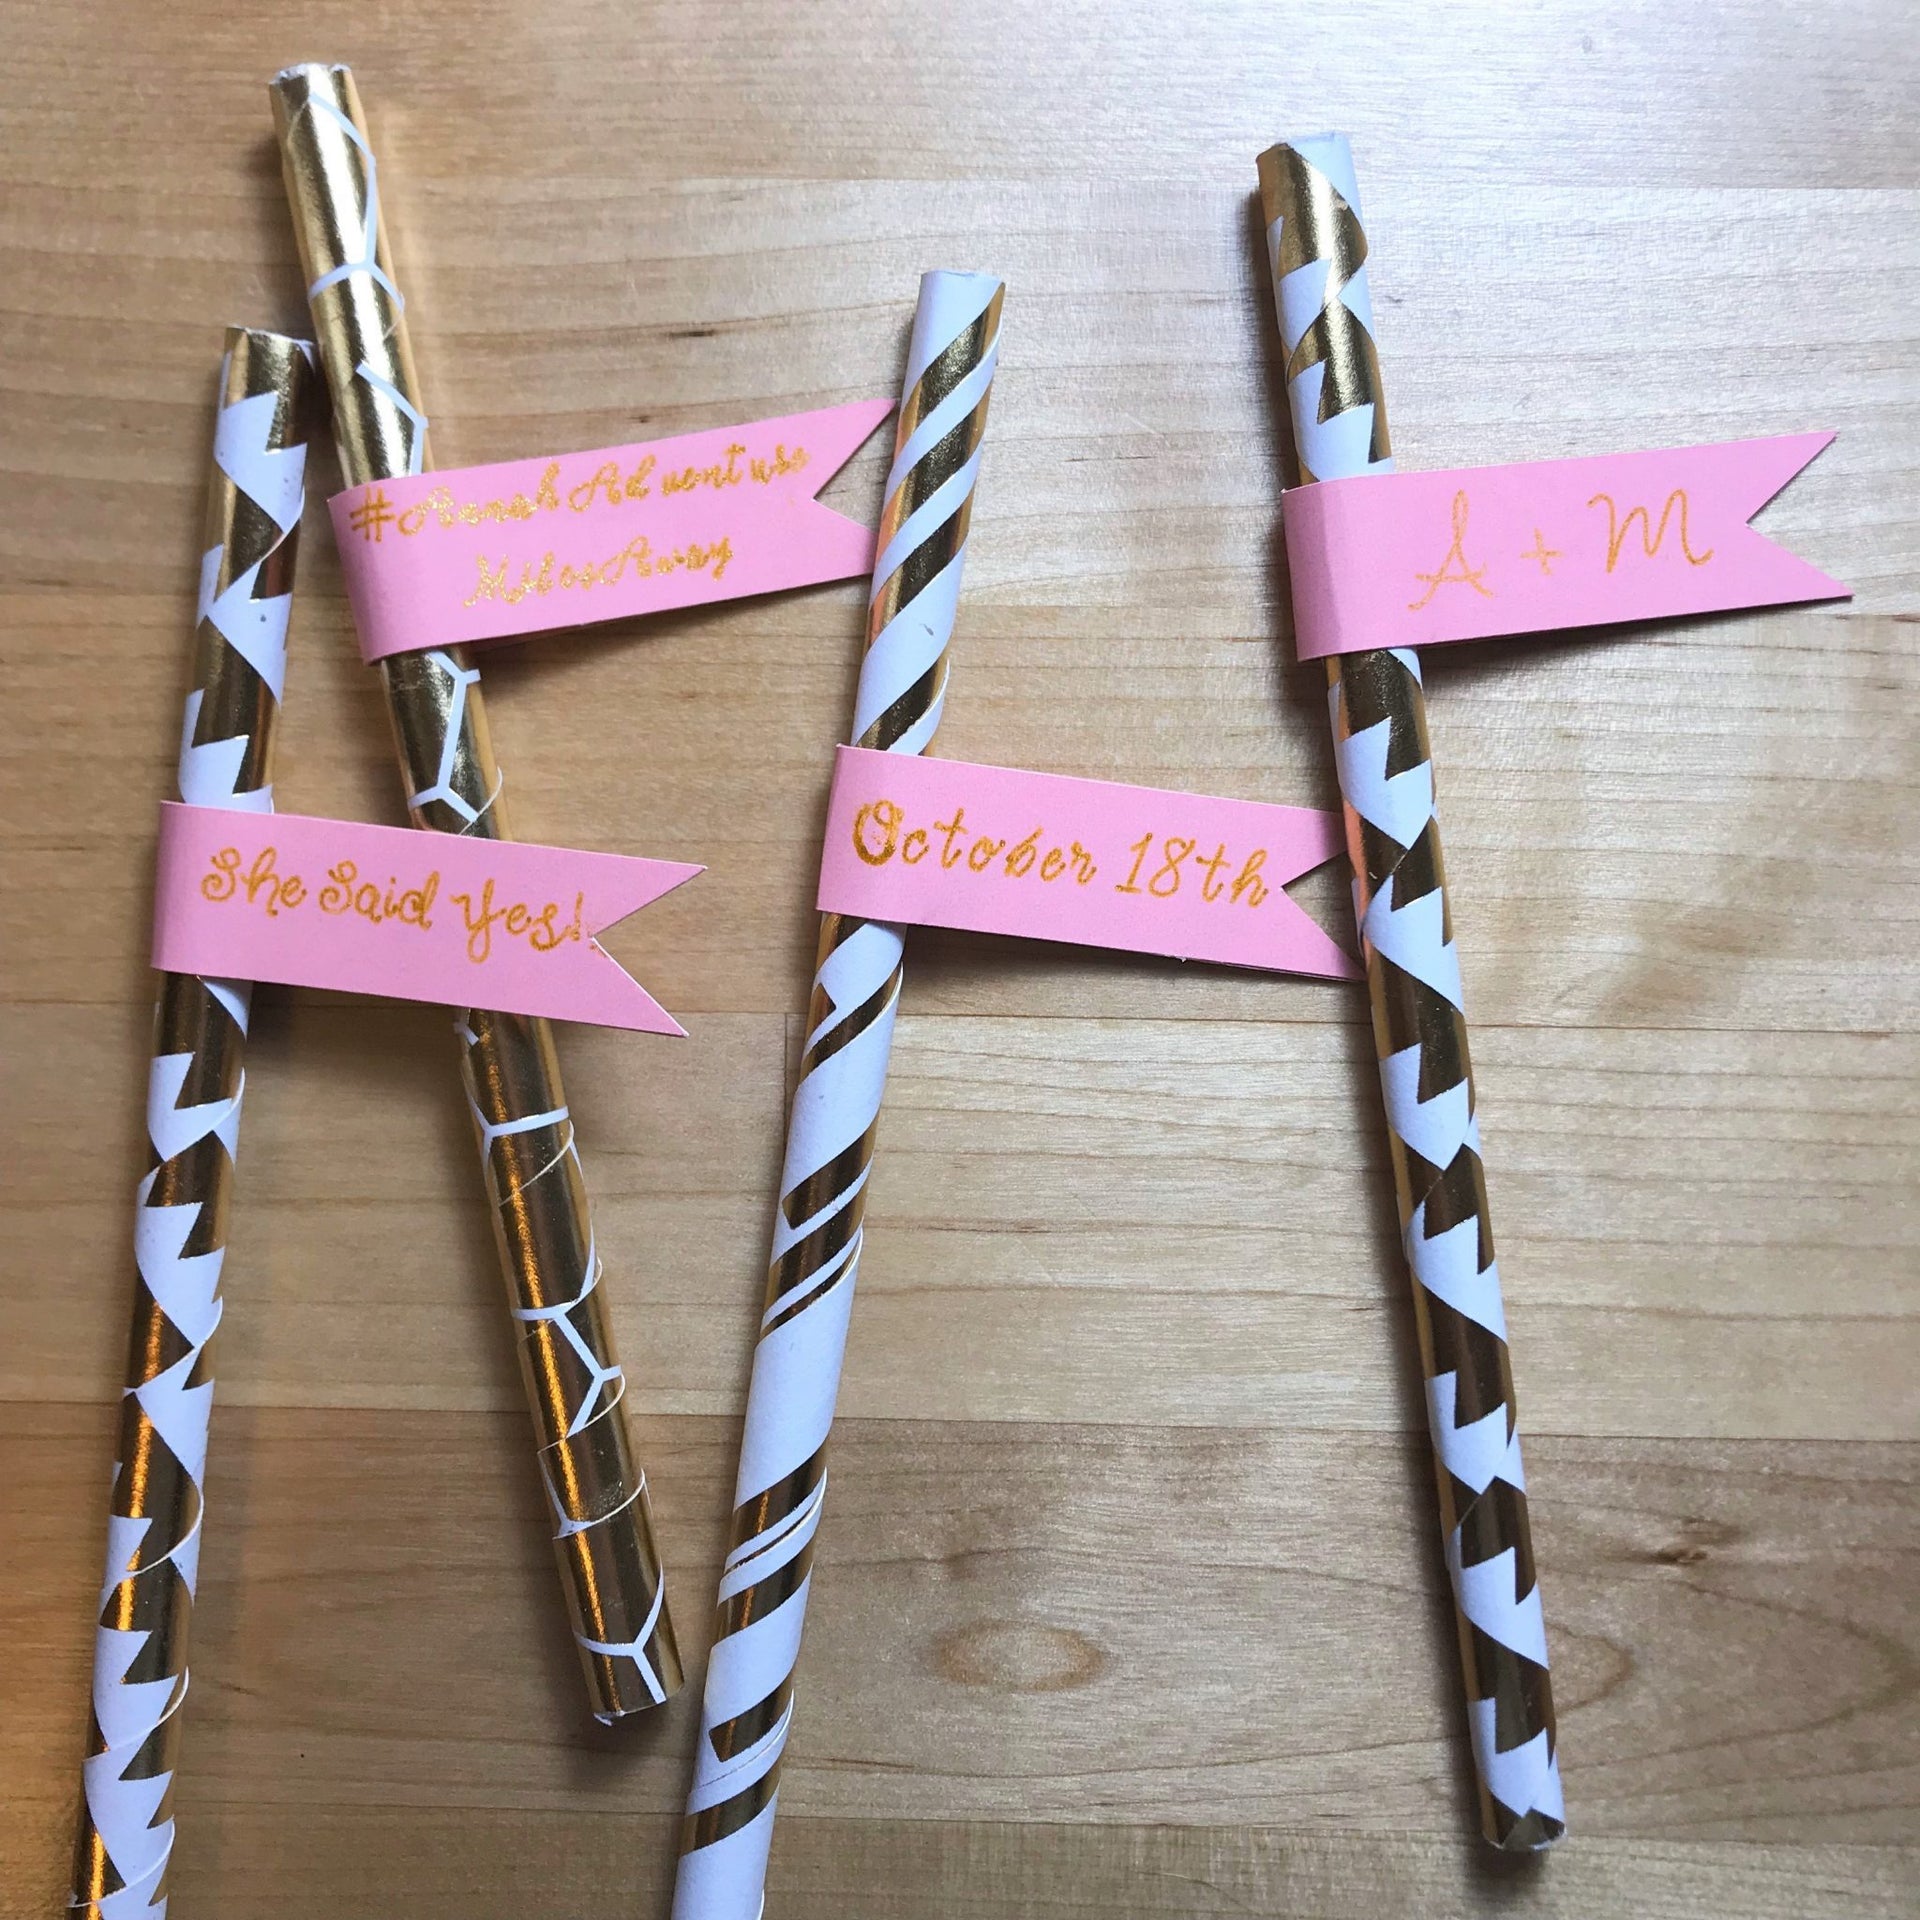
Step 6 // Make Banners or Decorate how you like!
Create your cut in Design Space. I created a banner shape and included a layer of text. Design Space Access had all of the fonts I needed!
Step 7 // Prep Cricut Cutting Materials
I placed my Cricut Cardboard Paper on the LightGrip Mat. Then I loaded the Cricut Maker with the Fine Point Blade & Gold Pen.


Step 8 // Remove from Mat & Apply to Straw
I used the spatula tool to help me remove the banner pieces & glued them around the straws.


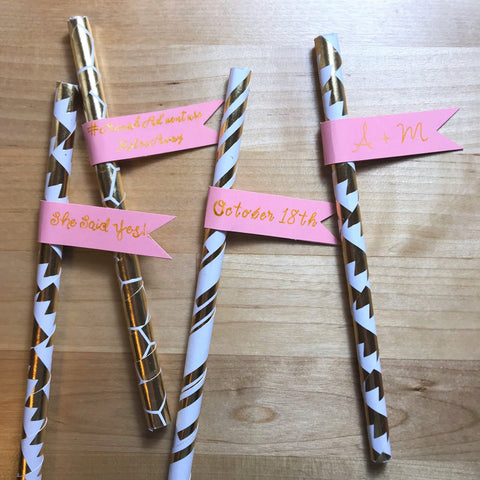
I hope you enjoy this project and give it a shot! It definitely requires precision & patience, but the end result is sooo worth it. The event these were created for isn’t until July, but I am already planning on pairing them with a mason jar & a tasty, fruity iced drink! Enjoy! -Annah
How to Make Custom Ribbon with Iron-On and a Cricut
FEATURED SALES


1 comment
I came across your site while browsing for ideas for a party. I will be making the lanterns!
Instructions are very clear and easy to follow. Thanks.