DIY Wood Sign with Iron-On Vinyl
 Did you know that you can apply Iron-On Vinyl to wood? Yep, it’s just about the best thing ever. When I think of using Iron-On Vinyl, my mind traditionally turns to projects that involve fabric – like t-shirts or canvas bags. But as I was perusing through Pinterest one day, I saw some people applying Iron-On to wood and knew I had to give it a try! And I’ll spill the beans now for you: I love it. You can just apply regular ole vinyl to the wood, but I think this way is more permanent and it almost sinks into the wood and is less obvious that it is vinyl. I love how this turned out and I think you will too.
Materials:
- Cricut Everyday Iron-On Vinyl (I used the Classics Mini Sample Pack)
- Cricut Iron-On Glitter: Black
- Cricut EasyPress2 (or an iron if you don’t have one)
- Cricut Weeder
- Cricut XL Scraper
- Cricut Maker or Explore Air 2
- StandardGrip Cutting Mat
Check out our YouTube video to see it in action:
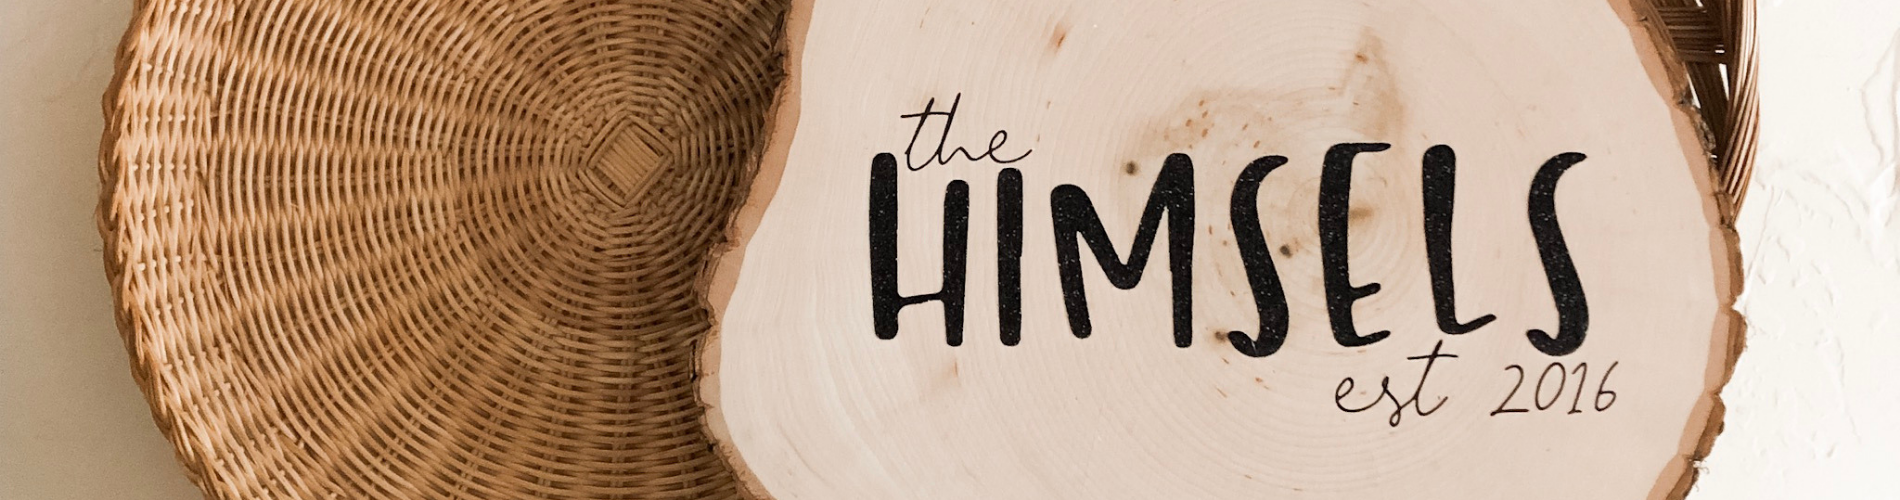
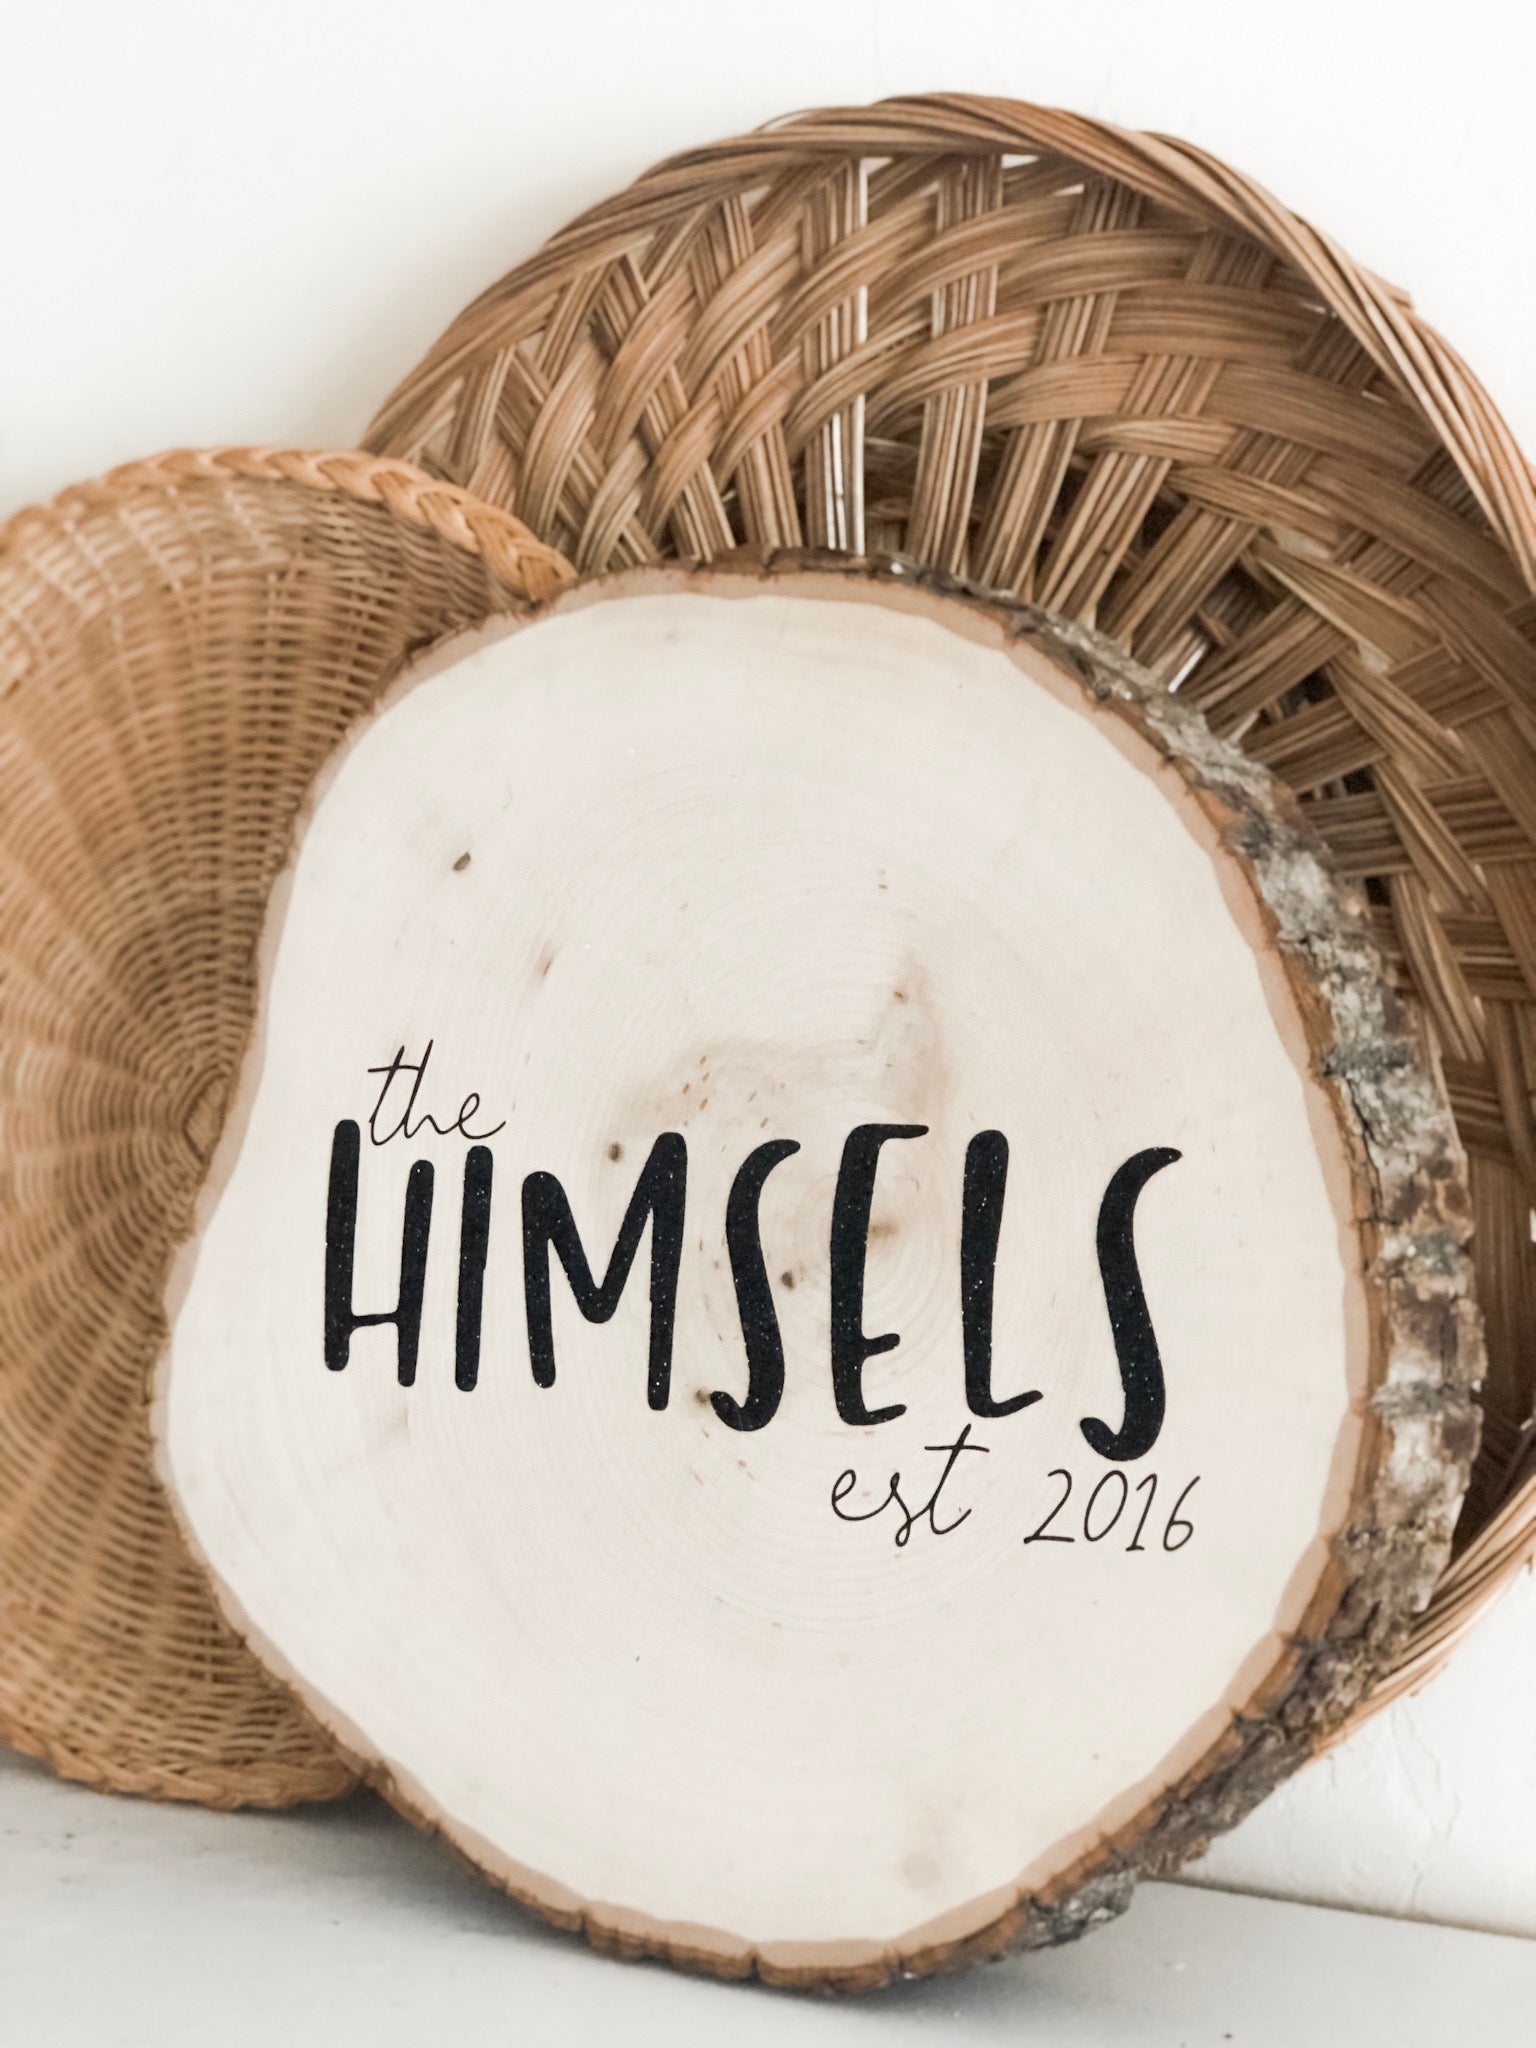
The first step is going to be to create your design. I wanted mine to be my last name and the year I got married, so that’s what I went with. Get creative with this! Consider what kinds of Iron-On you want to use too and if you’re going to layer. I decided I wanted my design to be in two layers, so that I could use Everyday Iron-On vinyl and also Glitter Iron-On. The “The” and “Est. 2016” are in regular black Everyday Iron-On vinyl and the “Himsels” is Glitter Iron-On.
Once you’re finished with the design, the next step is going to be to cut it out on your Cricut. I like to use a StandardGrip cutting mat for iron-on vinyl. Remember to put the Iron-On face down and to also mirror the image in Design Space. I started by cutting the Everyday Iron-On. Have you heard of the Everyday Iron-On Mini Sample Packs yet? That’s what I’m using here. If not, you should try one sometime! We sell them on our website and you can check out our assortment by clicking here. They are 3.5″ wide and 24″ inches long. It’s perfect for a project like this where you don’t need a ton of Iron-On. And you get an assortment of colors too! I’m a big fan. Once you’re done cutting the Everyday Iron-On, we are going to cut the Glitter Iron-On next. Again, make sure the shiny side is down and that your image is mirrored in Design Space! If you don’t, it will cut backwards and we don’t want to wreck your Iron-On! Make sure that your Iron-On is applied well onto your StandardGrip cutting mat, especially with the glitter iron-on vinyl. I like to use my XL Scraper to really make sure it’s adhered well and that there are no air bubbles under the iron-on.
 Once you’re done cutting, it’s time to weed our designs. I am using a Weeder Tool to do this and I think it might be one of my favorite tools of all time. It just makes weeding a breeze! Don’t forget the inside of your letters – like “a”, “o” or “e”.
 Next up, position the Iron-On on the wood and line everything up how you want it too. I like to do this to make sure that everything is straight and how I want it to be placed.
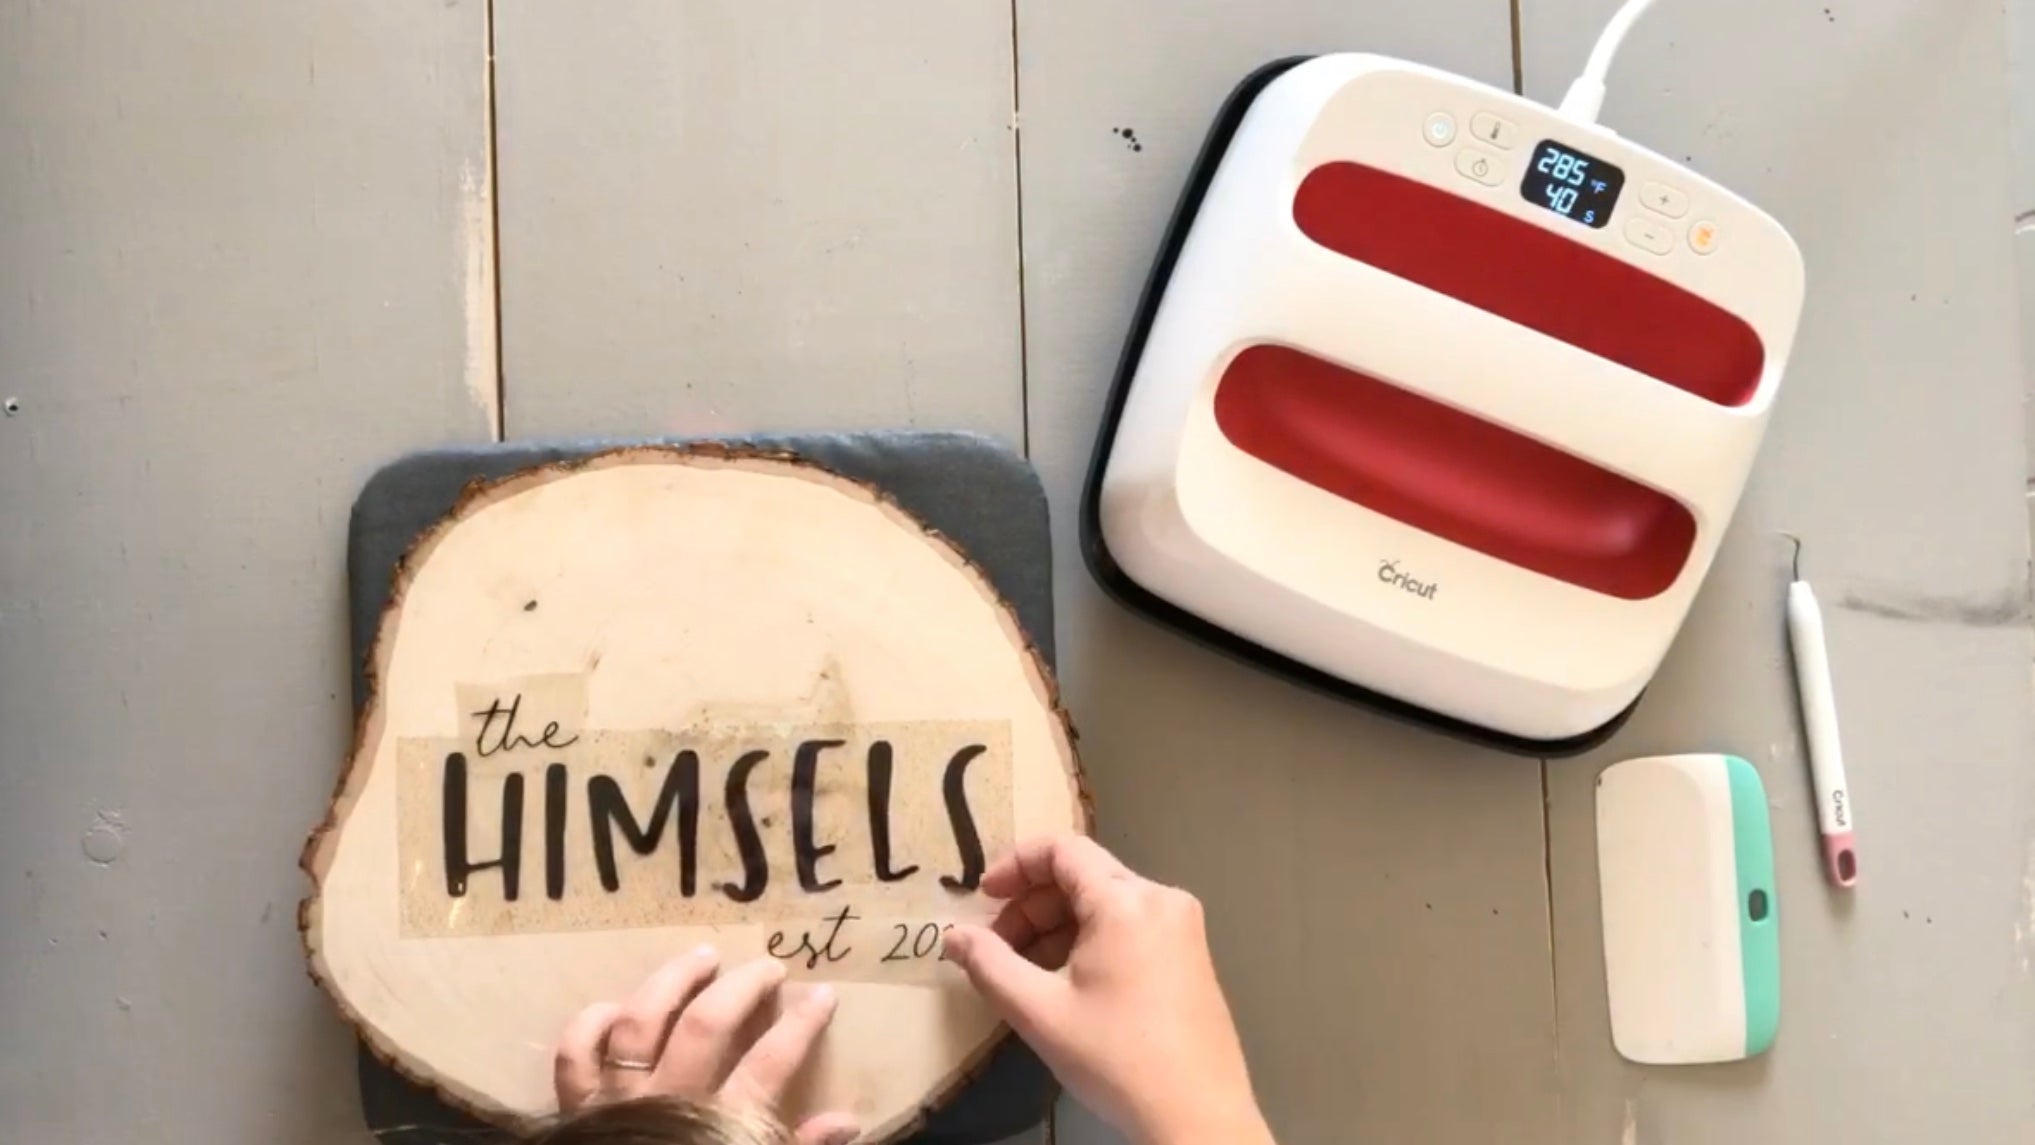 Then when you’re finished, remove the Everyday Iron-On so that you can apply the Glitter Iron-On first. I went to Cricut’s website to see what settings to put my EasyPress at. It’s called the “Cricut EasyPress Interactive Quick Reference Guide”. These were the directions for both the Everyday Iron-On and the Glitter Iron-On:
- Set temperature to 300F
- Preheat for 5 seconds
- Apply heat and firm pressure for 40 seconds
- Peel off warm
I wanted to add quick – even though both kinds of iron-on vinyl had the same settings, I still decided to do them separately just to keep things simple. I wanted to be able to focus on them one at a time. Totally up to you though – you could try doing it all at once!
The first thing that I pressed was the Glitter Iron-On. I followed the instructions above and got great results. However, I did notice that some areas hadn’t completely applied, so I went back over them for 5-10 seconds at 300F. If you see that something hasn’t entirely adhered, just go back over it with your EasyPress. Sometimes it helps to pull the plastic backing off from a different angle too.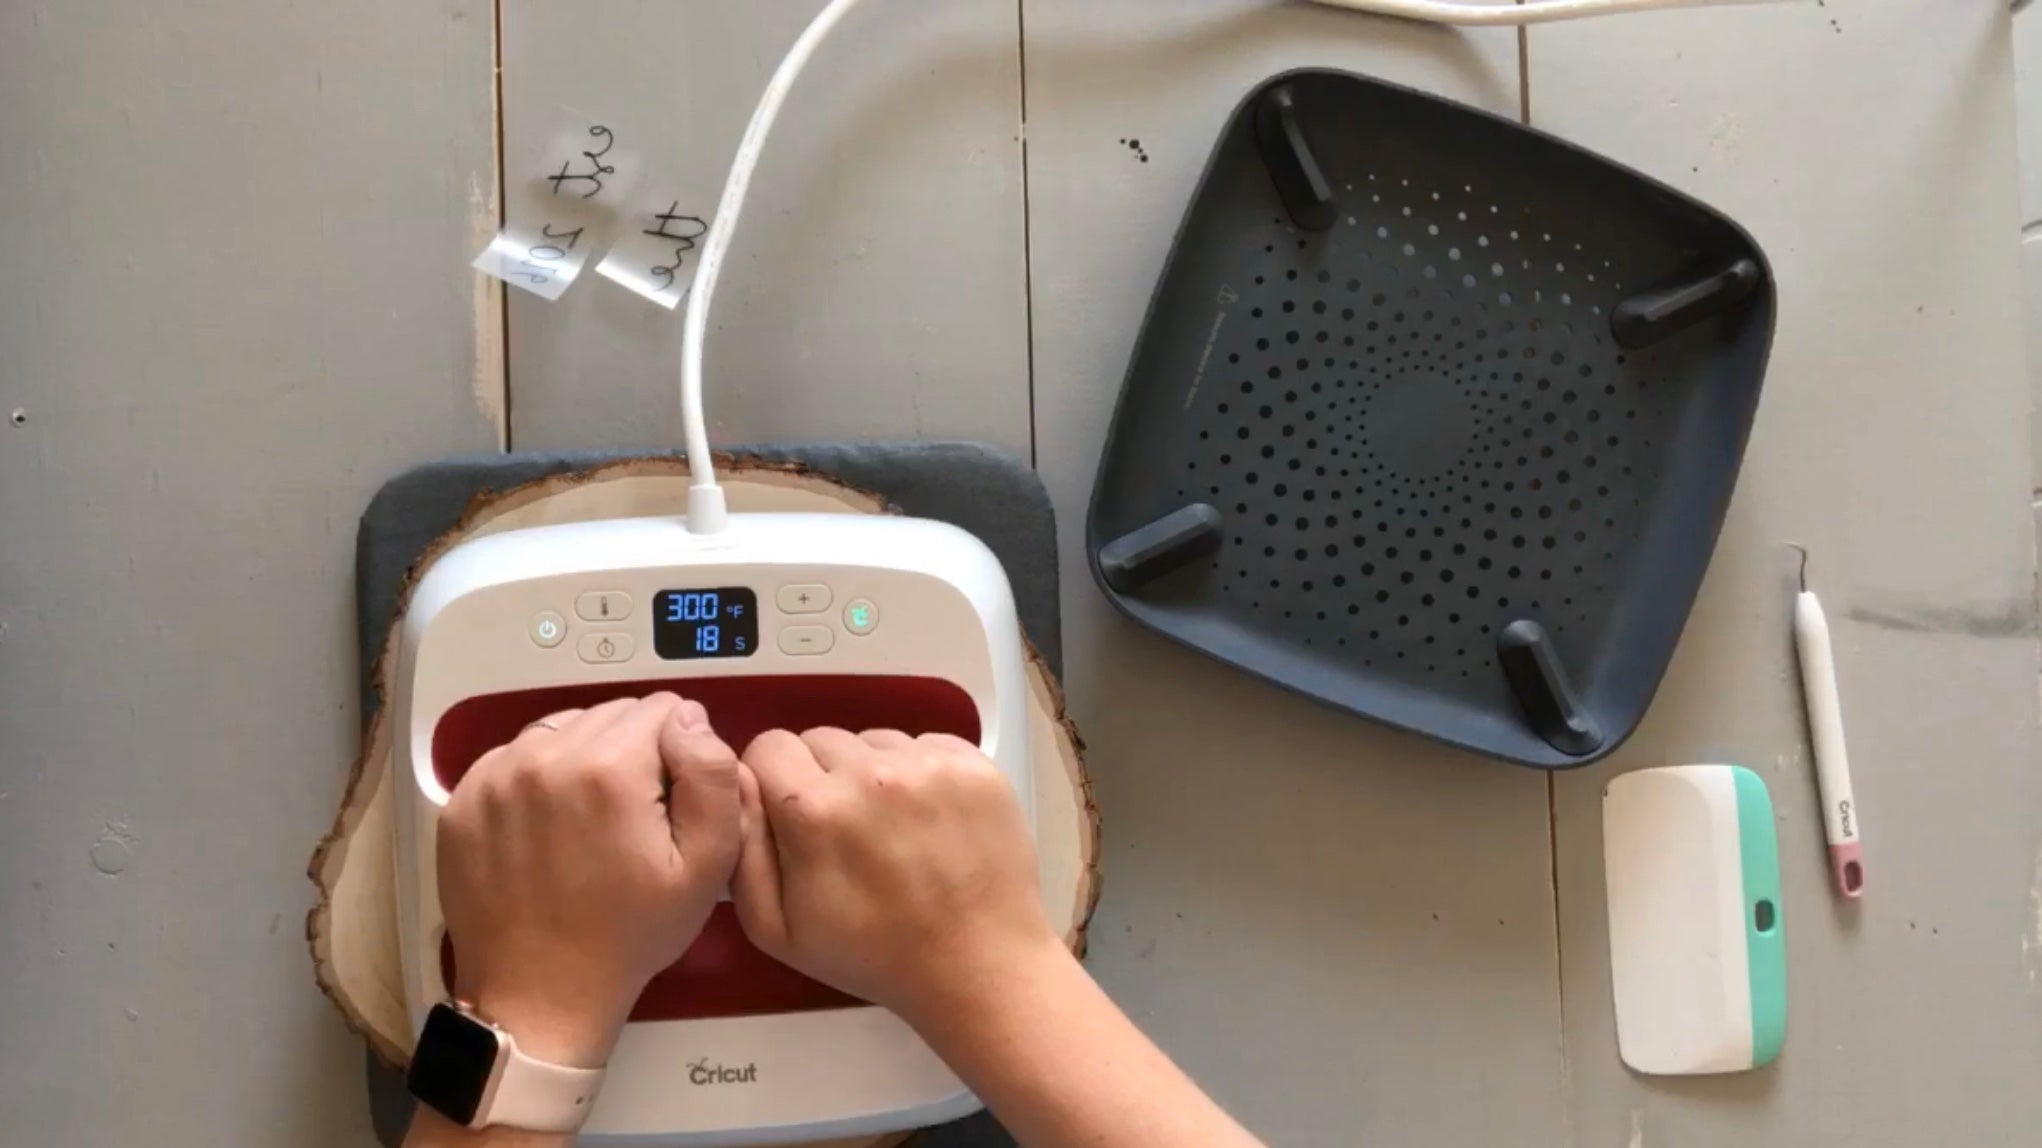 Then repeat the same steps for the Everyday Iron-On. I covered the glitter with the original backing that came on it while I was applying the Everyday Iron on so that the glitter won’t not get on my EasyPress.
 For both of these presses, you’ll peel off warm. Just be careful as it can get pretty hot – and remember to look for areas that might need a little more heat. I also like to do this slowly.
 After that, you’re all finished! You could jazz it up more if you wanted, but my home decor is very simple and modern, so I wanted to keep it that way.
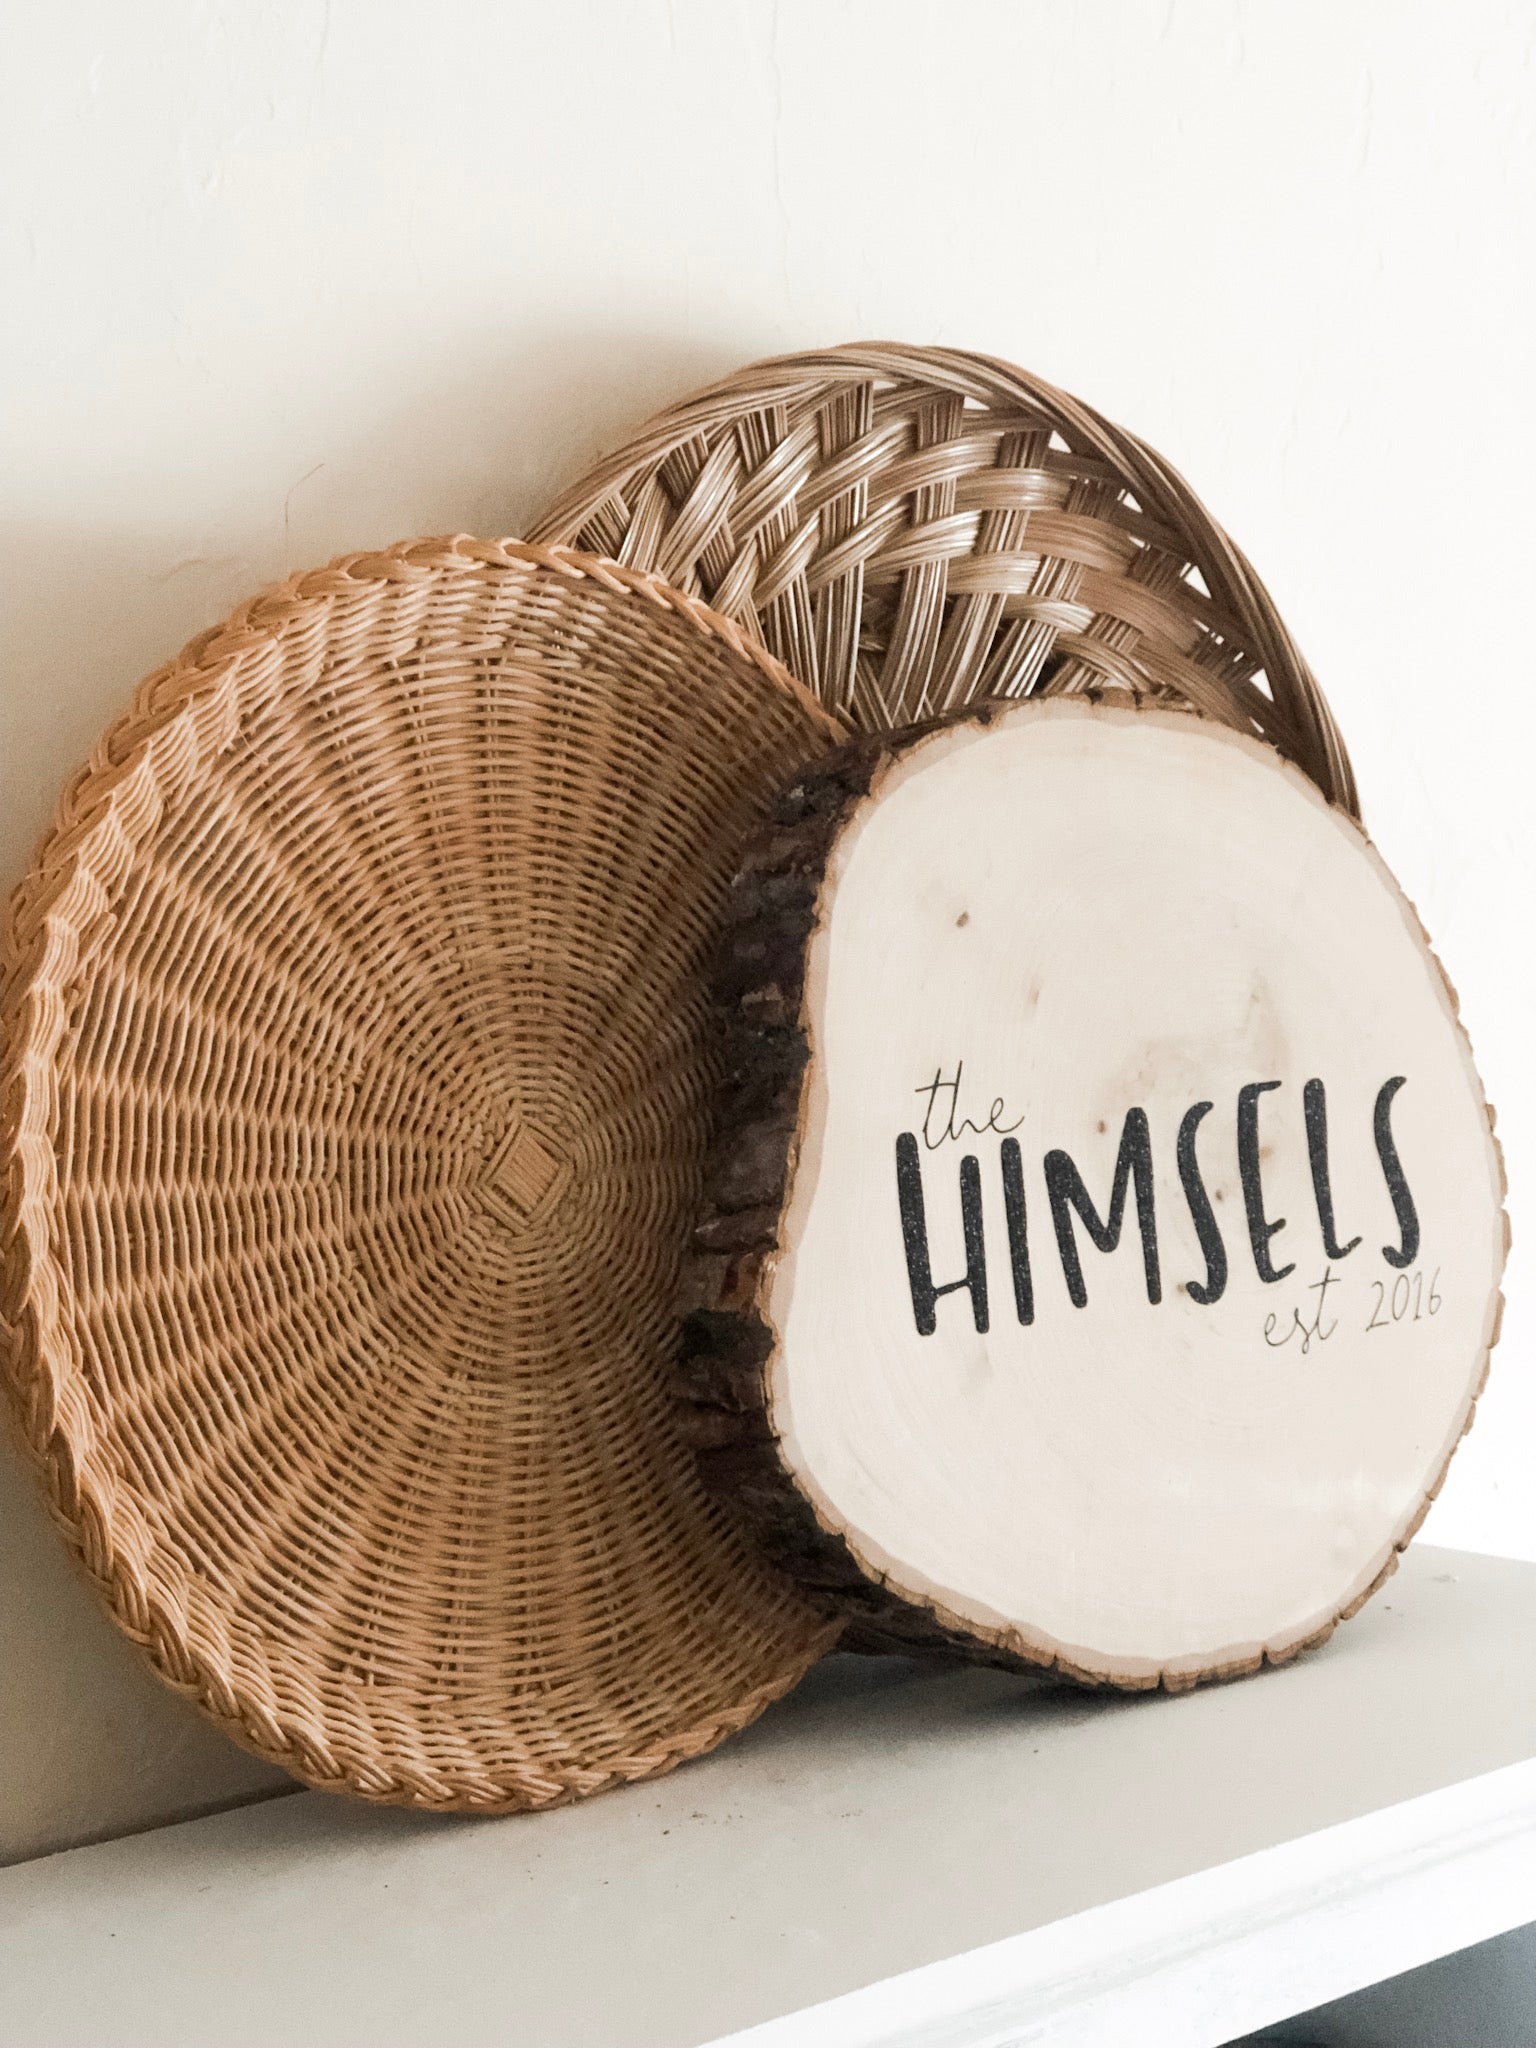 This was actually my first time using Glitter Iron-On! For that matter, it was my first time using ANYTHING glitter-related! I’m not really a glittery person, but I’ve had a goal this year to step outside my comfort zone and try new things. And guess what – I actually don’t hate it! I like the texture that it brings to the sign. I placed my sign on top of my hutch in my kitchen against these baskets and love how they all work together.
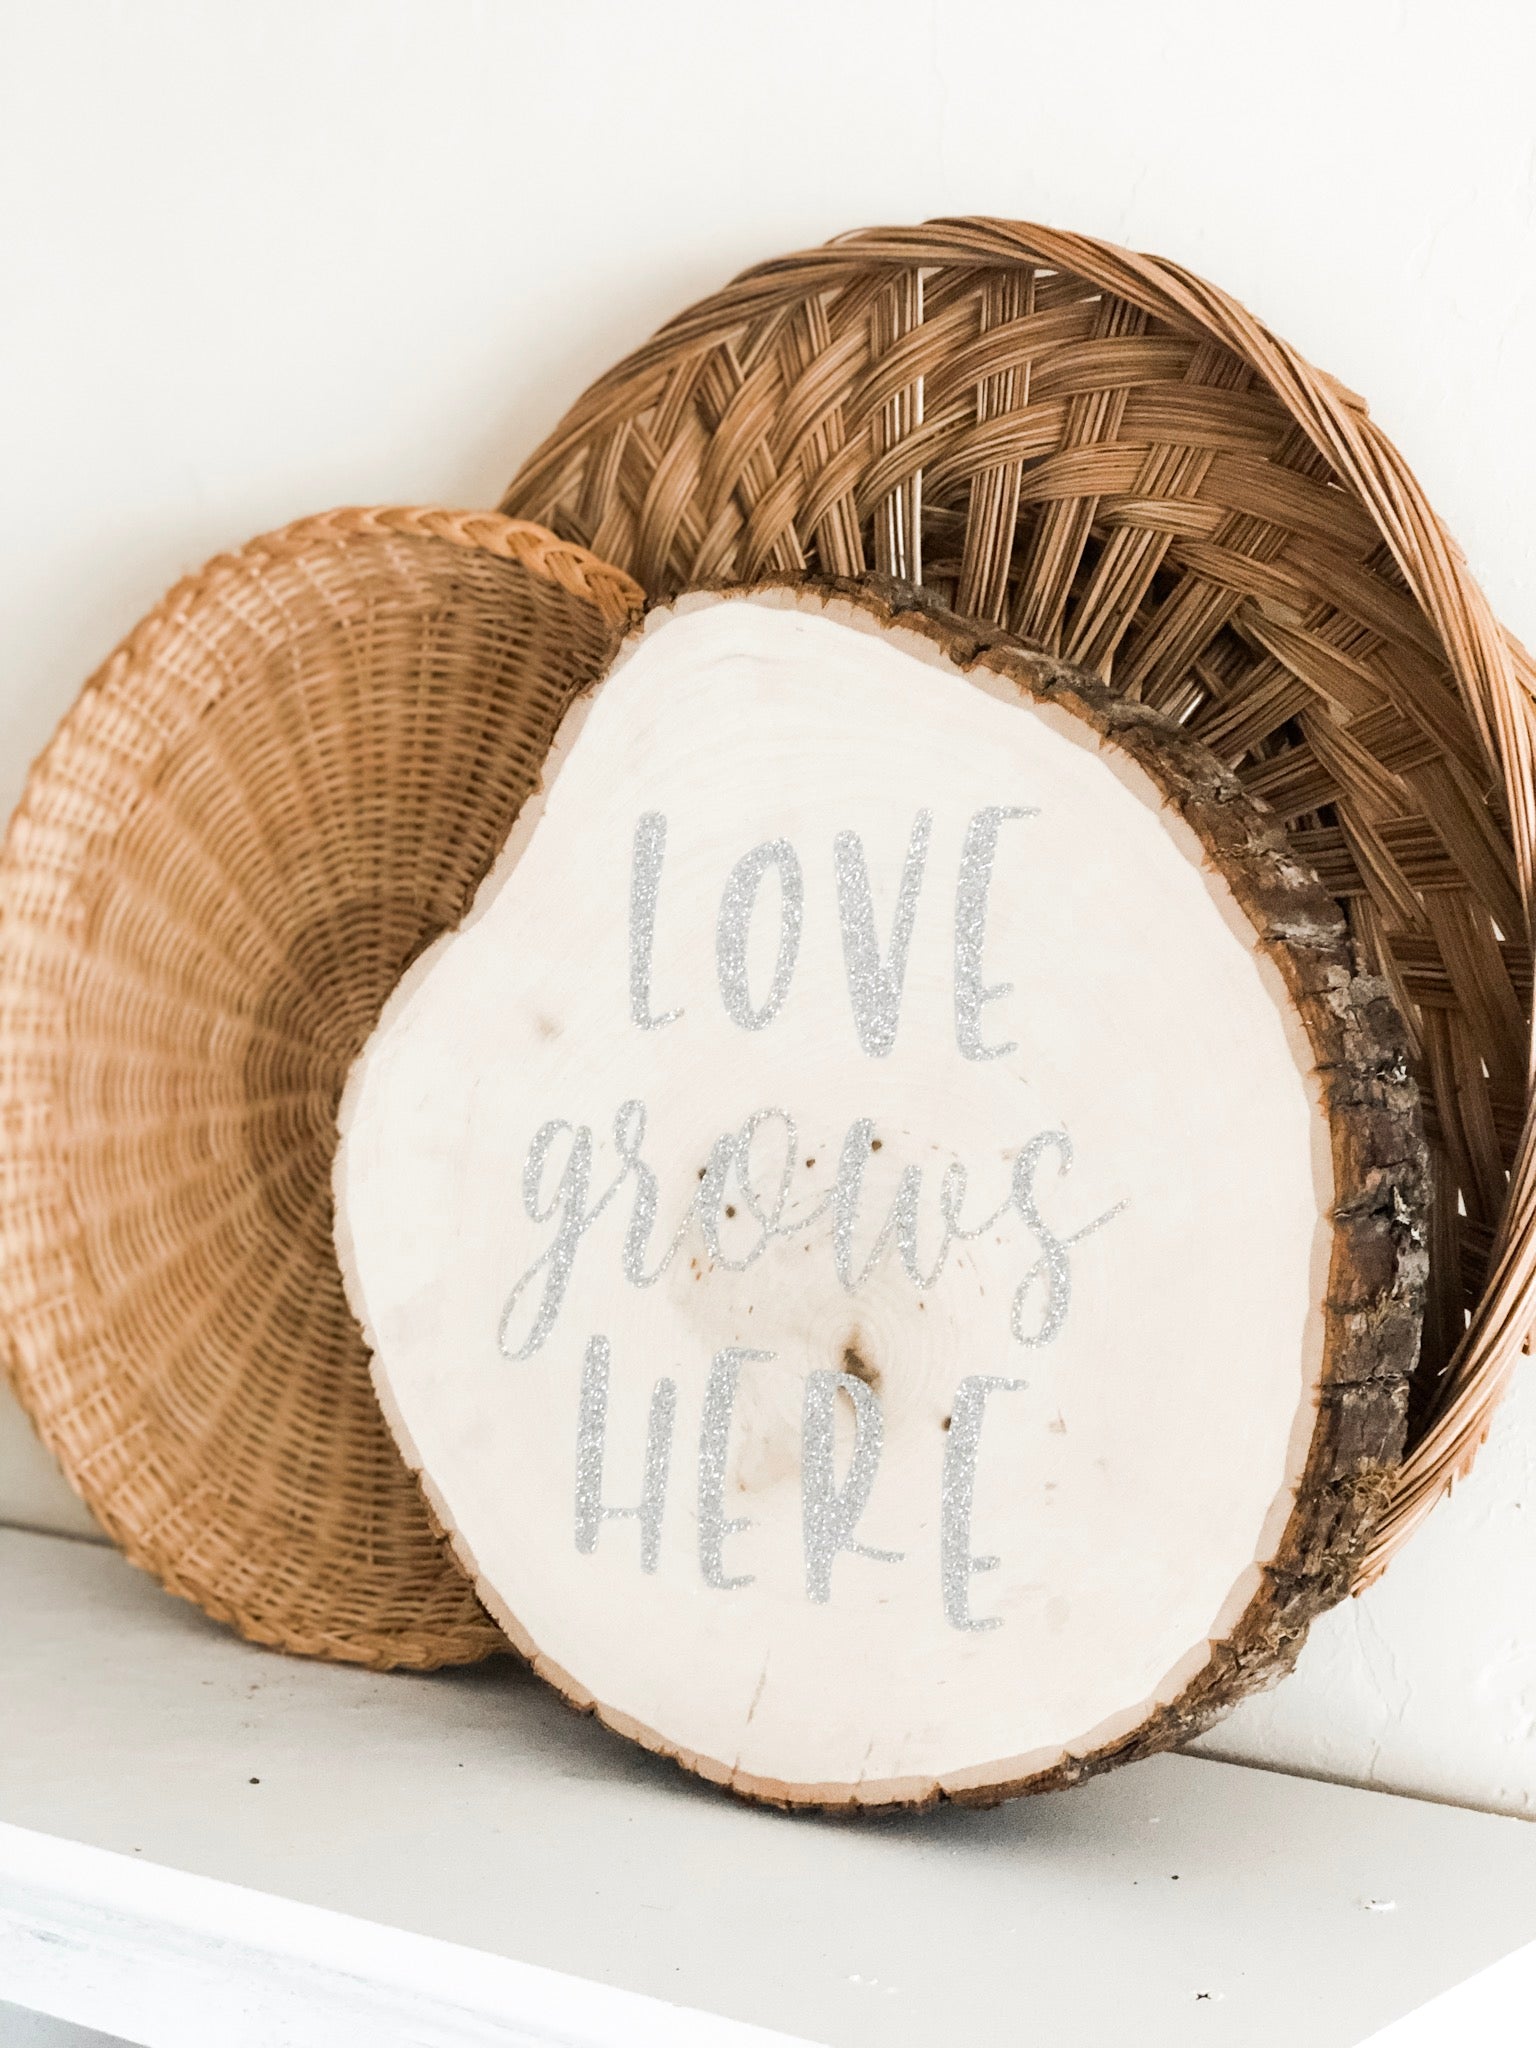 I actually had some extra Glitter Iron-On on hand, so I decided to create another design for the back. This way I can switch it out throughout the year if I want.
 I hope that this post encouraged you to go make something for yourself today! It’s fun to look around my home and see what I’ve made – and to know that I saved money doing it too, is always a nice bonus.
-Courteney

How to Make Wood Blocks with a Cricut
FEATURED SALES