
Hand Stitched Kitty Cat Mobile for Cat Lovers of Any Age
This kitty cat mobile is worked up in soft colors ideal for a child’s room or a cat lover of any age. Cover the wire hangers using raw edged fabric for a shabby chic look. Or make up the ornies by themselves to use as bowl sitters or hang anywhere you need a smile.

Supplies:
Small fabric scraps or fat quarters in colors of your choice
(Each cat takes one 5×6-inch piece of cream or white fabric and two 5×6-inch pieces for backing.)
Batting or white felt
Embroidery floss and needle
Buttons
Fabric pen
Stuffing
Wire (thin coat hanger)
Pattern
Directions:
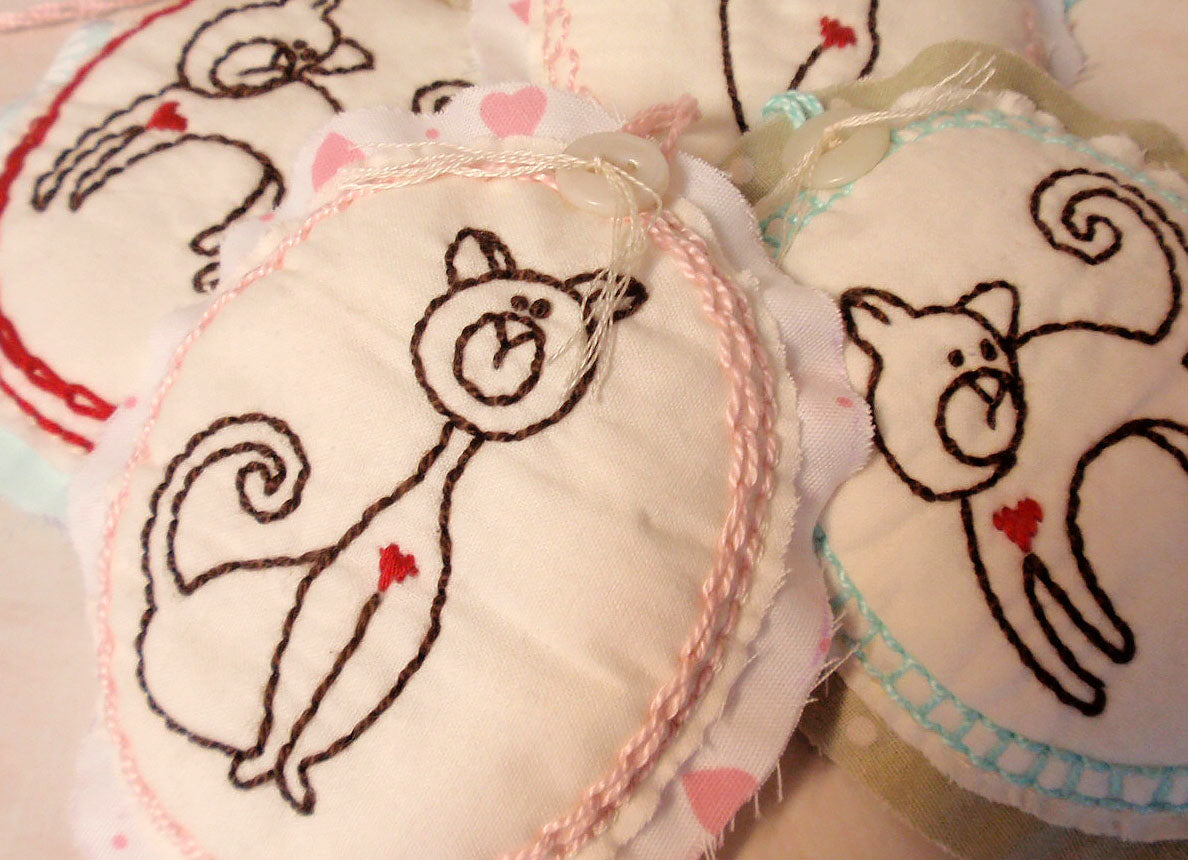
Transfer the cat design to a piece of cream or white-colored fabric.

Pin the fabric to a piece of batting or white felt. Stitch the cat through both layers using a simple back stitch. Stitch the heart using a satin stitch.

Stitch the border oval using a back stitch. If desired, embellish the border with additional stitching like these scallops, hand drawn using a fabric pen with disappearing ink.

Turn the embroidered fabric over and trim the batting close to the border stitching using sharp scissors. Trim the fabric itself to about ¼ inch from the border stitching. Cut two rectangles of your backing fabric and place them wrong-sides together. Pin the embroidered piece to both layers. Sketch an oval shape about ½ inch from the stitched oval using a fabric pen. Cut out the oval using sharp scissors.

Stitch through all 3 layers close to the stitched oval. Leave about 1.5 – 2 inches unstitched to add stuffing. You can hand stitch (as shown) using matching color thread or machine sew.


Lightly stuff the ornament and finish stitching the opening closed. Sew a button near the top of the ornament. Tie some cord around the button to suspend the ornie.

Cut a length of wire about 12 inches long. Twist the wire around a dowel (or something similar) to create a loop at the center of the wire. Bend the wire around a cylindrical object to create a “U” shaped curve. Bend up the ends of the wire using pliers to make a small hook on each end. Repeat with increasing longer lengths of wire to create a total of 3 graduated curved wires for the mobile.
Attach fabric scrap strips together using embroidery floss and a running stitch to create a strip about 24 inches long. Tie the fabric strip to one of the mobile wires at the hook on one end and wrap it around the wire. Tie off the strip at the hook on the other end. Repeat to cover all three wires with fabric.

Connect the fabric-covered wires using the center loop with thread or invisible fishing line. Adjust the spacing of the wires on the line so that about 3-4 inches fall between each wire.

Suspend an ornie from each hook. Tie an additional ornie to the bottom center wire if desired.

Colorful Felt Coasters (including Free Pattern!)
FEATURED SALES


