DIY Wedding Gift - Fabric Collage with Cricut Iron-On

Looking to create a unique and special gift for a newlywed couple? Why not try making a fabric collage using Cricut iron-on vinyl or iron-on designs! It's a simple and fun way to add a personalized touch to a piece of wedding art they can treasure for years to come.
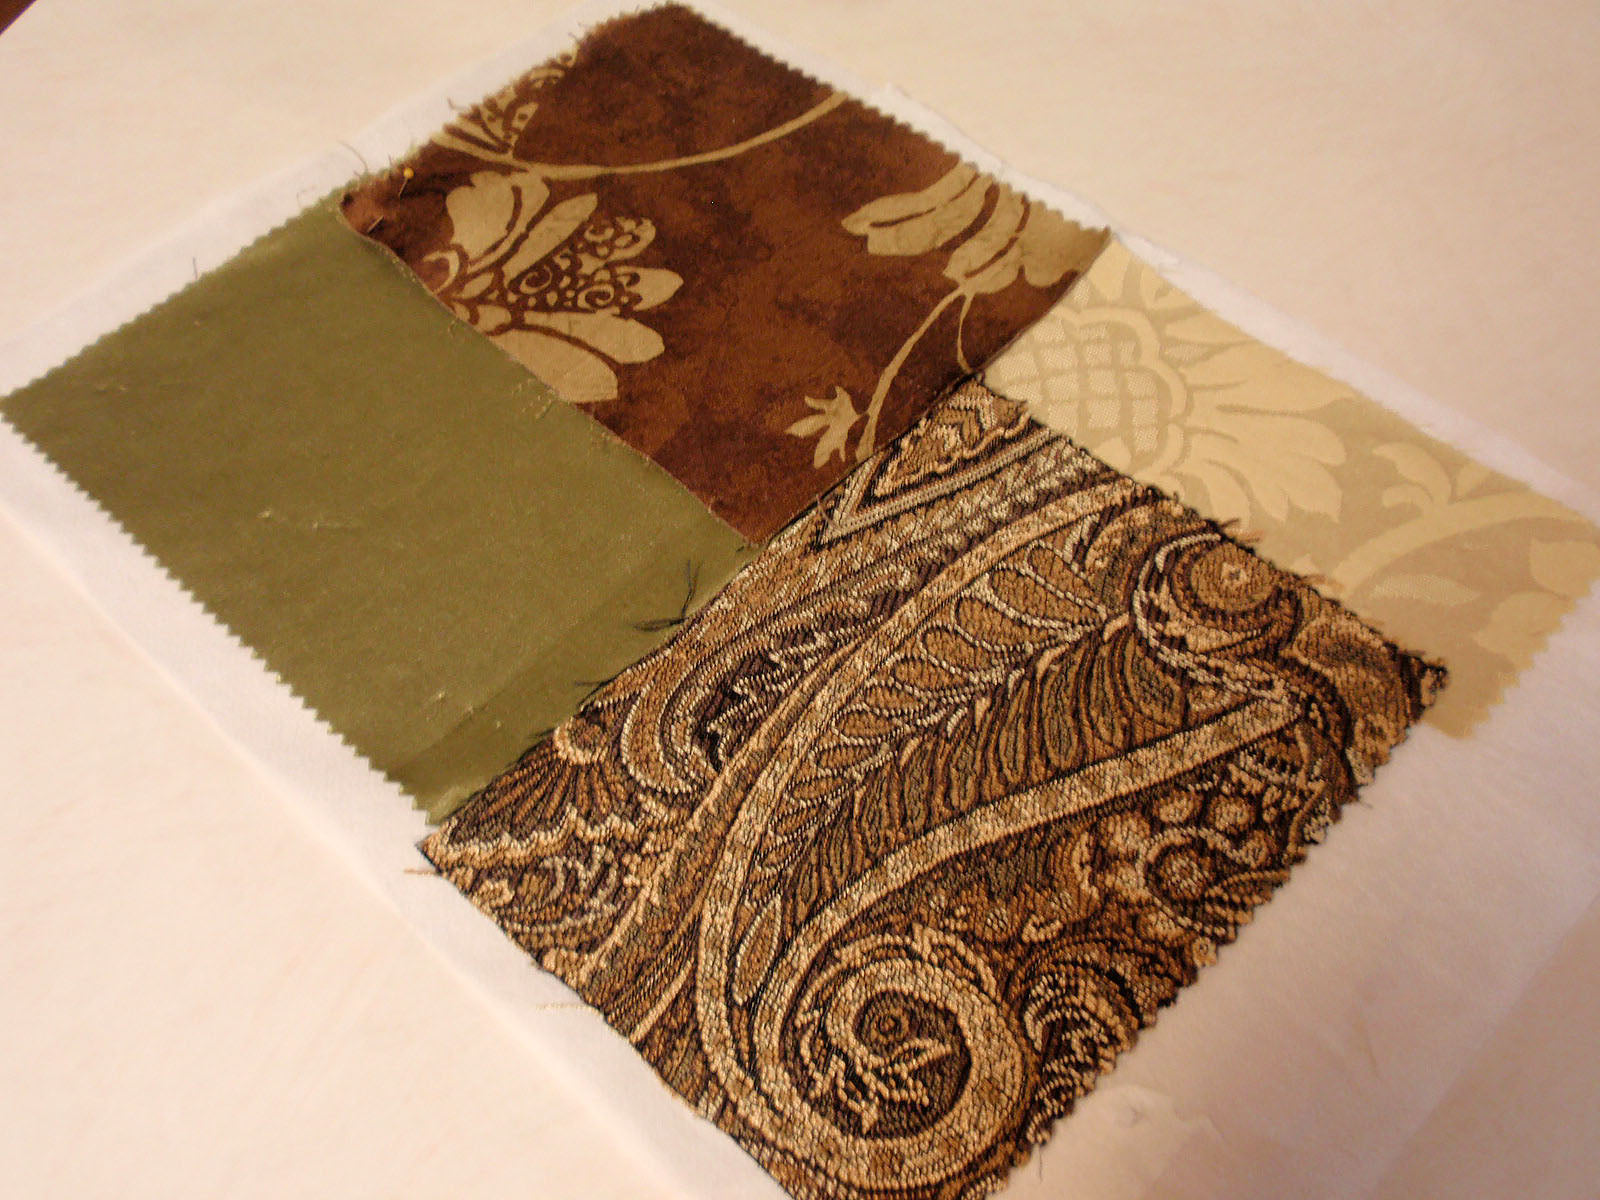
To start, gather some fabulous fabrics - upholstery samples or something unique to the couple - and assemble them on a piece of batting. Use simple embroidery stitches to stitch the fabric pieces together where they meet, creating the base for your collage.
Next, select a ready-made iron-on design or create your own image in Cricut Design Space. A simple silhouette or short phrase would work well. Cut and weed the design, then place the iron-on vinyl or iron-on design on top of a piece of tulle.
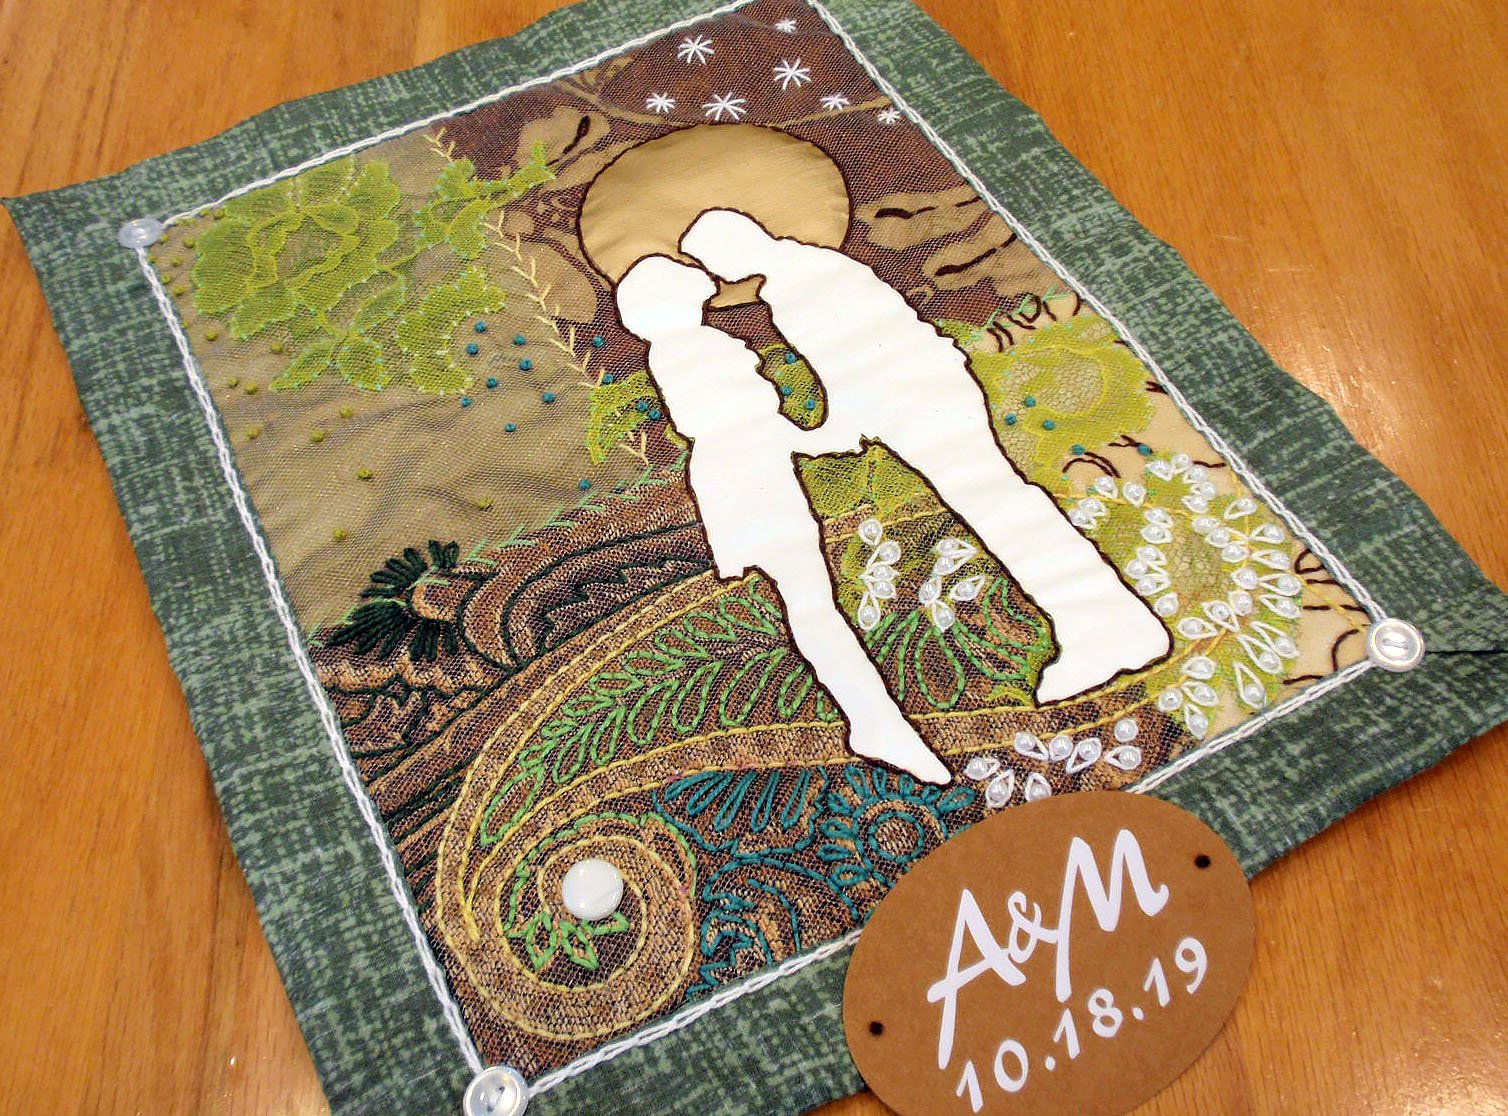
Now the fun begins! Layer stitching with the tulle and your iron-on design, adding additional embellishments like ribbon, lace, or beading if you'd like. When the collage is complete, finish it off by measuring and trimming the edges, folding and stitching the backing fabric, attaching a tag with the couple's names or initials, and sewing rings to the top back edge of the collage for hanging.
The great thing about this project is that each collage will turn out differently, making it a truly unique and special gift for any couple. So gather your materials and get creative with Cricut iron-on vinyl!
Materials:
- Fabric scraps for base of collage
- Batting
- Embroidery needle and floss
- Fabric pen with disappearing ink
- Tulle
- Iron-on vinyl or iron-on design
- Backing fabric
- Beads, other embellishments (optional)
- Rings for hanging
Directions:
Assemble your fabric scraps on a piece of batting. Leave at least one inch of batting around the edge of the fabric scraps. Pin or baste the fabric in place or use fusible web to hold the fabric in place for stitching.
Stitch the fabric pieces together where they meet using simple embroidery stitches to create the base for your collage.

Select a ready-made iron-on design or create your image in Cricut Design Space. A simple silhouette, like a couple, is a good choice for this project. A short phrase or quote would also work well. Size the image to fit your fabric base. Make the project, taking care to mirror the image before cutting. Place your iron-on vinyl shiny-side-down on your cutting mat. Cut then weed the design.

Cut a piece of tulle as large as your fabric base. Place the tulle on top of a piece of parchment paper and adhere the iron-on material to the tulle.

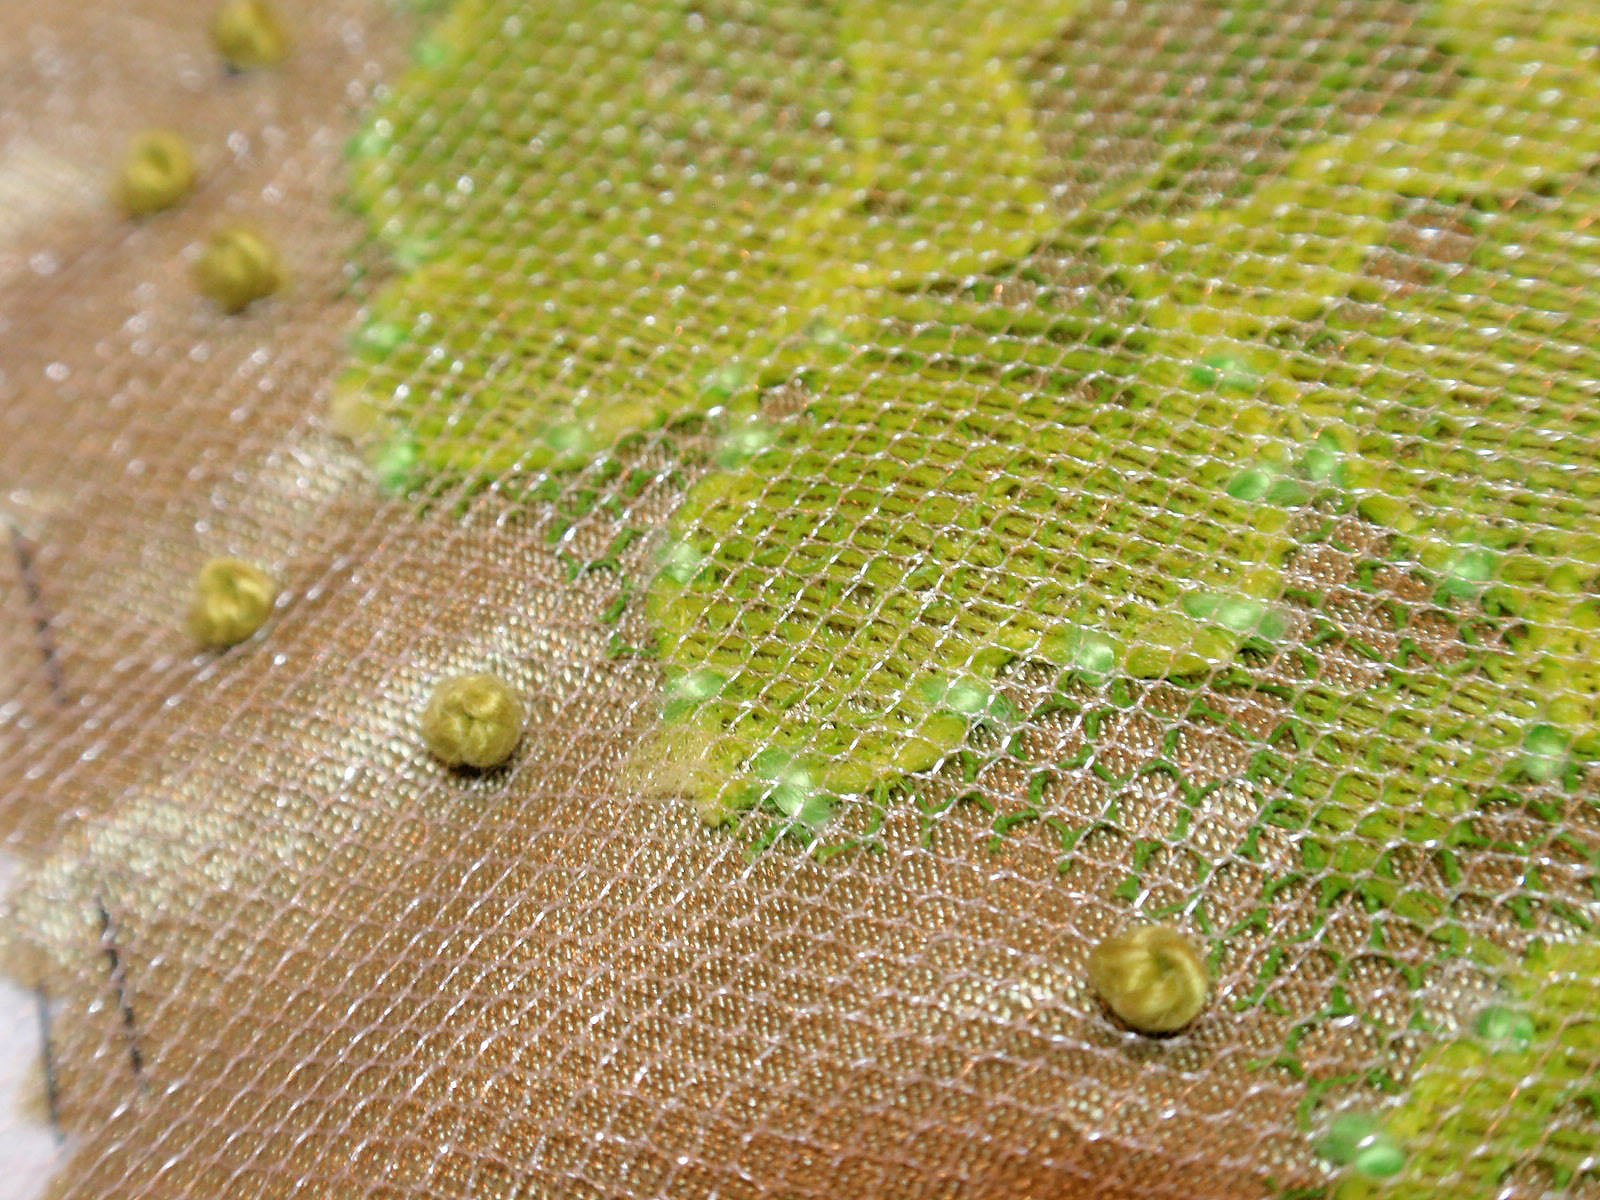
After the main base fabric has been secured, the fun begins! There’s no specific stitching pattern to follow. Instead, you work intuitively, using the fabric as your inspiration. The only real rules are to layer stitching with the tulle and your iron-on design. Add some stitching before you layer the tulle. Then pin or baste the tulle on top of the collage and stitch some more! Include additional embellishments like ribbon, lace, or beading if you’d like.
Below are stitching examples inspired by my color scheme and fabric scraps. These all use a limited number of simple embroidery stitches. New to hand stitching or out of practice? Brush up on your embroidery stitches here on the DMC website.


When the collage is complete, there are a couple different ways to finish it off. For this first technique, measure a one-inch border around the edge of the collage. Mark the lines using your fabric pen. Cut on the lines, trimming the collage, using a pair of fabric scissors.

Lay the trimmed collage on top of your backing fabric. Measure and mark the backing fabric with the fabric pen about 1.25 inches from the edge of the collage.


Cut the backing fabric using fabric scissors on the marked lines.

Fold the corners of the backing fabric over the front of the collage as shown in the photo below.

Fold the sides over the front of the collage and pin in place.

Stitch the backing fabric from the front of the collage near the cut edge.

Create a tag with the couple’s names or initials. This tag is made with iron-on vinyl onto a scrap of faux leather paper. Attach the tag to the quilt with a couple of French knots.

Sew 2 rings to the top back edge of the collage for hanging.


Alternately, the finished fabric quilt can be taped in place behind a mat and framed like “Hello Beautiful,” featuring floral fabrics and this cute little bunny.

The fun thing about these little quilts is how they turn out so very differently each time you make one! Check out these two examples for some more inspiration.

Wedding Favors - 3 Ways Using Cricut Pens
FEATURED SALES