
Free Shipping
On Orders $49+
On Orders $49+


It seems like personalized doormats are super popular these days – and I can totally see why. They are so stinking cute! When I first saw some funny ones, I instantly knew that I wanted one for my front door. I started scouring the internet trying to find out how to make one, but was super overwhelmed by the amount of information out there to make one. Of course, everyone has different ways to make these and different materials that they used. Today I am going to show you my tried-and-true method that will give you a perfect result (and hopefully relieve you of some headaches along the way!). And if you don’t feel like reading, I’ve also created a YouTube video that you can watch here!
Materials:
You can purchase all of your Cricut supplies on our website: www.craftecorner.com! You can also click on the specific links to shop. By doing this, you are supporting a family-owned small business and we are SO thankful that you choose to shop small!
1. The first step is going to be to design your file and upload it to Design Space. If you join our Facebook group, I have created and shared a bunch of doormat SVG files there! Click here for the link to join. The best part about this is that you can customize your doormat to say whatever you want. Here are some of my favorite sayings that I’ve seen floating around the internet lately: “I Hope You Like Dogs”, “If You’re Amazon, Joanna Gaines or a Babysitter, We’re Home”, “Please Hide Packages from Husband”, “Come As You Are”. You could do your last name and the year you got married…the possibilities are endless!
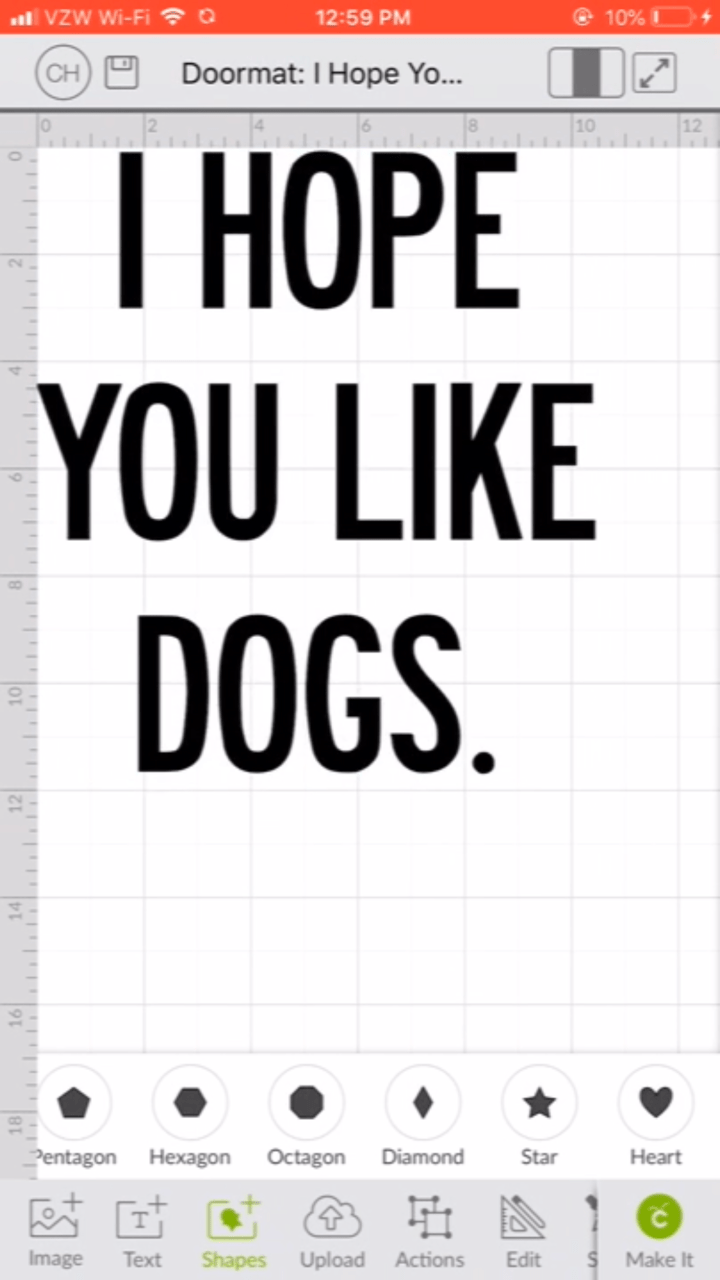
2. Once you have designed your file, the next step is to cut it. Today we are going to be using Cricut Permanent Vinyl to make our stencil. It is SO important that you use a permanent vinyl! Since we are applying our stencil to coir, you are going to need the stickiest vinyl out there – which is permanent vinyl. I have tried using regular Premium Vinyl and it will not stick well to your mat. Cut your vinyl to size and then use your XL Scraper to fully adhere it to the mat. I like using Cricut’s LightGrip Mat when I cut vinyl but a Standard mat would do as well. Once it’s done cutting, weed your stencil so that the inside letters are removed from the vinyl.


3. Next, transfer your vinyl stencil to your transfer tape. Use your XL Scraper again to really make sure the vinyl adheres to the transfer tape. Then peel the paper backing of the vinyl away from the vinyl. As you do this, the vinyl will transfer to the transfer tape!
4. Next up is applying the stencil (that is on the transfer tape) to your doormat. Line up your vinyl/transfer tape on your doormat. Use a tape measure to make sure that the design is centered. Or if you don’t want it centered, place it wherever you want! Once you have it where you want it, use the XL scraper to press the stencil on the doormat. Don’t go lightly – push hard. Once you feel like it’s fully adhered, slowly peel back the transfer tape, using your XL Scraper to hold the stencil down to the mat (if anything peels up). TAKE YOUR TIME! Do not rush this part of the process. Please note: it will NOT stick completely to the mat like you normally would adhere vinyl to wood, canvas, etc. Just keep pulling back and making sure that everything is sticking to the mat. This is going to be the trickiest part because the vinyl will not completely stick to the coir material. However, I promise it will stick ENOUGH to be able to use as a stencil and still get crisp and clean lines.

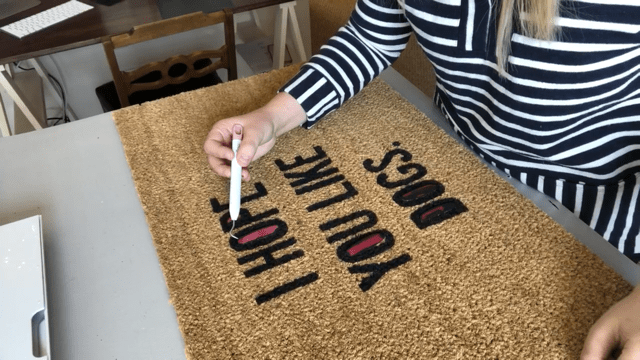
5. Now that the stencil is applied to the mat, the hardest part is over! Before you paint, I just wanted to include a note about a few different kinds of paint. I HIGHLY recommend using a strong outdoor paint. I recommend using Valspar Porch, Floor and Patio Latex Paint. It’s tough stuff. You can get it at Lowes. We used it to paint the floor in our trailer a year and a half-ago and the floor still looks great! If you don’t have this paint or want to spend money on it, you can just use any regular acrylic paint or chalk paint. However, just know that it will fade faster over time than a durable outdoor paint like this one would. Or if you find a paint at the store that specifically says outdoor on it, I would gravitate towards that one first! Also, you’ll want to choose black – it’ll show up the best that way.
6. Now that you’re familiar with different kinds of paint, it’s time to actually paint! The coir will soak up a lot of paint, so you’ll need to apply it thick. I like to use a brush with bristles instead of a foam brush so you can really get the paint in the coir. When I apply the paint on, I really put it on thick. I actually push it into the coir and then brush it out. Just make sure that you are never going under your stencil – always over it! When you get to the inside of letters like A or O, make sure that you really push the inside letter down before you apply paint over it. As you go, continue to reinforce the stencil with your scraper…or even just push it down with your hand. Some parts of the stencil will start to come up, but if you just push it down before you paint it, you will be ok! Once you have painted the whole thing, I like to go back over and see what spots I may have missed or didn’t get as much paint. Fill those spots in!


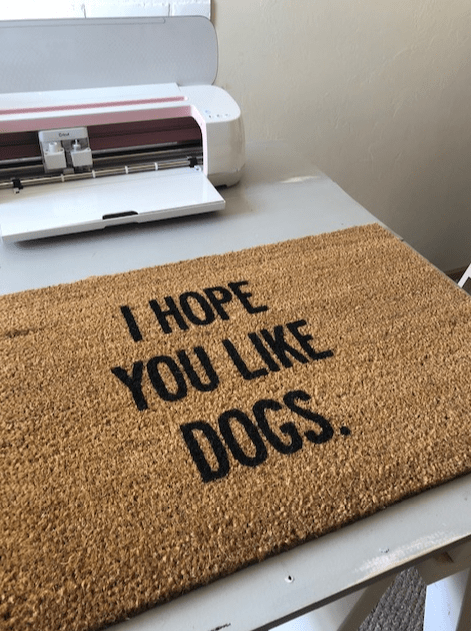
7. Next, let it dry to the touch before peeling off your stencil. If you’re impatient and want to see your creation right away, you can actually peel the stencil off right away – just know the paint is still wet and you might get paint on your hands. I usually peel it off right away because I like to see what I’ve done. I like to use my Cricut Weeder to remove the inside of the letters. You’ll want this to dry overnight or at least 6-8 hours before you put it by your front door. Otherwise, you risk people getting paint on their shoes (and in your house!)

That’s all! I promise it’s so simple and that anyone can do it. Like I mentioned above, if you want some free SVG files for your doormat, all you have to do is join our Facebook group here! Please let me know if you have any questions.
Thanks for reading!
-Courteney (+ Lucy, the dog)

Cricut Bedroom Refresh - DIY Headboard and Closet Doors

Comments
Leave a comment