DIY 3D Wood Door Hanger with Cricut Maker

You guys, I’m so excited about today’s DIY that I’m sharing with you! It’s one of my favorite projects that I’ve done because it’s my first project cutting basswood on the Cricut Maker! If you haven’t cut basswood before, check out this post I wrote that covers a bunch of good tips. I’d highly recommend reading it before cutting for the first time! Click here for the post.
I wanted to add, you have to have the Maker for this project. Sorry to my Explore Air friends, but we need the Knife Blade for project. Also, do you notice my dog in the photo above? My husband thought he was being funny and was holding up the dog — didn’t realize it until I put the photo in, but thought it was too funny to redo!!
Materials:
- Wood round (I found mine on Amazon) – 12″ or 16″
- Cricut Basswood
- Cricut Knife Blade
- Cricut Maker
- StrongGrip Cutting Mat
- Paint
- Ribbon
- Masking Tape/Painters Tape
- Glue (preferably wood glue, but super glue or hot glue can work as well)
- Drill
Before we cut our wood, we are going to get our round prepped. I painted the base of my round in a light grey color. If it’s rough, you’ll want to sand it down – but mine was perfectly smooth so I didn’t have to sand.
Then we are going to cut the basswood on the Maker. Insert the knife blade in and then apply the basswood to a StrongGrip cutting mat (the purple one). You’ll need to apply masking tape or painters tape to the sides of the basswood to prevent it from moving. Then move the star wheels all the way to the right and insert the wood and get cutting.

It’s going to take some time to cut, so you’ll want to keep an eye on it. Mine did 14 passes before it was finished. It took about 30 minutes to cut. I would not recommend doing a fancy design since the wood is pretty thin.

Right before it does the last pass (so in this case, the 14th pass), the Cricut will pause and ask you if it should cut or if it is finished. In this case, it did not need to do the 14th pass. I could tell this because the wood was easily coming off the mat. I used a weeder tool to see if it was cut all the way through and it came up with no issues. If it’s finished, hit unload. If it needs to keep cutting, then continue to hit the “C” until it is cut all the way through.

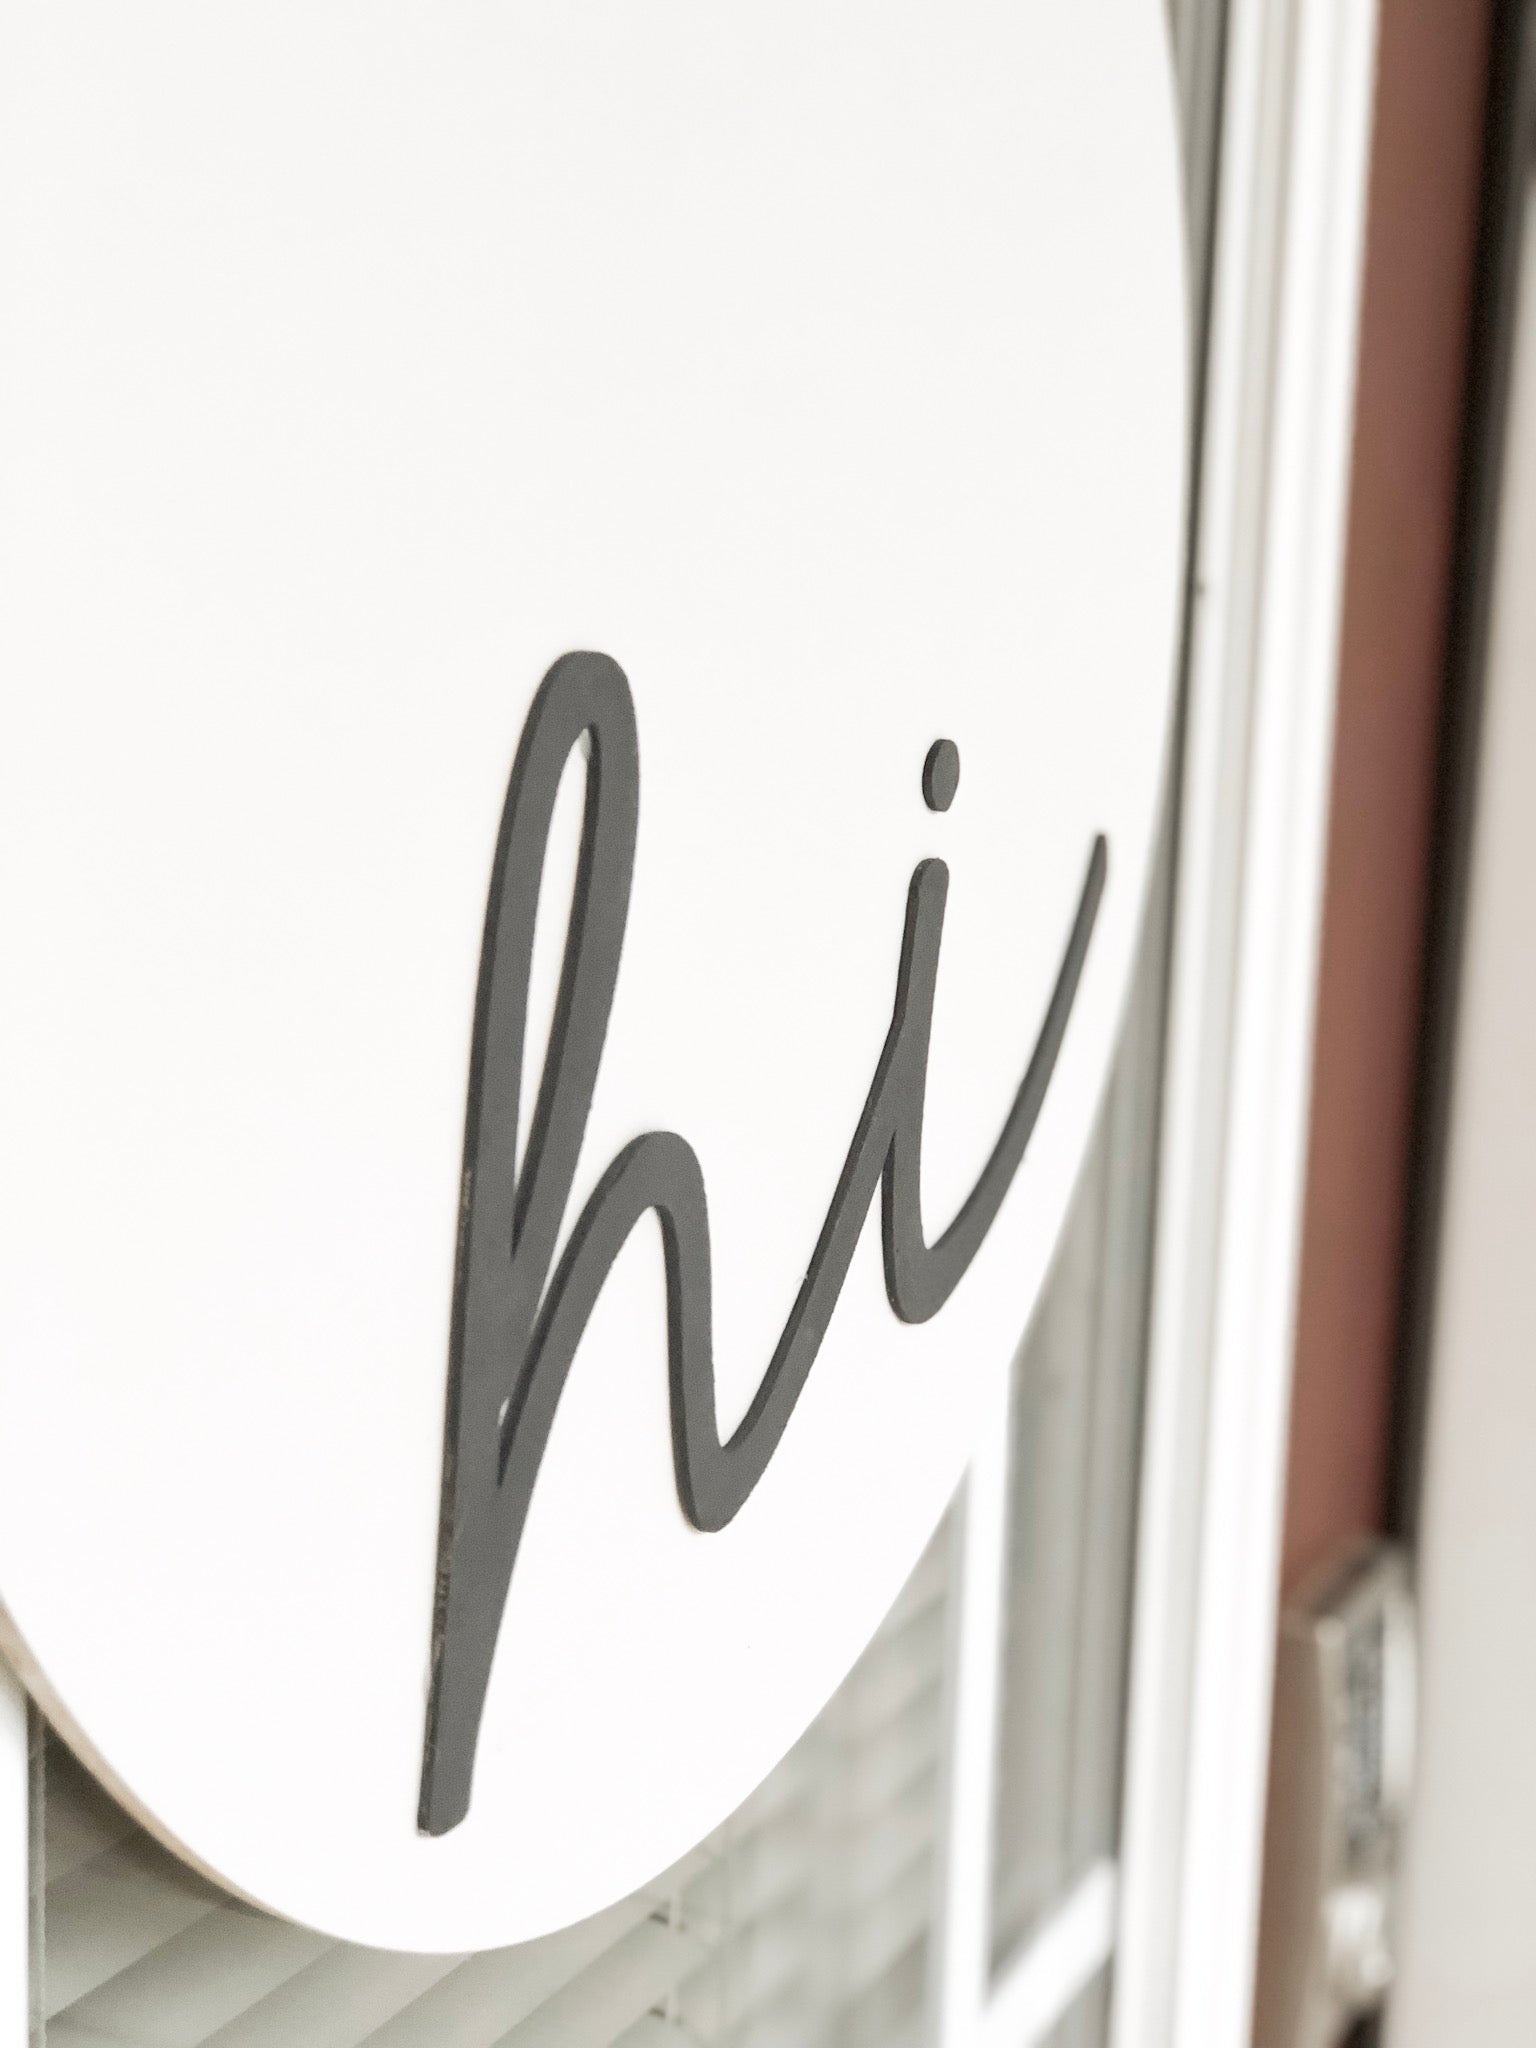
Once it’s finished, I painted the “Hi” with a charcoal chalk paint from Rustoleum. Since this paint is so thick, I only needed to do one coat and it dried super fast.

Then we are going to glue the “Hi” to the wood round. I highly recommend using wood glue for this. However, I didn’t have any on hand so I used hot glue. It just got a little hot when I was gluing, but I survived.

Then it’s time to drill a hole in the round! My husband is a smarty-pants so he recommended putting a piece of painters tape where we will drill the hole to help prevent a bunch of the wood splitting.

Then drill a hole! You’ll need the supervision of your dog, of course.

And the last step is to put your ribbon through the hole! I put a little bow on my ribbon. You could jazz up your round however you want: flowers, bows…anything! I have a very simple taste, so this is perfect for me.

And then you’re finished! I love how the “Hi” pops off the wood round. I hung it on my front door and love how it turned out.

Now I’m wondering what else I should cut with basswood?! Let me know in the comments below if you have any questions. Happy making!
-Courteney


Splatter Guard Pumpkin with Cricut Wood Veneer
FEATURED SALES