Create Your Own Imagery for Fabric Collage Using Cricut Pens

I love creating small art quilts using fabric scraps and my Cricut machine. It's a great way to relax and unwind after a long day. I enjoy hand-stitching each piece and making them unique. Recently, I've been experimenting with using the Cricut's gel pens to add imagery to my collages. First, I iron the fabric scraps onto ordinary freezer paper to provide backing and support while the Cricut draws on it. Then, I upload my chosen images to Cricut Design Space and set them to "write" mode. Once the image is complete, I peel away the freezer paper, cut or tear the fabric to size, and secure it to batting. I love adding embroidery stitching and other embellishments to my collages to make them even more special. Finally, I pin the quilt to a piece of backing fabric and sew it in place. The end result is a beautiful and unique piece of art that I can display in any room of my home.
Supplies:
- Cricut gel pens
- Fabric scraps
- Backing fabric
- Freezer paper
- Embroidery floss
- Batting
Directions:
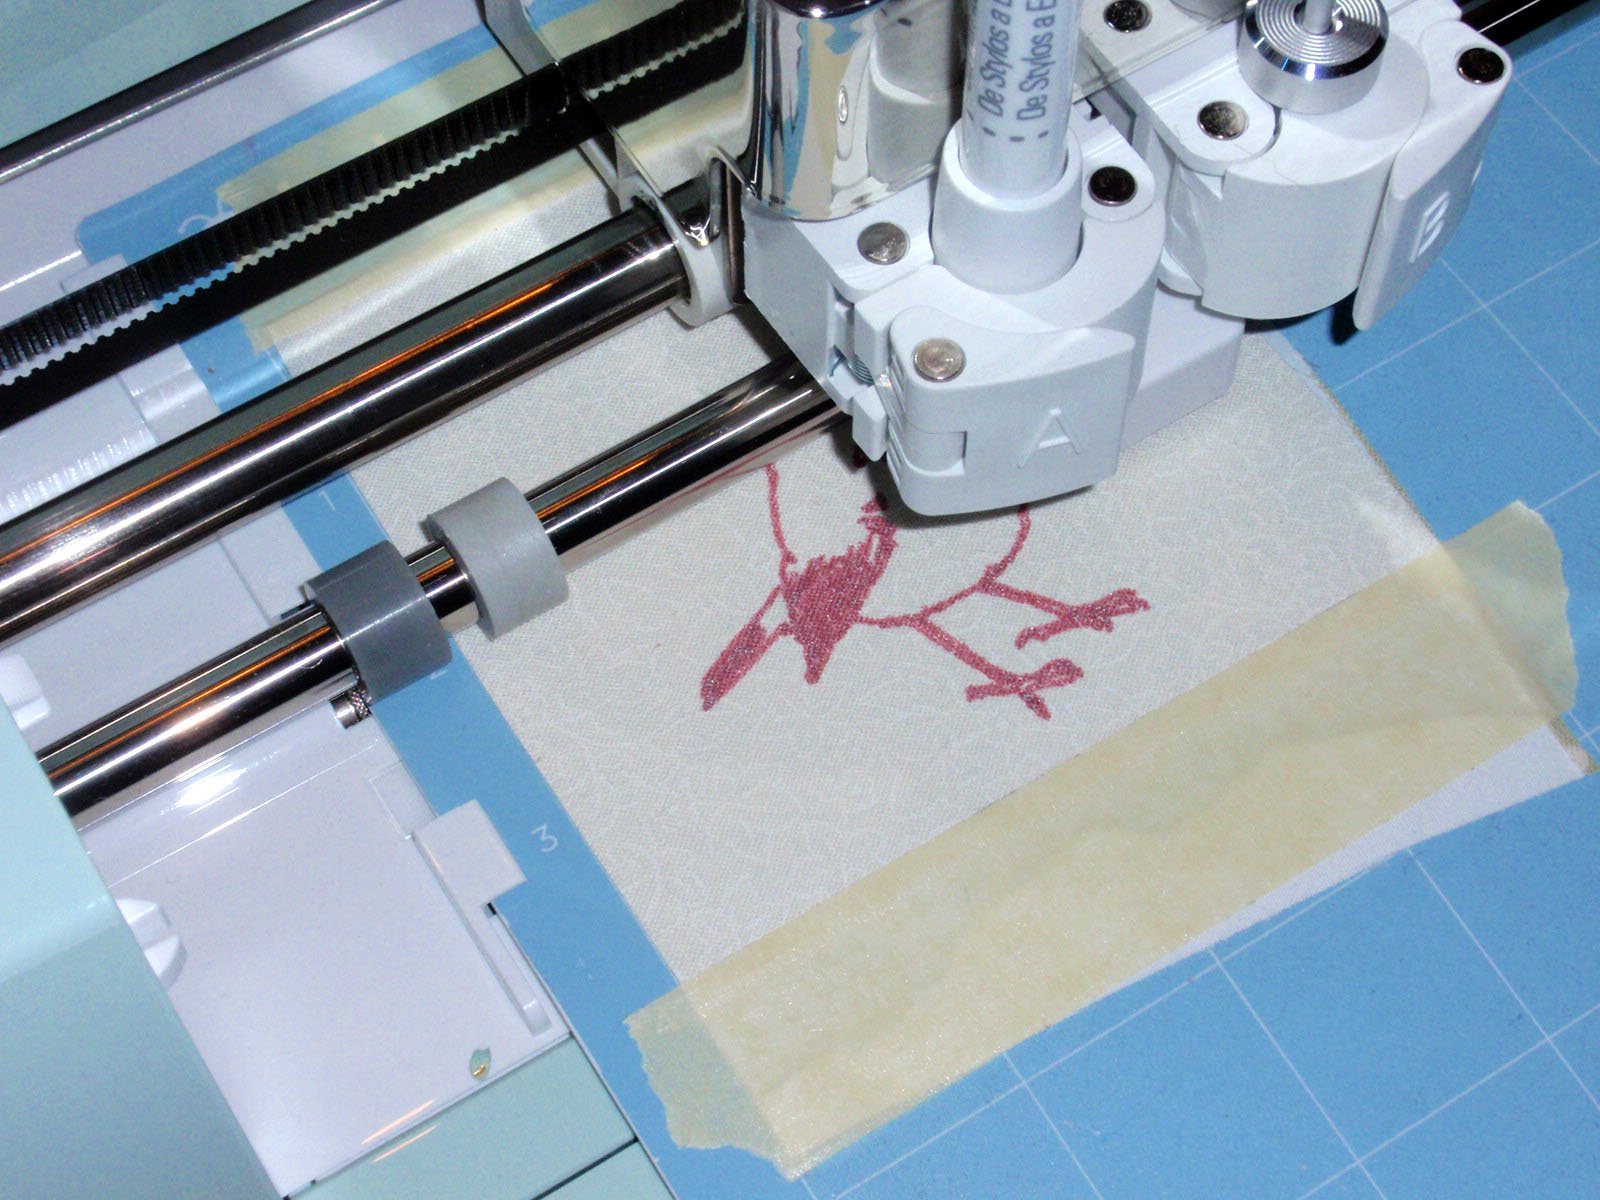
Select some fabric scraps for your project. Use a hot dry iron the iron the fabric to ordinary freezer paper (from the grocery store). The freezer paper will provide backing and support to the fabric while the Cricut is drawing on it. Once you’re done drawing, however, the freezer paper peels cleanly off the fabric without any alteration of the hand of the fabric.


Upload your images to Cricut Design Space. Be sure to set the images to “write”. You want the machine to draw the image on the fabric without cutting it out.

Place the fabric backed with freezer paper on the cutting mat. Secure one or more of the edges of the fabric using masking tape as needed.

Load a gel pen in the machine and follow the prompts to make the project.

Remove the fabric from the mat and peel away the freezer paper. Cut or tear the fabric to size for your collage. I like to work with fabric scraps with a textured edge, so I use scissors to make a small cut in the edge of the fabric and then simply tear the piece to size. Lay your fabric pieces on a piece of quilt batting. When you are satisfied with the organization and design, pin the fabric in place.

Sew the fabric scraps to the batting using simple embroidery stitching.


After all the fabric pieces have been secured to the batting, add stitching to highlight imagery or add texture to the collage. Include beads, buttons, charms or any other embellishments that you’d like.


When all your stitching is complete, pin the collage to a piece of backing fabric. Trim the backing fabric to the size of the collage and sew in place using a blanket stitch around all edges of the collage.

Create a hanger from your favorite materials. I used some wool felt and plastic rings to hang and suspend the finished quilt.

Snowflake Holiday Cards With Watercolor and Cricut Pens
