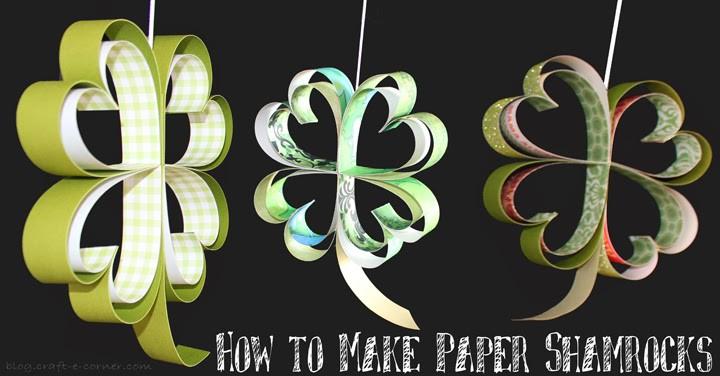
St. Patrick’s Day Crafting: How to Make Paper Shamrocks

First thing you will want to do is gather your supplies:
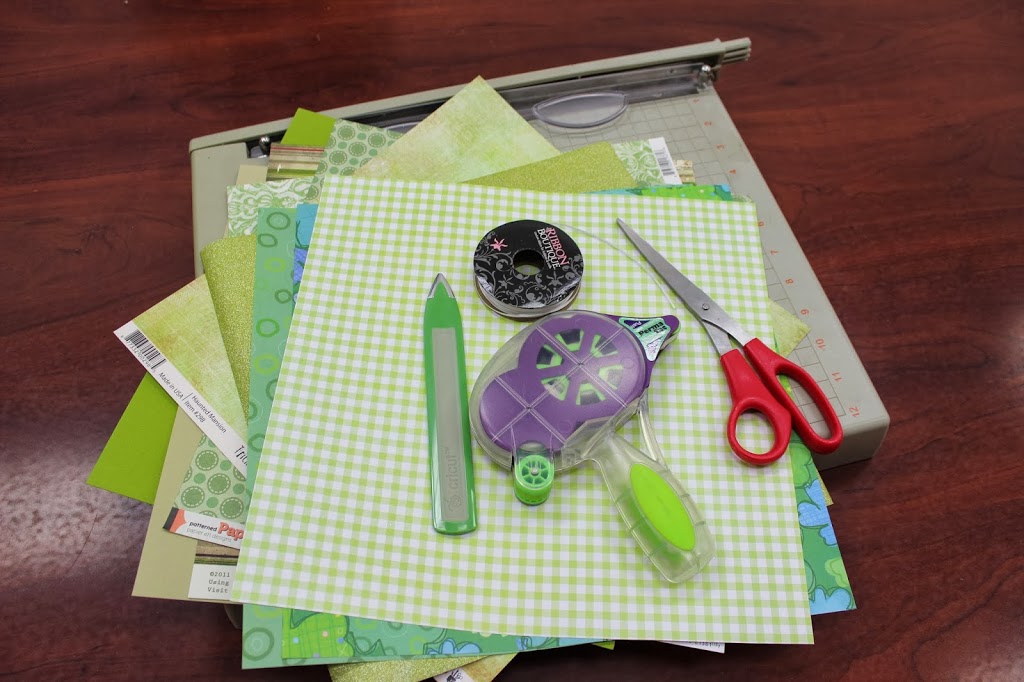
- 12×12 Green Scrapbook Paper
- Paper Trimmer
- Scissors
- Ribbon, Twine or Yarn
- Glue Glider Pro with Permatac (or other adhesive)
- Bone Folder (mine is from the Cricut Tool Kit)

To make the leaves of the shamrock, I first unfolded one of my green 12″ strips and ran a line of tape along the ends. I added one line of adhesive in the middle over the bend too (see red arrows, above). You want a thin line as close to the edges as possible. I love using my Glue Glider Pro with Permatac for projects like this… it is probably more sticking power than I “need,” but it never lets me down!
Next I took one strip of my green gingham and stuck one end (pattern side UP) to one end of the solid green strip where I put the adhesive. Then I bowed the outside green paper and stuck the other side of the gingham paper to the other end. You’ll have somewhat of a D shaped piece of paper at this point. Next I took my tape and ran a little strip along the outside edge (see red arrow above…. tape runner adhesive is hard to photograph!).

I bent the paper backwards on itself to that last little strip of adhesive I put down in the previous step. Pinching the ends together, I then lined up the bottom edges of the two hearts and stuck the middle parts together (that’s where the middle strip of adhesive comes into play!). Do this 4 more times until you have 4 green double heart leaves.

Next take one of your hearts and run some tape along the bottom edge (TIP: I used by hand to support the paper when using a tape runner so I didn’t squish my hearts). Stick the two hearts together to make half your shamrock. Next I ran some tape along the side of the half shamrock and stuck down my ribbon that will be used for hanging. I joined the other two hearts together and attached the stem to that half of the shamrock. Leave enough of a tail hanging out that you can slightly curl your stem. Stick the two halves together to make your whole shamrock. Finally I used bone folder to slightly curve the stem (see how you can use a similar technique to make a beautiful curled paper wreath here). I trimmed the stem to a length that looked good to me and angled the end a little with my scissors.


How cute did these turn out? Feel free to use different colors of paper even – who says shamrocks have to be just green? I’m sure the leprechauns wouldn’t mind shamrocks in all the shades of the rainbow!
Feel free to experiment with this project- make shorter paper strips for smaller shamrocks, if desired. You could add more layers too! Just keep a 2″ difference between layers so they separate nicely.
I hope this gets you in the mood for St. Patrick’s Day! How will you celebrate St. Patrick’s Day this year?
When you give this project a try let me know how it turns out!
FEATURED SALES