
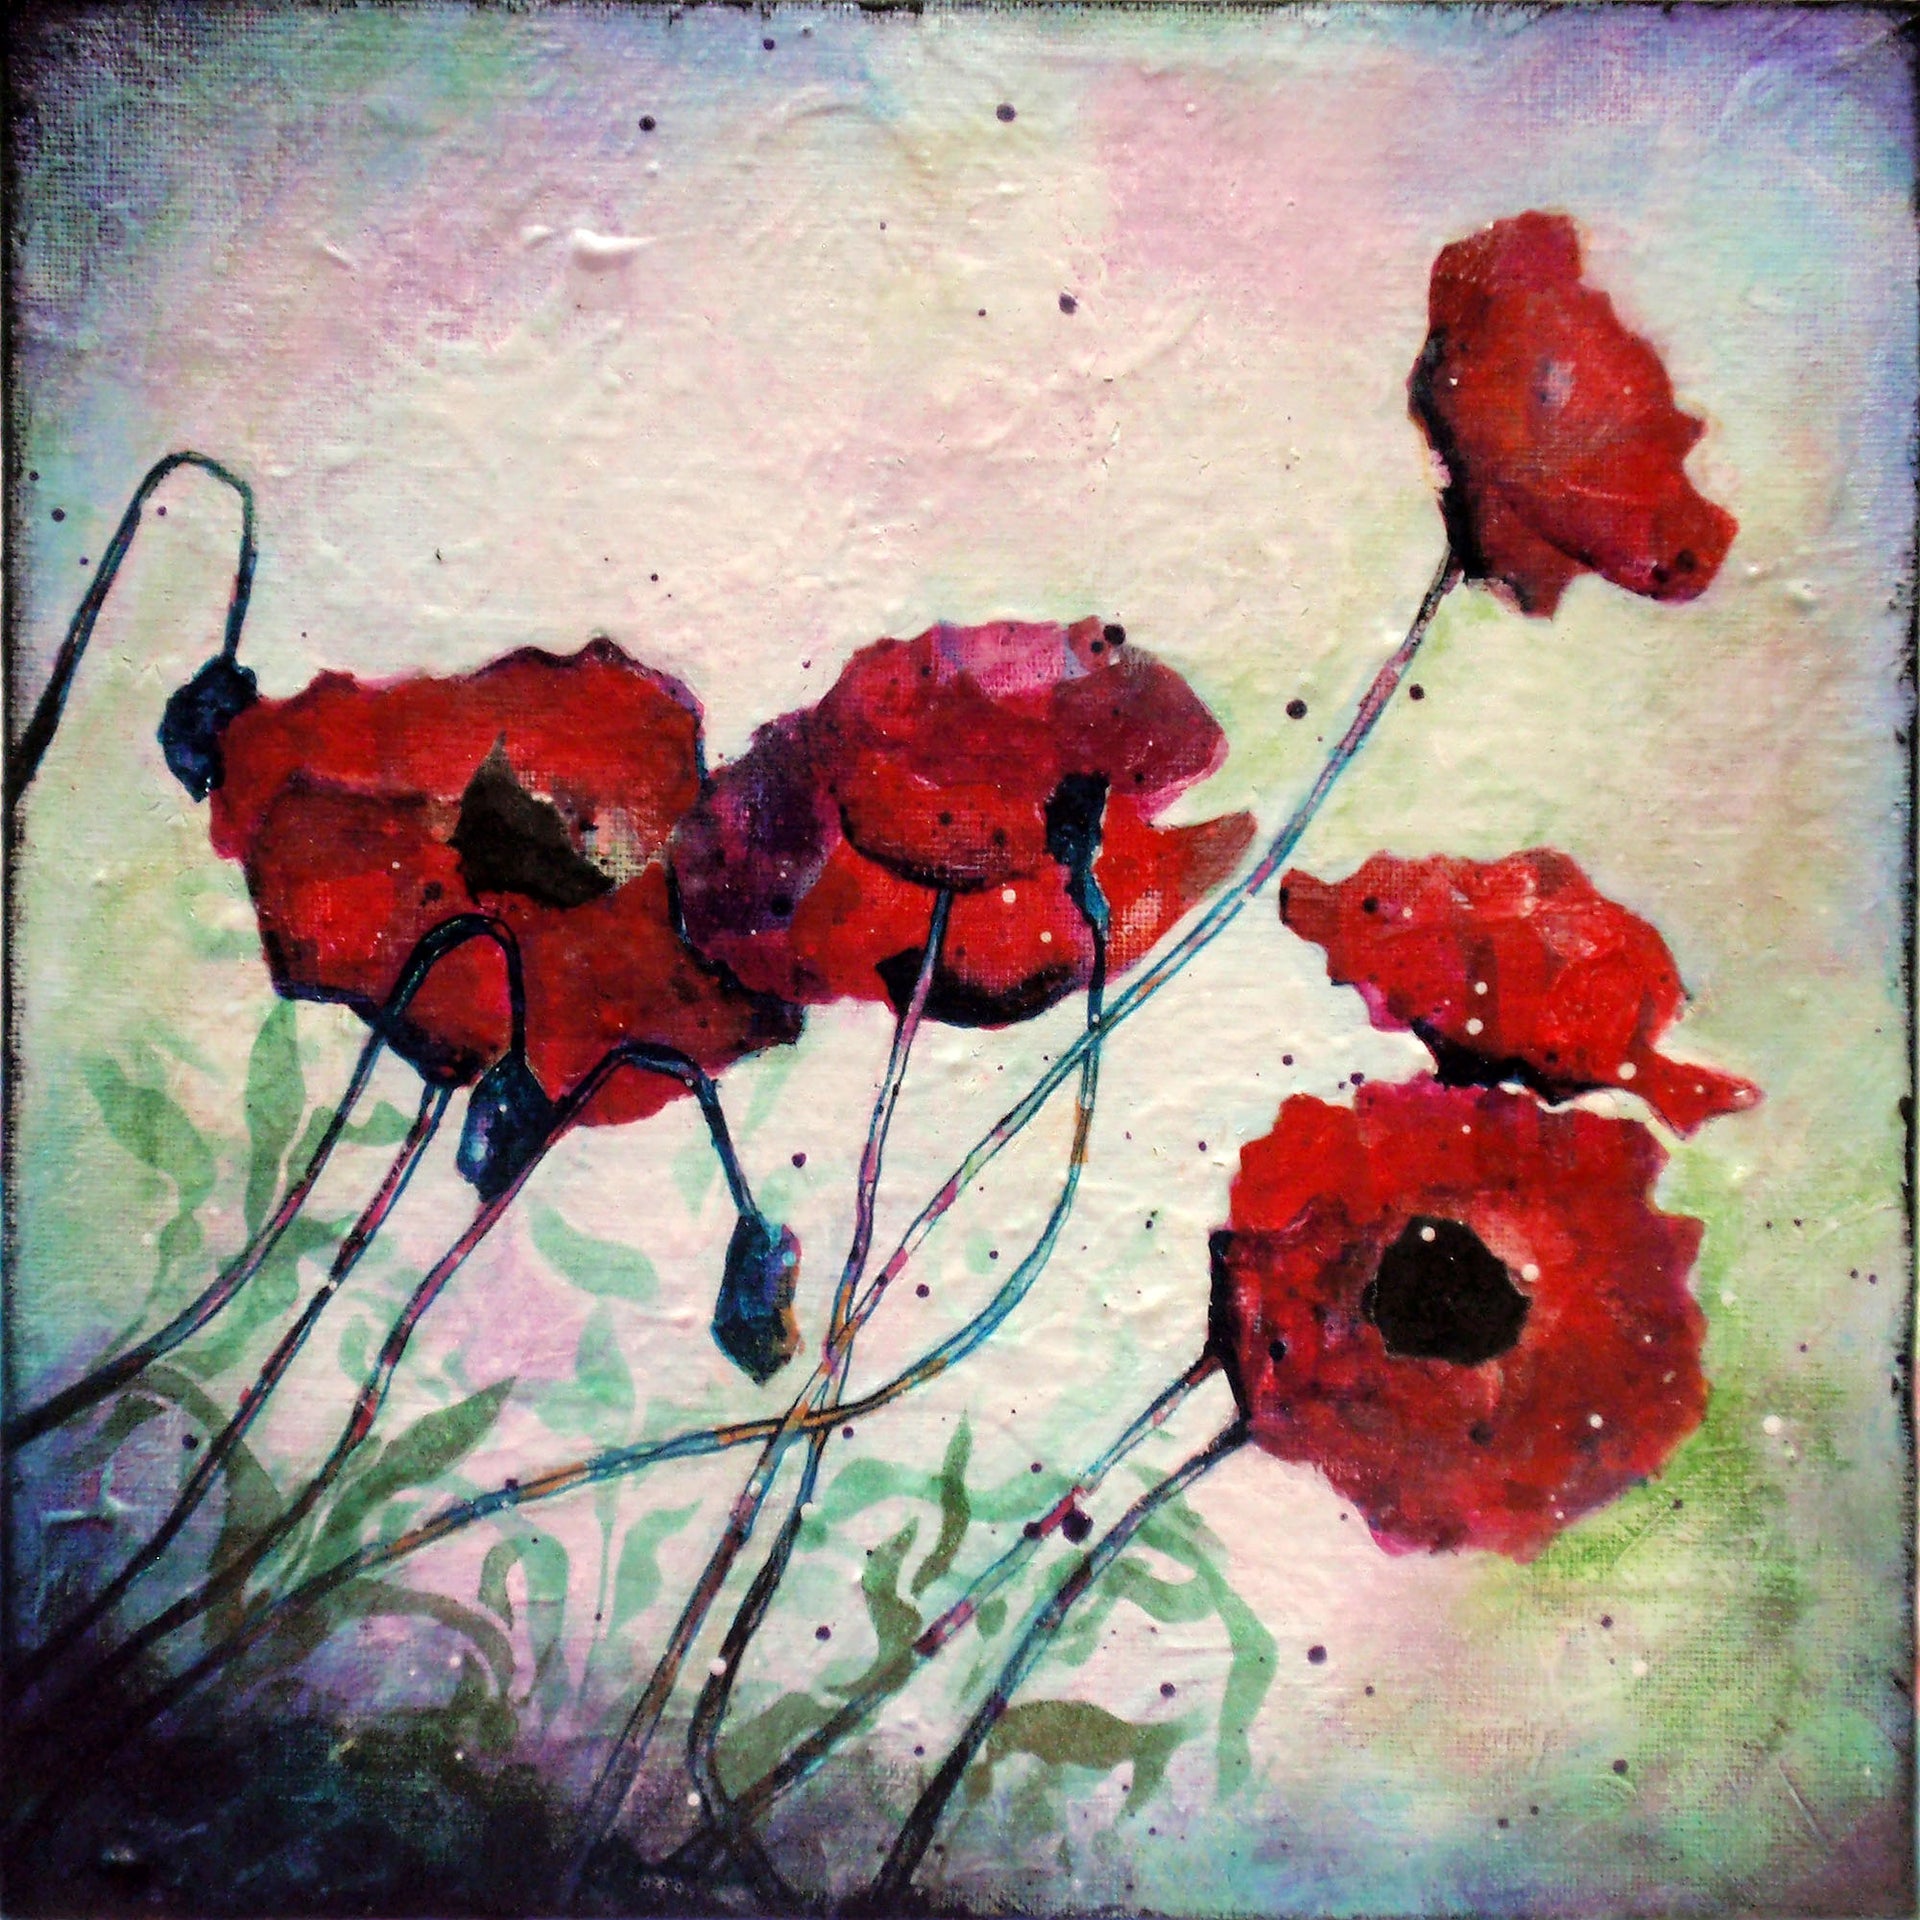
Abstract Poppy Painting: Beginner Acrylic Painting Project
The secret of getting ahead is getting started. – Mark Twain
Sometimes the hardest part about painting is just getting started. Many artists struggle with “blank canvas syndrome,” the feeling of not knowing exactly how to begin or what to paint.
This project makes it easy to overcome the blank canvas. It begins with relaxed random painting. Have fun mixing colors and splattering paint directly on the canvas. Then you’ll use a negative space painting technique to turn the randomness into a colorful floral image for your wall.

Supplies
Acrylic paints (red, pink, lime-green, teal, white, black, assorted dark shades – purple, blue or blue-green, green)
Paint brushes, small-medium round, medium flat
Gesso and wide gesso brush
Canvas board, at least 10 x 10 in.
Permanent ink pad, black
Carbon or transfer paper and pencil
Small piece very dark, black, or black-patterned scrapbook paper
Acrylic medium or decoupage or white glue
Pattern
Step 1
Select a stretched canvas or canvas board surface to paint. I’m using a 10 x 10 in. canvas board for this project. I wouldn’t choose a surface much smaller than this to allow for enough variety of color and pattern in the underpainting. Prepare your surface with a coat or two of acrylic gesso. Use undiluted gesso from the container and feel free to create some texture in the gesso with your brush strokes.

Step 2
Using a flat brush, apply short strokes in random directions across the canvas. To begin, I’m using paint in colors of red, pink, and purple plus some white. Working with colors close to one another on the color wheel ensures me that any colors that mix while I work will not be unattractive brown shades. I encourage you to choose your colors in this manner so you can work quickly and allow the colors to blend as your strokes overlap.
Add some paint spatter to the canvas using paint loosened with water. Add a small amount of water to the paint on your palette. Load the paint on your brush, hold the brush horizontally over the canvas, and tap the handle to release the spatter. Add as many splatters as you’d like.
Allow the paint to dry.

Step 3
Rotate your canvas and repeat the application of short random strokes using different colors. I’m using teal and lime green plus some white. Again, let the paint mix on the canvas. As before, these colors are close together on the color wheel and will create new attractive colors when blended. Allow the paint to dry.
Continue to paint short strokes in random directions until your canvas is covered or nearly covered with paint and you’re happy with the result. Acrylic paint is very forgiving. If there is a section of the canvas that’s not turning out as you’d like, simply paint over the area with gesso and begin in that section again. Know, too, that much of this underpainting will be covered up in the next steps.

Step 4
Enlarge the floral pattern to fit your canvas.

Step 5
Choose the orientation for your canvas that you like the best. Transfer the pattern to the canvas using your favorite transfer paper and pencil. I’m using good old-fashioned carbon paper to get my pattern on to the painted surface.


Step 6
Using a small round brush and dark paint, paint on the pattern lines to outline the flower shapes. I’m using a fluid acrylic paint in a highly-pigmented blue-green color called phtalo turquoise. Another dark blue, dark purple, or even black color would work well too.

Step 7
Using a small flat brush, paint outside the pattern lines using white paint with a bit of blue. Allow the paints to mix on the canvas. For my bit of blue, I’m using the same shade of blue-green paint that I used to outline the pattern in the previous step.

Step 8
Glaze over the flower shapes using thin red paint to help unify the colors of the underpainting. Leave as much or as a little of the original color showing as you’d like. I elected to apply my red glaze to only a portion of some flowers, leaving some of the green and teal paint untouched.
Add some light green dots to the flower pod shapes using a small round paintbrush. I’m using the same shade of yellow-green paint that I used in the underpainting.

Step 9
Use more of the same dark color to shade the bottom of each flower where the flower meets the stem.

Step 10
Tear some irregular circular shapes from black or other very dark paper to use as centers for your flowers. As you tear, pull the shape you want to keep towards you to prevent white edges on the shapes.
Adhere the paper to the canvas using acrylic medium. If you don’t have medium, decoupage glue or even thinned white glue would also work. Put the medium both under and on top of the paper, pressing the paper to the canvas well using your damp finger.
Put a small dab of dark purple paint on a damp – not wet – paper towel and rub the paint over the canvas near the edges. Allow to dry. Repeat the process using dark blue ad dark green paint. If possible, use the same colors you used earlier in the project. Allow the paint to dry between applications with the paper towel. Because the paint application is so thin, it doesn’t take long. Repeat with as many layers as you’d like until you’re happy with the look. And if you make a mistake, remember you can put white paint on top to cover it up and begin in a section again.
Step 11
Ink the edge of canvas using permanent black ink pad and paint the canvas edges black. If desired, allow some of the black paint to come over edge onto the front of the canvas and smudge using your finger.

Step 12
Add some additional paint spatters using a dark purple and white paint. You can call your painting finished at this point or you can continue to add as many paint layers as you’d like.
Go back and repeat any of the previous steps or create new details using other art materials you have on hand. Move back and forth using the paint-stained paper towel and white paint applied using a flat paint brush. Add additional red glaze to the flowers. Add paint through a stencil using a triangular make-up sponge. Stamp designs using a rubber stamp and the permanent ink pad. Tear paper in additional colors and patterns and adhere to the painting. Play a bit and have fun!

Beginner Oil Painting Project Tutorial
FEATURED SALES


1 comment
This gave me so much more confidence to put paint on the canvas. I am delighted with my project. Thank you,