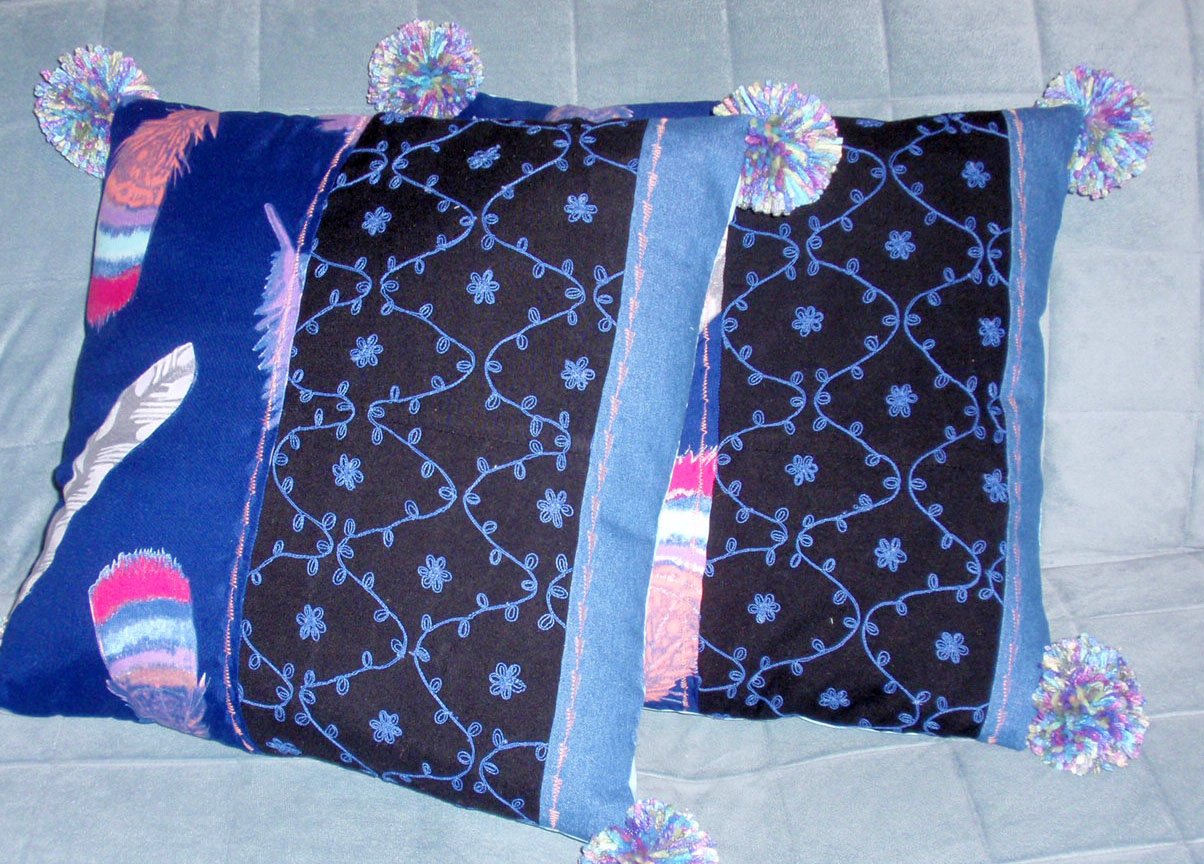
Recycled Fabric Pillows

Gather up some recycled fabric to make these one-of-a-kind pillows. Raid your closet or visit your local thrift store for some interesting, inexpensive fabrics to complement your home décor.
Supplies:
Recycled (or new) fabrics
Pinking shears
Sewing machine
Pins and needle
Thread
Scrap paper and tape
Ruler or yardstick
Iron
Pillow form, your choice of size
Pom pom maker (optional)
Yarn (optional)
Directions:
Wash, dry, and iron your recycled fabric items.

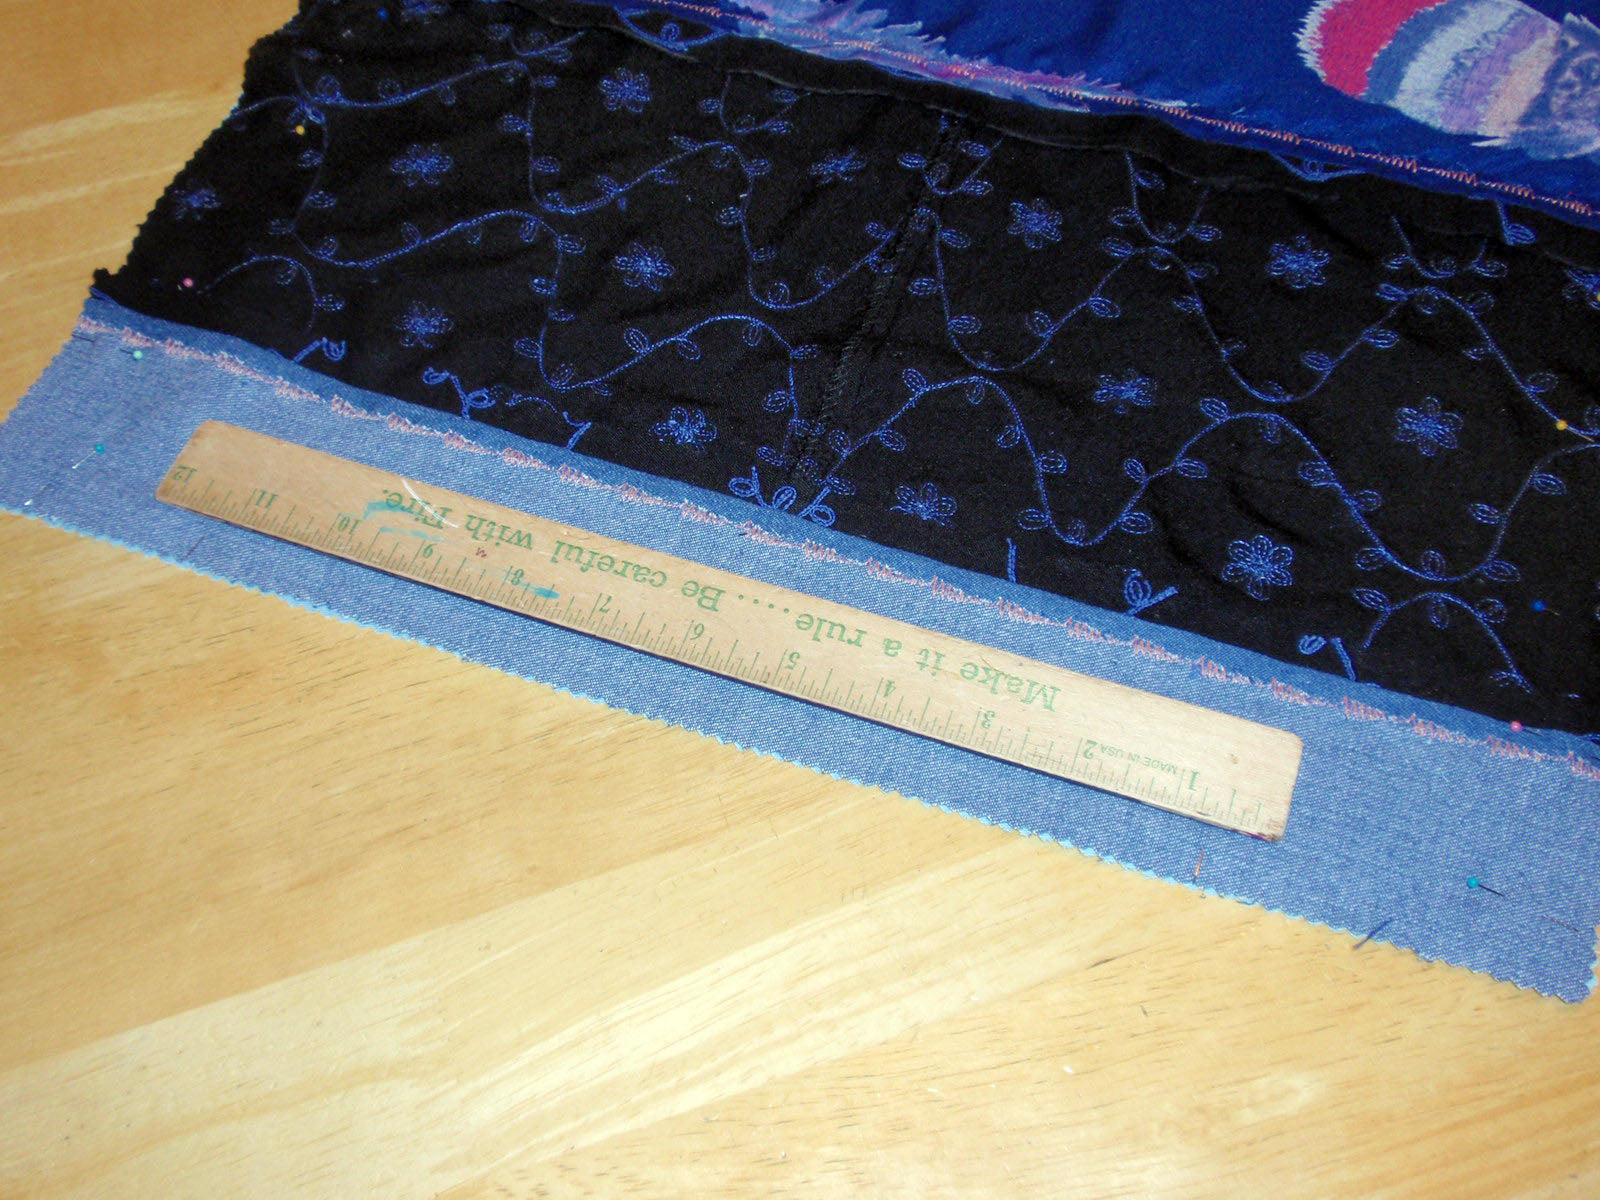
Cut the fabric into wide strips using pinking shears. Figure the minimum length of the strips by adding several inches to the size of your pillow form. For example, strips for a 16-inch square pillow should be about 18-20 inches long. Depending on the nature of your recycled fabrics, your fabric strips may be irregular, like this one cut from a round skirt. Create a plan for how you’d like to organize the fabric strips for your pillow cover.

Select 2 strips that will be next to one another on the pillow cover. Place the strips right-sides together and pin in place. Sew the strips together using a half-inch seam allowance.

You may need to trim the fabric strips after stitching to make them square, like with this piece cut from the round skirt.

Repeat using additional fabric strips until all your strips are joined.

Press your seams open with an iron.

Now’s the time to add to your pillow top some decorative top stitching, beading, or any other trims that you might like.

Tape some scrap paper together to make a pattern for the pillow. The pattern should be at least one-inch larger than your pillow form. For example, the pattern for this 16×16 inch pillow is 17×17 inches. Pin the pattern to your fabric and cut a pillow front using pinking shears.

Use the pattern to cut a second piece of fabric for the pillow back.

Pin the pillow front to pillow back with right-sides together. Stitch the pieces using a half-inch seam allowance. Leave part of one side open and unstitched for inserting the pillow form.
Trim the corners to remove excess fabric as shown. Take care not to cut the stitching line.

Turn the pillow cover right-side out.

Gently insert the pillow form into the pillow cover. Fold the unsewn edges under and pin the edges together.

Hand stitch the opening closed.

For fun, add some over-sized pom poms to the corners of your pillow. The sample project used the large pom pom maker from Clover. Watch these video instructions to learn how to use this handy gadget. Sew your pom poms to the corners using a double length of heavy thread and knot securely in place.

Thrift Store Desk Accessories using Cricut Vinyl
FEATURED SALES